In Part 1 of this series, we covered key concepts and requirements of Progressive Web Apps (PWAs) and how they differ from other ways of building apps. We then saw how simple it was to use the Vue 3 PWA module to turn any existing app into a PWA.
In this article, we will expand these concepts further by deploying our PWA to Firebase Hosting, then we’ll test its performance with Lighthouse, and customize its appearance through the manifest file. With a live app, you will see firsthand how a PWA behaves and perhaps get inspired to build one yourself.
To get started, clone this Github code, which contains a simple Vue 3 PWA using the steps in the previous article.
Deploying our PWA to Firebase
Now that we have written code and created a working app, we are ready to put it on the web so others around the world can access it. A Vue app is simply a collection of static Javascript and HTML files. To deploy it, we will require a static hosting service such as Firebase Hosting, Amazon S3, or Netlify to serve our files to the user. A full list of deployment options can be found here.
In this article, we will use Firebase Hosting to deploy the app. Firebase is a service by Google Cloud that enables quick and easy development of apps through their ecosystem of fully managed tools such as databases, authentication, analytics, and much more. Firebase Hosting is a production-grade web hosting service with a global content delivery network (CDN) at your fingertips. You can start with the free “Spark” plan that provides 10GB of storage and 360mb of data transfer per day.
To get started, signup for an account on Firebase and also install the Firebase CLI on your laptop.
Next, login to your account using the Firebase CLI by typing this into your command prompt:
firebase login
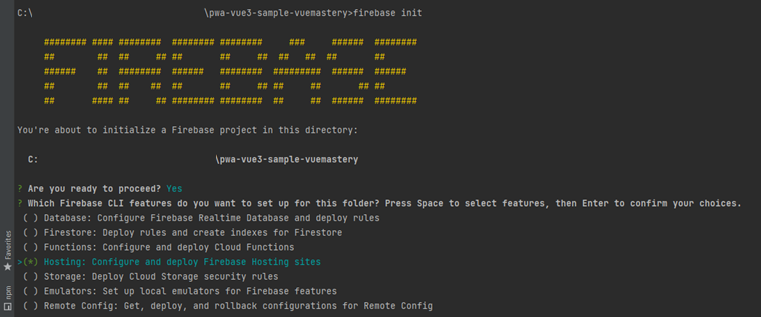
Use your command prompt to navigate to the folder containing your Vue App and initialize a new firebase project using:
firebase init
It will then prompt you to select what services in Firebase this app will require. Select Hosting.
It will then ask if you want to use an existing Firebase project or Create a New Project, which is what you should select here.
It will then prompt you to name the project and follow through with some details.
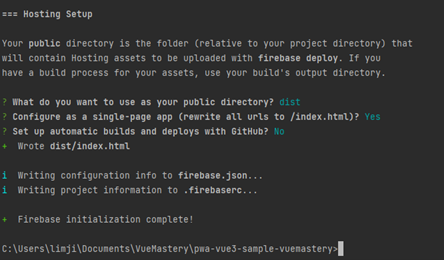
dist is the public directory because that is the default folder created after building the Vue app for production. Configure as a Single Page App for Vue.
Great! Your project has now been initialized for Firebase. It is time to build our Vue app into production-ready files. Use the command below.
npm run build
Notice that a dist folder has been created (short for “distribution”). We are now ready to deploy this folder onto the web by using this command:
firebase deploy
If everything works out, you should see a link to your deployed app in your command prompt in the form of https://yourprojectname.web.app. Firebase creates an HTTPS secured URL, which is one of the 3 requirements for a PWA.
Congratulations, your PWA is now on the web and you can share this with your users!
Installing the App on your Phone
We have discussed how Progressive Web Apps can be installed and behave like a native app on your mobile device. You can head over to the new link on your mobile device to see this in action.
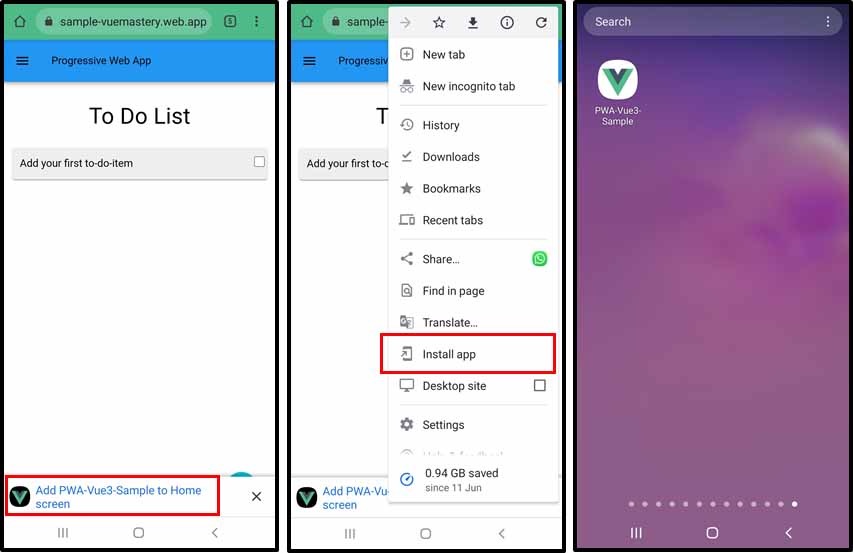
Chrome will prompt to add the app to the Home Screen if it is a PWA. In the top-right menu, you will also find Install App. The app will be installed and you can find the icon in the app drawer as you would expect of a typical app.
By using airplane mode and opening the app, you can confirm that the app works offline!
Installing the App on your Desktop
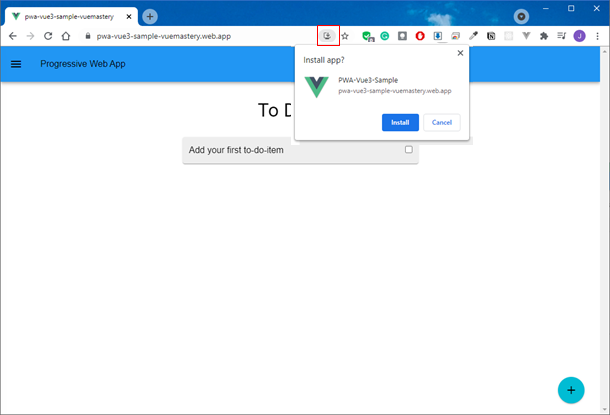
Another advantage of PWAs is that they can also be installed on your desktop. In the URL bar, you will see an install icon.
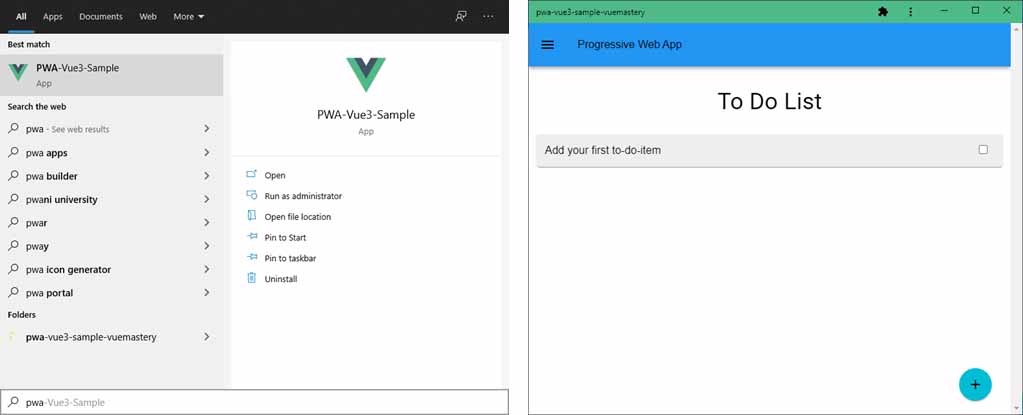
After installation, the app will appear in your start menu like a normal application. It will also run within a headless Chrome environment. Cool, huh?
As you can see, PWAs are very powerful as a tool for cross-platform applications that behave in an almost-native manner.
Testing Performance using Lighthouse
Chrome comes with the Chrome Inspector tools that include Lighthouse, a diagnostic tool to evaluate how well your app performs on the web. That’s what we’re about to tackle.
Just head over to the URL and hit F12 to bring up the inspector. Click on Lighthouse. Ensure that Progressive Web App is ticked and click Generate Report.
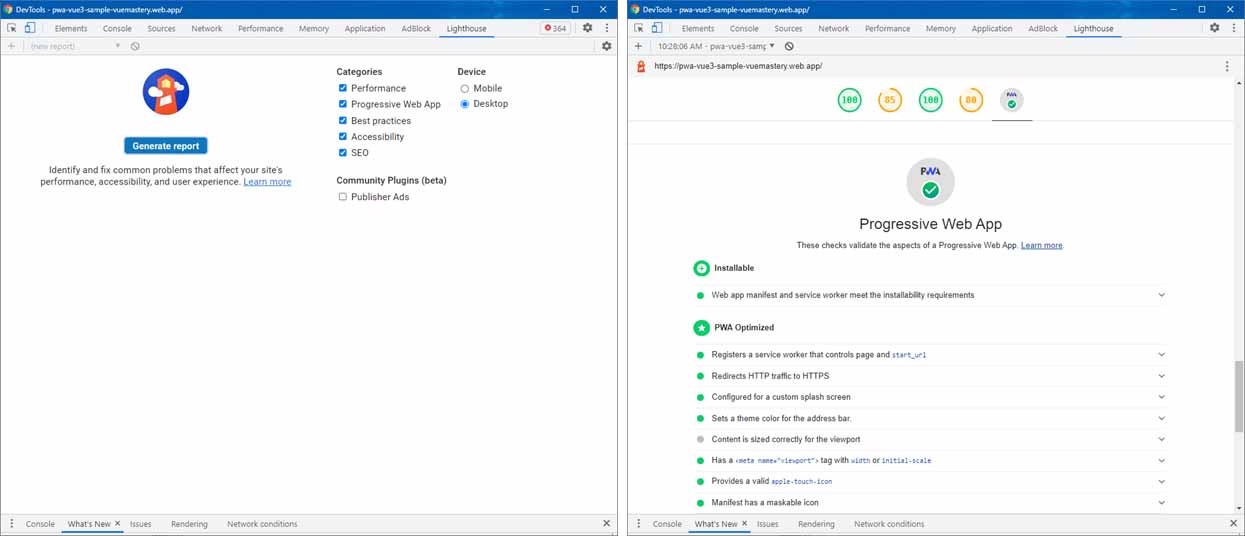
The lighthouse report covers 5 main areas: Performance, Accessibility, Best Practices SEO and PWA and provides feedback for improvement. The first 4 areas provide a score out of 100. For the PWA section, the report will show you if your app has met all the requirements of a PWA and highlight any issues to improve its performance. It breaks down the test criteria and provides a pass or fail remark with feedback. For example, it checks if the Web App Manifest and service worker are available, HTTPS has been enabled, splash screen has been customized, and more. There are also links to articles to understand the criteria further.
Troubleshooting Issues - Service Worker Not Starting
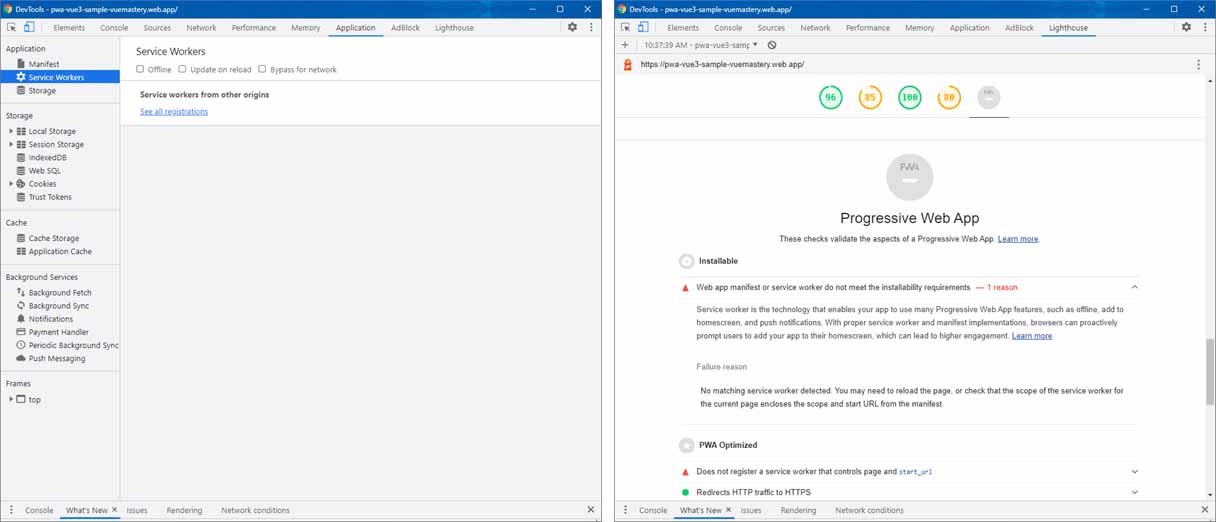
When using the Vue PWA plugin, you might encounter issues with the service worker; 1 of the 3 key components of a PWA. An important thing to note is that the service worker will not be active when the app is not in production. The PWA needs to be built first and deployed to Firebase to see the service worker in action.
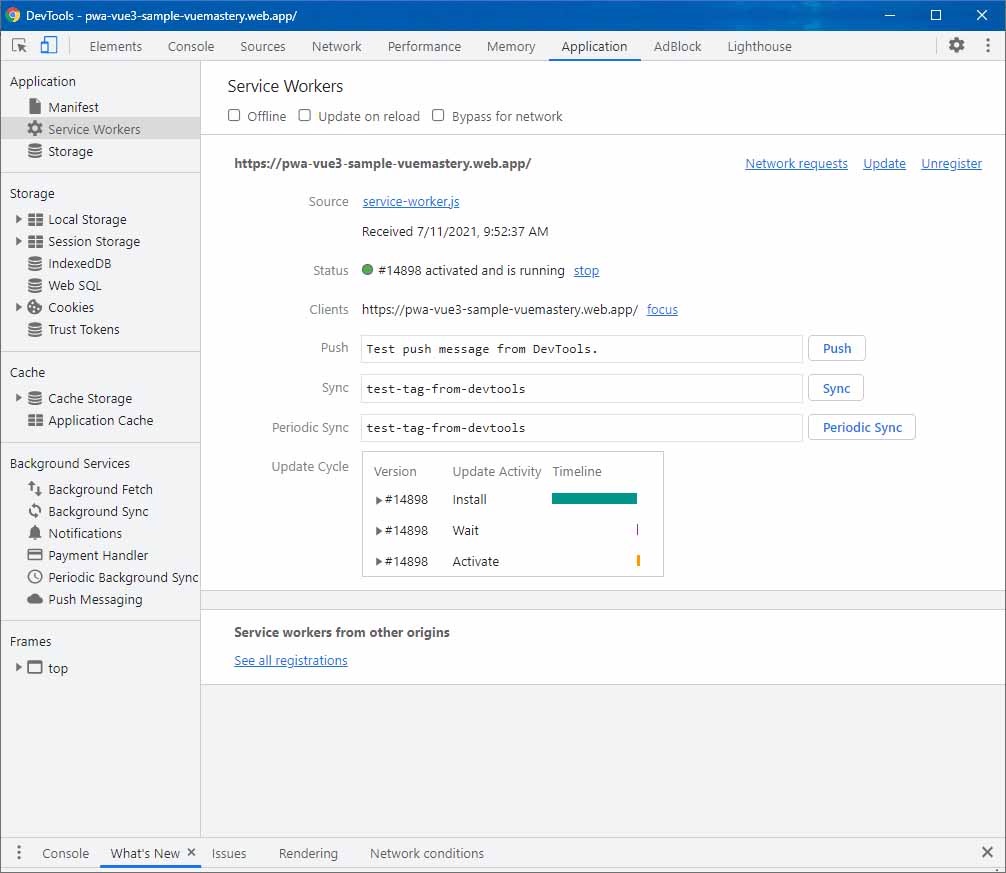
A potential problem you may encounter is that the service worker is not “registered”. The inspection report on your Firebase URL will say that it does not meet the requirements of a PWA as no service worker has been found. This means that the browser has not been told to register your service worker or that the service worker file doesn’t exist.
To solve this, follow the two steps below.
Ensure registerServiceWorker.js has been imported into main.js
Check that the registerServiceWorker.js file has been imported into main.js.
registerServiceWorker.js is tasked with loading the service worker file into the browser.
main.js
import { createApp } from 'vue'
import vuetify from './plugins/vuetify'
import App from './App.vue'
import router from './router'

//This is important - This file is created when you install the Vue PWA plugin.
//It is used to tell the browser to "register" the service worker
import './registerServiceWorker'

const app = createApp(App)
app.use(router)
app.use(vuetify)

app.mount('#app')
Configure Service Worker in vue.config.js
Another important thing to do is to check the workboxPluginMode. For this article, it is important to set it to 'GenerateSW', which means it will create a generic service worker with all the basic requirements of caching.
Another available option is 'InjectManifest', which allows you to create your own service worker and tailor it to your needs. We will cover this in more detail in another article.
vue.config.js
module.exports = {
  pwa: {
    // configure the workbox plugin
    workboxPluginMode: 'GenerateSW',
  }
}
If those issues are resolved, you can redeploy the app to Firebase and refresh the browser. You should then see that a service worker has been registered and is active. You are ready to go! Fire up Lighthouse again and verify that your app meets all the PWA requirements.
Customizing the Appearance through manifest.json
Now that our PWA is up and running. Let’s do some modifications to the manifest.json in order to change the appearance of the splash screen and change the app icon. This will be done through vue.config.js. We will create a new property called manifestOptions, which will contain various properties we can change to customize our app.
As you test this, you will need to build and deploy your app, and clear your cache on your mobile device to see the changes.
Changing App Name
In order to change the app name, just change the property name. Now, the name underneath the app icon in your app drawer will reflect this new string.
vue.config.js
module.exports = {
  pwa: {
    // configure the workbox plugin
    workboxPluginMode: 'GenerateSW',

    manifestOptions: {
      name: "MyApp",
      short_name: "MyApp",
  }
}
Changing App Icon
To change your app icon, head over to this link and download any 512x512 PNG icon and place it in public/img/icons. By adding the icons property to manifestOptions you can set the icon with its src path, size and type.
vue.config.js
module.exports = {
  pwa: {
    // configure the workbox plugin
    workboxPluginMode: 'GenerateSW',

    manifestOptions: {
      name: "MyApp",
      short_name: "MyApp",
      icons: [
        {"src":"./img/icons/myicon.png","sizes":"512x512","type":"image/png"}
      ]
  }
}
Changing Splash Screen Color
To change our splash screen color, we can specify background_color in order to change the color of the splash screen to a shade of blue using a hex code.
vue.config.js
module.exports = {
  pwa: {
    // configure the workbox plugin
    workboxPluginMode: 'GenerateSW',

    manifestOptions: {
      name: "MyApp",
      short_name: "MyApp",
      icons: [
        {"src":"./img/icons/myicon.png","sizes":"512x512","type":"image/png"}
      ],
      background_color: "#12b0db",
  }
}

You should now see the changes reflected in your app once you reinstall it. The name, icon, and background_color have all been changed to what we have specified.
There are many other properties available for customization which you should check out. To learn more, head over to this link and this link for an in-depth list and descriptions.
Conclusion
We’ve covered a lot in this series so far! Hopefully, you’re feeling excited to start experimenting with building your own PWAs. To dive even deeper, you can check out Vue Mastery’s full course Progressive Web Apps with Vue 3, taught by Vue.js Core Team Member Ben Hong.
And of course, you can continue with this blog series where we will expand further on what’s possible with service workers and how we can attempt different offline strategies. See you in the next article in this series!