With Vue 3 is now released and it’s easy to start coding up Vue 3 applications today. In this article, we’ll look at how to learn Vue 3 from scratch, how easy it is to start using the Composition API in your Vue 2 code, how to migrate an app from Vue 2 to Vue 3, how to create a Vue 3 app from scratch using the CLI, and how to start playing with it.
How to learn Vue 3
If you’re interested in learning Vue from scratch starting with Vue 3 here’s what I’d recommend:
1. Watch through Vue Mastery’s free Intro to Vue 3 Course
2. Code along with the course, using the CDN
<script src="https://unpkg.com/vue@next"></script>
3. Try installing Vue 3 using the CLI
See below for the instructions.
4. Take a read through the official docs
You can find the Beta version of the docs here.
How to use Vue 3’s Composition API in Vue 2
Vue 3’s biggest feature (so far) is the Composition API, which provides an alternate syntax for writing larger components, reusing code across components, and using TypeScript. This is not the new way we code components in Vue 3. This is an alternative syntax that you might choose to use based on the three reasons I formerly mentioned.
Luckily for you, this feature can be used in your Vue 2 application today by using the Vue Composition API plugin. If you’re unsure why you’d want to use the Composition API, definitely check out my Why the Composition API video. I’m going to assume that you already know the why, and you’re ready to start playing with the new syntax.
How to migrate from Vue 2 to Vue 3
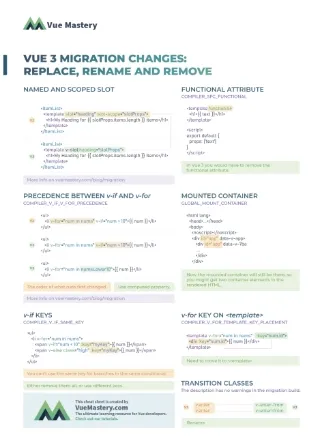
If you think you might want to migrate your Vue 2 app completely to Vue 3 the Vue documentation team has been working hard on a migration guide. Here at Vue Mastery we’ve produced a Vue 2 to Vue 3 course which visually teaches the differences.
How to create a Vue 3 app
If you’re not working inside an existing Vue 2 project, you’ll want to follow these steps:
1. Ensure you have the latest Vue CLI installed
$ npm install -g @vue/cli
or
$ yarn global add @vue/cli
2. Create a Vue project using the CLI
$ vue create project_name
3. Select to use Vue 3 in the option prompts.
4. Ensure the project works
$ cd project_name
And then run the development server with:
$ npm run serve
or
$ yarn serve
Then go to the appropriate local server in a browser, perhaps http://localhost:8080
You now have a fresh Vue 3 application and you can start playing with the Vue 3 Composition API:
How to learn the Composition API
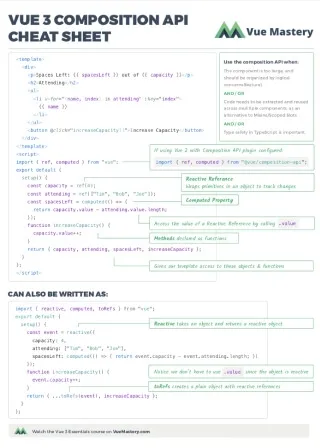
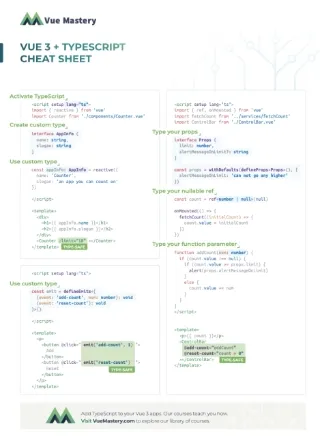
First and foremost, there’s my Vue 3 Essentials course which teaches all the basics. Then there’s the Composition documentation as well as the API that Evan You posted online. I’d also recommend downloading our Vue 3 Cheat Sheet, which has all the syntax you’ll need to start memorizing the new API.
If you’re working with a new application and want to see the API in action quickly, feel free to copy and paste the following code into your App.vue. Do note the difference in the import line depending on if you’re inside a Vue 3 app or Vue 2 app with the Composition API plugin.
<template>
  <div>
    <h1>My Event</h1>
    <p>Capacity: {{ capacity }}</p>
    <button @click="increaseCapacity()">Increase Capacity</button>
  </div>
</template>

<script>
import { ref } from "@vue/composition-api"; // <-- Use this line if you're in a Vue 2 app with the composition API plugin
import { ref } from "vue"; // <-- Use this line if you're in a Vue 3 app

export default {
  setup() {
    const capacity = ref(3);

    function increaseCapacity() {
      capacity.value++;
    }
    return { capacity, increaseCapacity };
  }
};
</script>
If you then fire up your server you should see the following:

Breaking it down
If you haven’t seen this syntax before, let me give you a quick rundown.
import { ref } from "vue";
In Vue 3 we’ll need to get used to doing more imports. This allows bundlers to do something called tree shaking, which means if you don’t use the feature, it won’t be included in your production bundle.
setup () {
The setup method is where all the action happens. This method gets called after beforeCreate and right before the created lifecycle hooks. Notice that setup is the only function inside our component. Our code no longer gets organized by options (i.e. data, methods, computed, lifecycle hooks).
const capacity = ref(3);
ref refers to a Reactive Reference. Here we’re taking an integer and wrapping it in an object, which makes it reactive.
function increaseCapacity() {
  capacity.value++;
}
This is simply a component method that we will call from our template. It increments capacity.value, because capacity is a reactive reference, and the value of the reference is held in the value property. This is necessary to make a primitive (integer) reactive.
return { capacity, increaseCapacity };
When using the Composition API, we must return the variables and functions that our template needs access to. Yes, this is more verbose, but it also means we can control what gets exposed and we can easily trace where a property is defined. This makes our component more maintainable.
The rest of the code (basically the template) is nothing new. If you want to watch some video lessons that teach this syntax, you’ll find that in our Vue 3 Essentials course.
Organizing your Composition Functions
Since your composition functions contain code you want to reuse across components, you’ll likely encapsulate them into their own files and place them in a directory. I’ve seen developers create folders called use, composable, and hooks to contain these composition functions. To see some examples of what these look like in the wild, Core Vue Team Member Thorsten Lünborg created some code samples you can read.
So are people really using this in production?
Recently in Vue London, I polled the audience to see if anyone was using the composition API in production with the Vue 2 plugin. The only three that raised their hands were on the core team. 🤷♂️
So would I dive into using this in a new application for a client? Probably not. However, would I use this on a side project to get familiar with the syntax? Absolutely!
How to use Vue 3 without the CLI
Just like with Vue 2, you can still load up Vue 3 in a plain HTML file to play with it in your browser. Here’s a simple example working from an index.html file that you can create yourself on your desktop.
<div id="app"></div>

<script src="http://unpkg.com/vue@next"></script>

<script>
  const { createApp } = Vue;

  const App = {
    data() {
      return {
        name: "Gregg",
      };
    },
    template: `<h1>Hello {{ name }}</h1>`,
  };

  createApp(App).mount("#app");
</script>
Sure enough, when I open my browser I get my name printed out. After getting this to work, I realized that I should be able to use the new Composition API. Same example:
<div id="app"></div>

<script src="http://unpkg.com/vue@next"></script>

<script>
  const { createApp, ref } = Vue;

  const App = {
    setup() {
      const name = ref("Gregg");
      return { name };
    },
    template: `<h1>Hello {{ name }}</h1>`,
  };

  createApp(App).mount("#app");
</script>
Notice the setup method is being used, and it worked!
A Few Take-Aways
Now that it’s released, it’s a great time to start learning Vue 3 and even to use it in new projects. The only problem you might run into is that supporting libraries are still getting updated. However, if you run into any problems, I’m sure with some googling you’ll find the answer to your problems. Happy coding!


