

With the introduction of Nuxt Content, building content-heavy projects like blogs, documentation, and portfolio sites has become a lot easier for Nuxt developers. However, one of the challenges of using Content is that it requires technical knowledge and is not too beginner-friendly to use across teams with non-technical backgrounds. With this in mind, Nuxt Studio was created to make collaborations between teams like this easier.
Nuxt Studio is a git-based CMS tool powered by Nuxt Content used for building Nuxt 3 applications. It is built on top of GitHub, and it provides a seamless two-way sync between your repository and Studio, granting content teams complete autonomy within the developer-approved stack. This means that with Nuxt Studio, users do not need to bother with setting up a separate database to manage or store content. It also makes it easy to keep track of present and past changes made to your files and projects.
It does so by reading the content/ folder in your application and parsing every .yml, .csv, .md, and .json file to create a powerful data layer for your app. Among all these, Nuxt Content also offers support for using Vue Components inside your Markdown files. Nuxt Studio, however, builds on top of this to give you some extra features that make it even easier.
They include:
- GitHub Integration: With Nuxt Studio and the Nuxt Studio GitHub App, you can commit recent changes, create a new branch, open a pull request, and merge to GitHub without having to leave the editor. This helps reduce the time spent switching between different tabs and also helps keep you focused on your project.
- Variety of themes: Nuxt Studio offers a variety of themes that allow you to get started with your projects without any hassle. There are themes like Alpine, for creating a blog and Content Wind, a minimal portfolio, etc.
- Easy deployment: Nuxt Studio allows users to deploy their applications on platforms like Netlify and Vercel. It also allows projects to be hosted on GitHub pages, where the deployment does not require any extra configuration and also comes with a free
.nuxt.spacedomain. - Rich text editor: The Nuxt Studio editor offers users an easy and fun way to create and update content on the go. Users can also see live updates from their teammates in real time and previews of the changes being made without leaving their editor. Vue and Nuxt engineers can also enjoy the autocompletion of their Vue components in the Markdown editor. It also offers a preview of media assets in the
public/folder, making it easy to preview and select your preferred media to use in your markdown file.
Getting Started with Nuxt Studio
Now that we understand what Nuxt Studio is, let’s explore its capabilities. In this section, we will cover how to get started with Studio, including creating an account and exploring options for teams and collaborators. We will also discuss how to select the option that best suits your needs. Once that is complete, we will move on to creating and configuring our first project.
To begin using Nuxt Studio, you will need to sign up by connecting your GitHub account. This process involves creating a Studio account using your GitHub credentials. The account you create will be personal, enabling you to start new projects that are intended for your independent work.
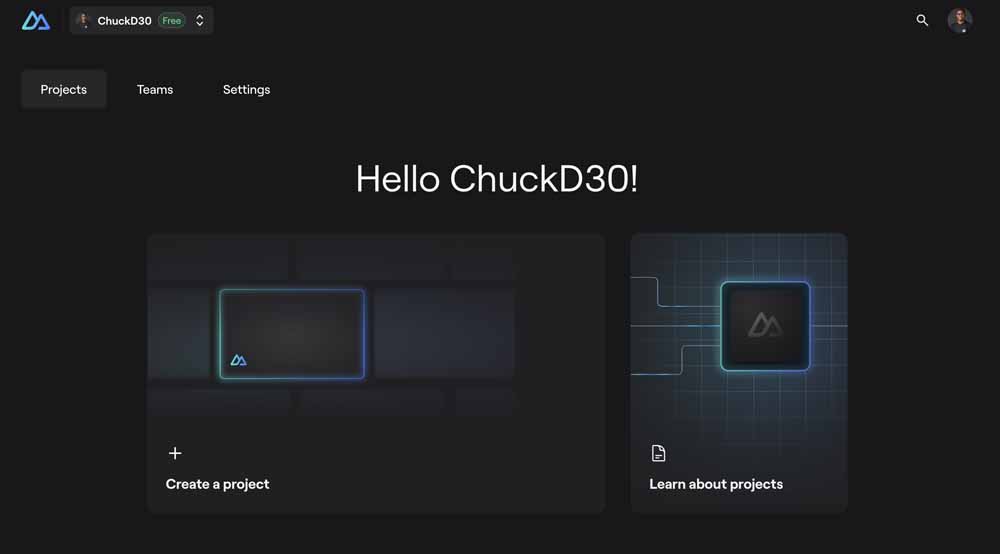
Once you log in, you’ll see the projects tab, where you can choose to either Create a project or Learn about projects.
Nuxt Studio also enables users to collaborate with multiple people on a project by creating a team.
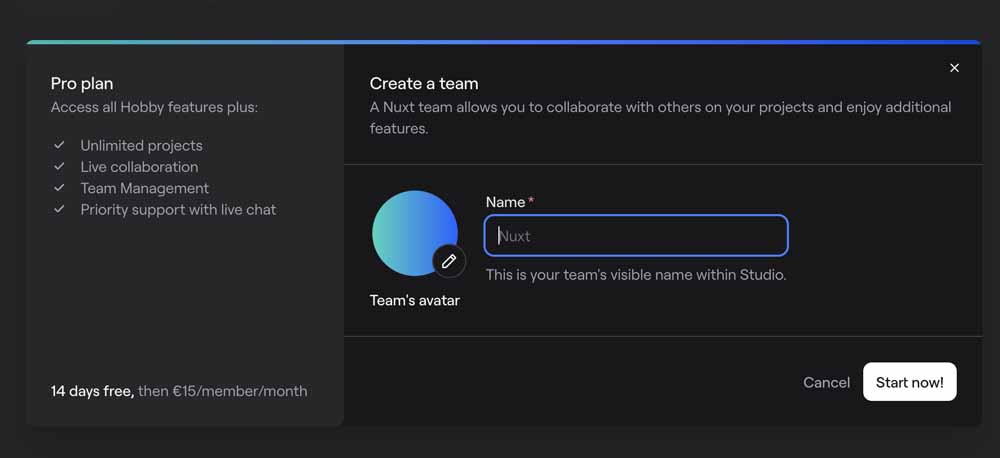
The Pro plan comes with the following features, outside of the existing features of personal accounts:
- Unlimited projects
- Live collaboration
- Team Management
- Priority support with live chat
It costs €15/month with a trial period of 14 days.
Nuxt Studio Project Types
Before we create our first project, it is important to understand the types of projects that Studio offers.
Project Types

Currently, there are three ways to get started with a new project in Studio:
-
Start from a theme: With this option, you can start your project using any of the existing themes available in Studio.
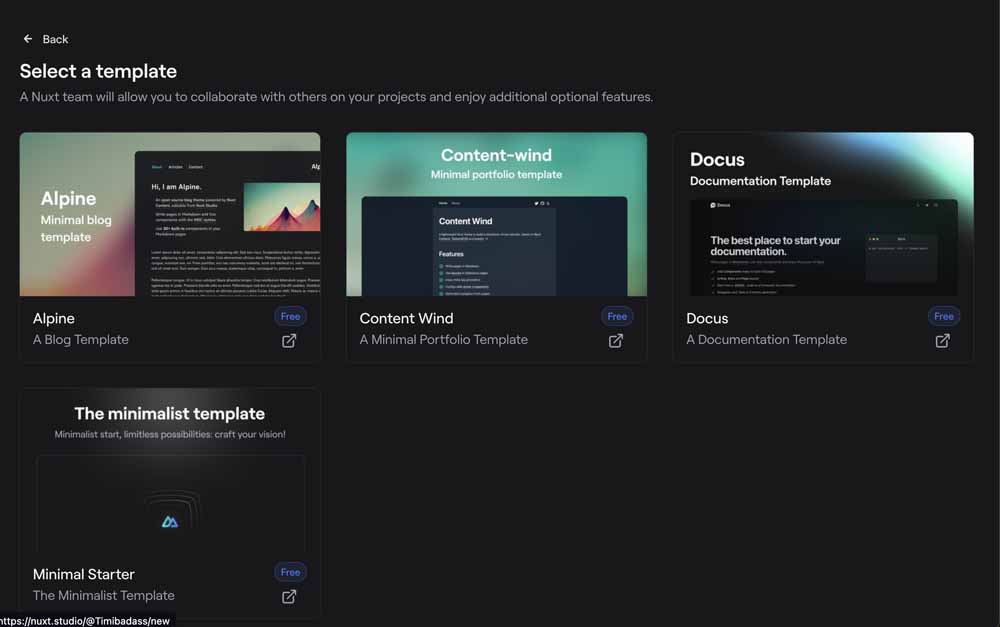
These themes are currently tailored to various types of projects, such as blogs, portfolios, and more. You can also configure them to match your personal preferences once added to your project, and can be added to either an existing or a new GitHub repository.
-
Importing From GitHub: This option allows you to import an existing repository from your GitHub.
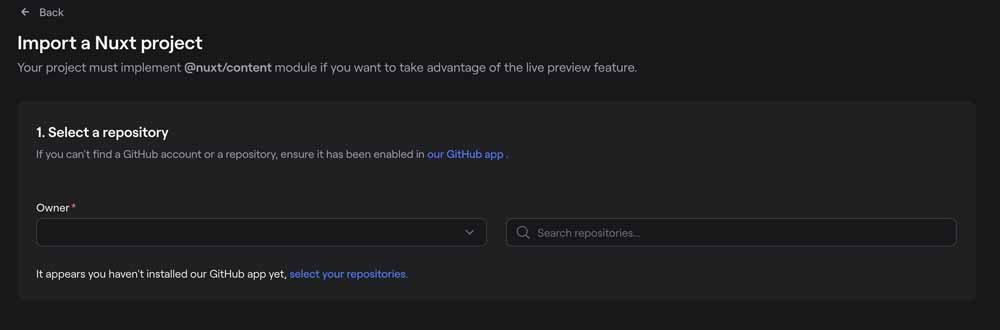
Here, we have to pick an account and a repository to import but in order for Studio to access your GitHub account information, you first need to install the Nuxt Studio GitHub app.

After selecting an account and granting permissions, refresh the import screen. You will then see a list of your repositories, based on the permissions set for your account. Please note that the selected repository must be a Nuxt project that incorporates the Nuxt Content v2 module and includes a
contentfolder. -
Importing Content Repository: Nuxt Studio also allows you to upload a repository that contains a
content/directory. This option does not require your repository to be a Nuxt 3 application with the Nuxt Content module.
First Project
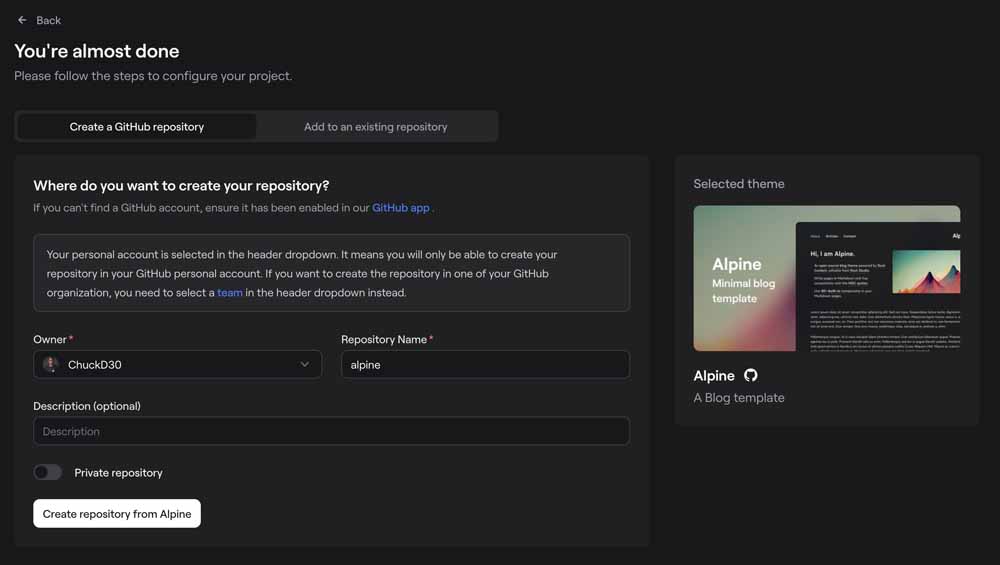
Now that we understand the different project types available, let’s create our first project using an existing theme.
After selecting a theme, you are presented with the option of either setting up a new repo or an existing repo for your theme.
At this stage, your project can only be configured or edited in Studio. Once you select a deployment option, you’ll be granted access to the live editing preview. We will choose GitHub Pages, which includes both configuration and a free .nuxt.space domain.
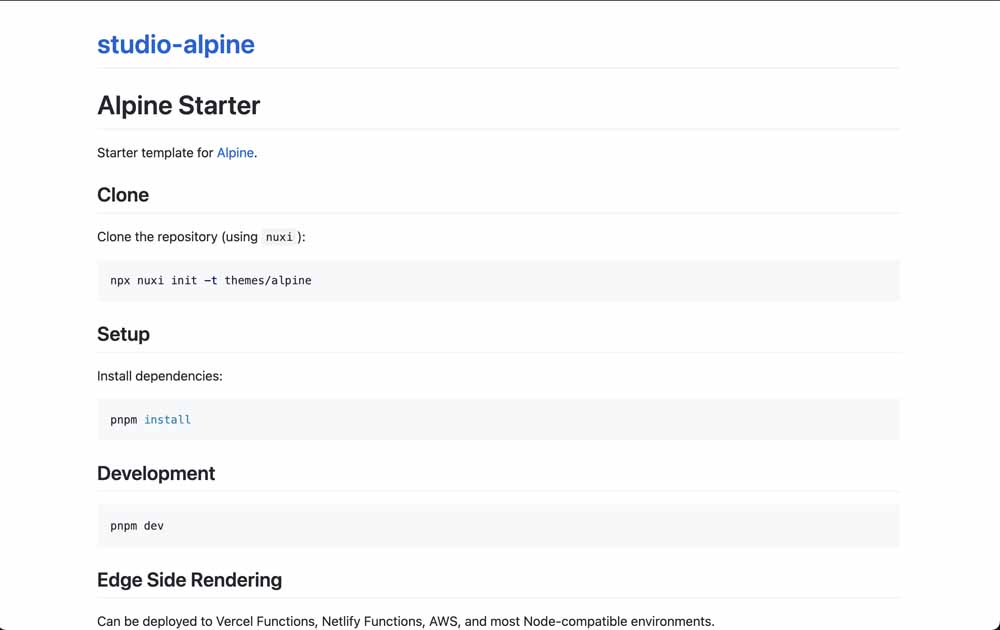
During this process, we are allowed to change the subdomain to be attached to the free domain, and once confirmed, if you visit the URL (while deployment is in progress), what appears in your browser is the content of your README.md.
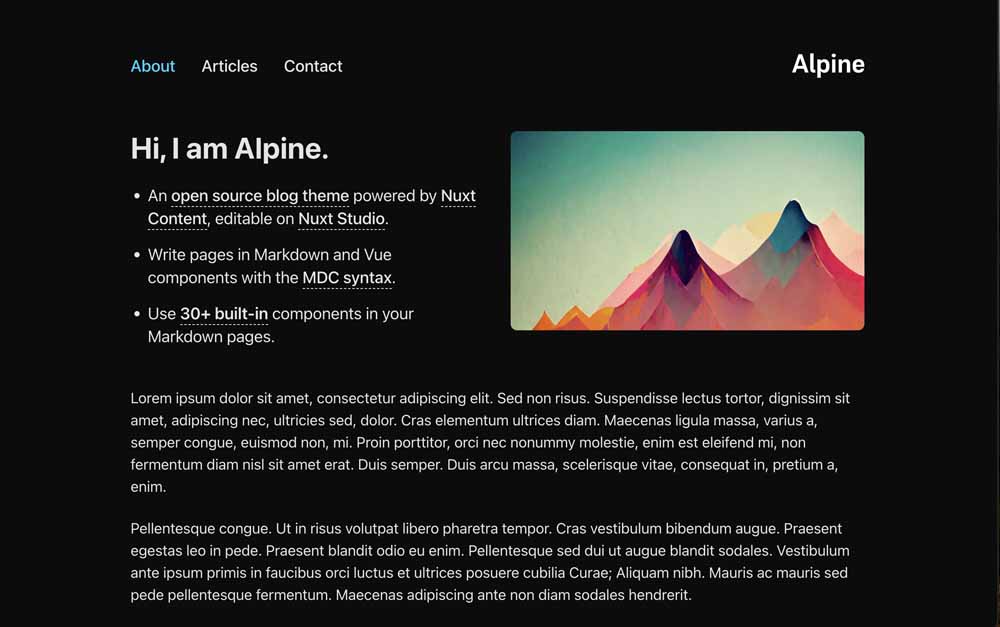
Once the deployment is complete, GitHub Pages will read the contents of your content/ folder and render them on your app, starting from the index.md file.
Nuxt Studio Editor
We have successfully deployed our first Studio project with a theme. However, in an ideal situation, we would need to add our content and other extras. This can be done using the Studio Editor, which is accessible by clicking on the “Edit on Studio” button. Clicking on this button takes you to a new screen, which is split in two.
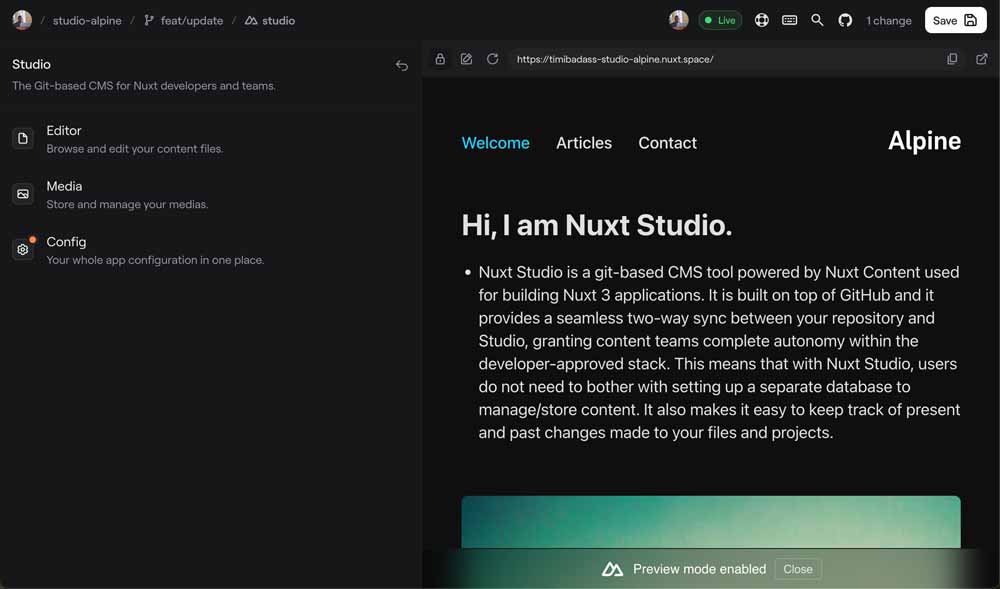
On one side of this screen, you can perform the following actions:
- View and edit content
- Store and edit media
- Configure application
Editor
On the other side of this screen, Nuxt Studio provides an in-app browser that is used to preview the live version of your app. This allows you to see a live preview of your application as changes are being made to any of the sections listed above.
If you click on the Editor option, depending on the theme/project setup, you should see something like this:
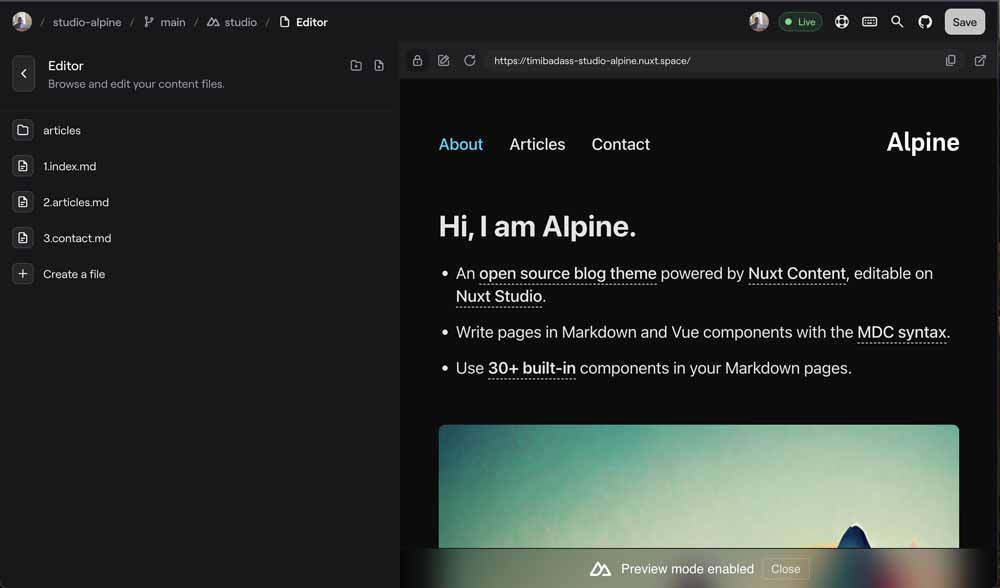
We can see that this contains a list of folders and files that are present in the content/ folder. This is a result of the project configuration that was automatically set up when we decided to use the Theme option for our project.
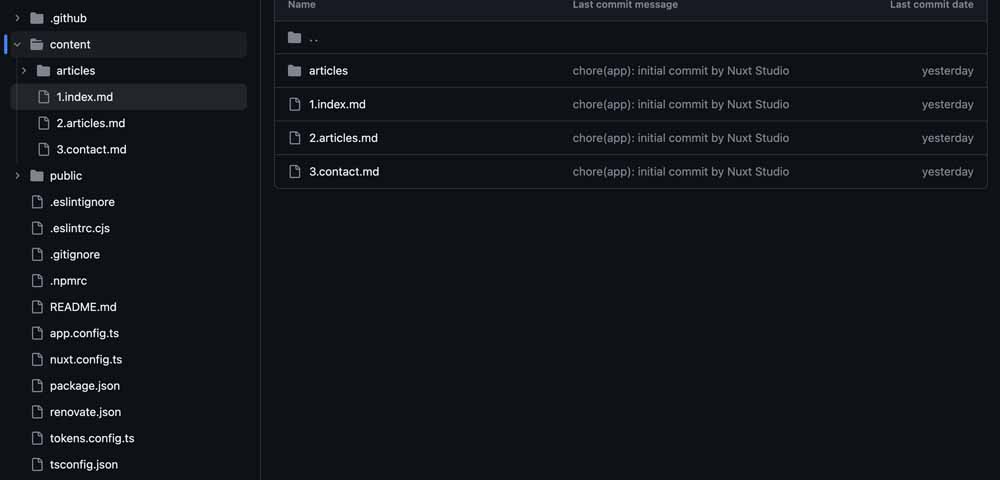
Here, you can view the entire content of our repository, which includes the nuxt.config.ts file and various folders. Inside the content/ folder, files are prefixed with numbers to specify their order of appearance. This feature is part of Nuxt Content and applies to folders as well.
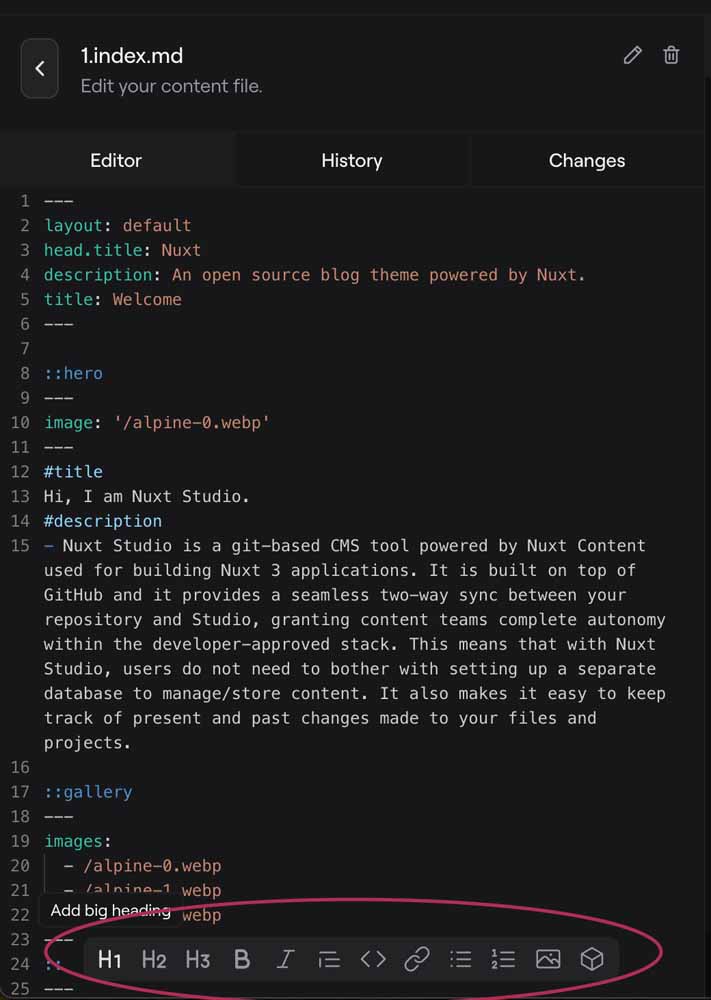
You can make changes to any of these files by simply clicking on them. Upon clicking, the next screen you’ll encounter is the editor screen, which offers several options for modifying your content.

In addition to editing content in this editor, you can also monitor the commit history of your GitHub project in the History tab. Furthermore, you can keep track of any changes made to the current file you’re working on in the Changes tab. While editing, you can see the changes being made to your project in real-time with the preview URL window on the right side of this screen.
Media
This is the second option that Studio provides for managing content in your projects, it is used to manage media content effectively. It does this by fetching all the contents of the public/ directory and making them available to preview and delete. You can also upload new media, create new folders, rename, and move existing files around in this section.
To reach the Media configuration, return to your current project’s dashboard, where it’s the second option following the Editor.
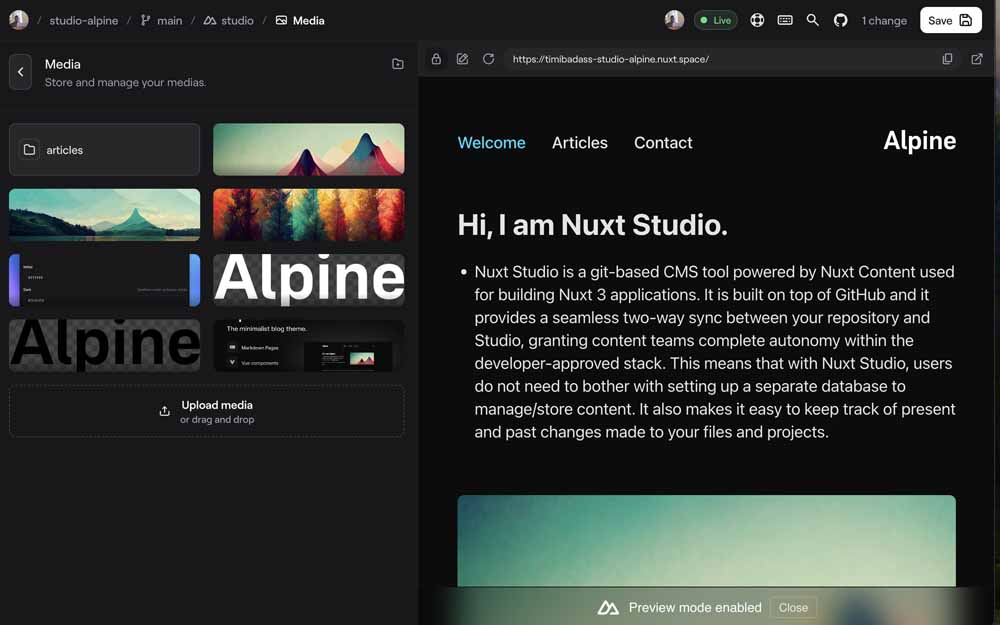
As of now, Nuxt Studio can only handle images in this section. Support for other forms of media, such as audio and videos, will be available in future versions of Studio.
Config
In this section, Nuxt Studio allows you to customize your project’s configuration, which is divided into two categories:
- Application: Here, Studio provides an intuitive user interface for editing your app.config.ts file. This file contains settings for your theme, project setup, and other Nuxt configurations, such as icon size, CSS class, and icon aliases.
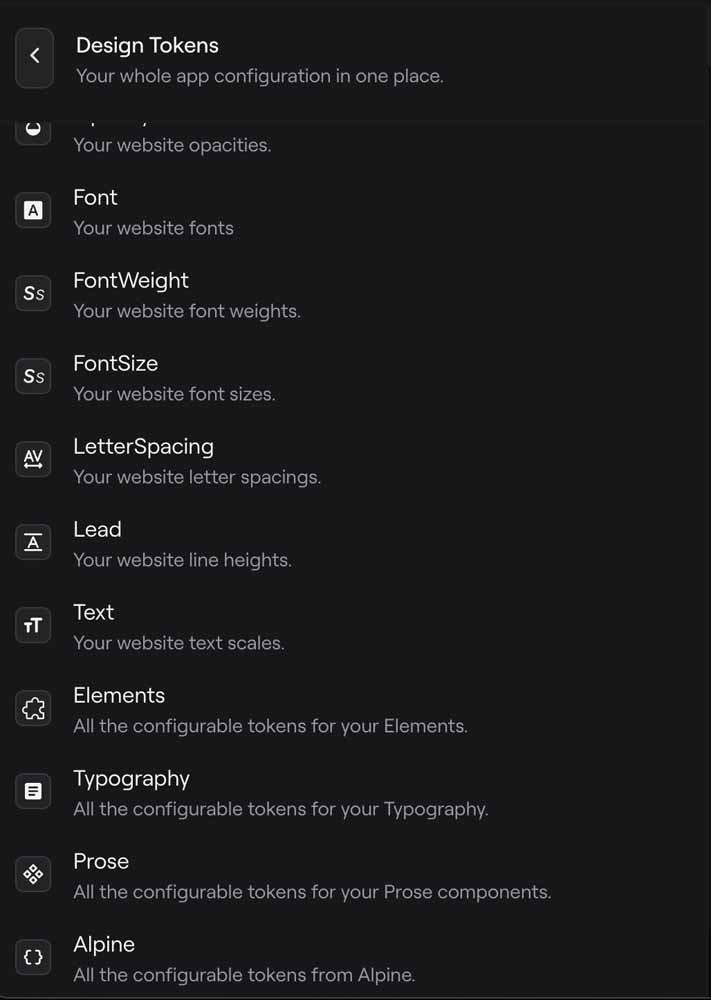
- Design Tokens: This section in Studio offers a range of options for shaping the visual style of your project. You can adjust settings like font size, border width, color palette, typography, and more, all related to the appearance of your project.
To access the configuration settings page for a project, return to the dashboard, where you can find the three sections (Editor, Media, and Config).
After editing your files, modifying your application config, or adding new media to your project, these changes are initially saved as a “Draft”. It is important to note that this draft is different from GitHub, as these changes are only accessible within Nuxt Studio. To make these changes visible in the live app or outside of Studio, you will need to save them.
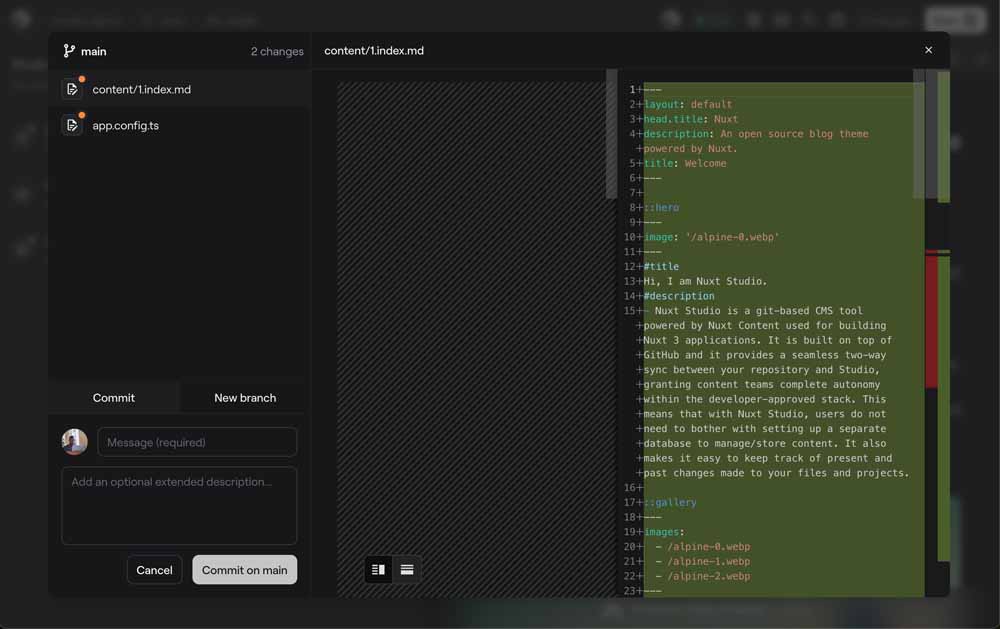
Clicking on the “Save” button on Nuxt Studio triggers a modal that contains a list of files that have been edited along with the changes made to them, similar to how it is on GitHub. As part of the application access granted to the GitHub App installed on your profile, Studio can make commits, create a new branch, and add collaborators (when working with a team).
Nuxt Studio Configuration
When we think about making modifications to our projects in Studio, they are currently broken down into two parts:
- App Config
- Tokens Config
App Config
As we have briefly covered in the previous section, Nuxt Studio allows you to make changes to your app using the app.config.ts, a configuration file introduced in Nuxt 3.
To make this work, you need to ensure that this file exists and is present in the root folder of your project. If you are using an existing theme for your projects, this file will be created automatically, so you don’t have to do it yourself.
This file will also exist if you are working with a GitHub repo for a Nuxt 3 app and it should look like this:
app.config.ts
export default defineAppConfig({
  alpine: {
    title: 'Alpine',
    description: 'The minimalist blog theme',
    image: {
      src: '/social-card-preview.png',
      alt: 'An image showcasing my project.',
      width: 400,
      height: 300
    },
    header: {
      position: 'right', // possible value are : | 'left' | 'center' | 'right'
      logo: {
        path: '/logo.svg', // path of the logo
        pathDark: '/logo-dark.svg', // path of the logo in dark mode, leave this empty if you want to use the same logo
        alt: 'alpine' // alt of the logo
      }
    },
    footer: {
      credits: {
        enabled: true, // possible value are : true | false
        repository: 'https://www.github.com/nuxt-themes/alpine' // our github repository
      },
      navigation: true, // possible value are : true | false
      alignment: 'center', // possible value are : 'none' | 'left' | 'center' | 'right'
      message: 'Follow me on' // string that will be displayed in the footer (leave empty or delete to disable)
    },
    socials: {
      twitter: 'nuxtlabs',
      instagram: 'atinuxt',
      linkedin: {
        icon: 'uil:linkedin',
        label: 'LinkedIn',
        href: 'https://www.linkedin.com/company/nuxtlabs'
      }
    },
    form: {
      successMessage: 'Message sent. Thank you!'
    }
  }
})
Nuxt Studio provides you with a User Interface that allows you to make changes to this configuration file directly from your browser. With this interface, your application’s configuration is broken down into two (or three) sections.
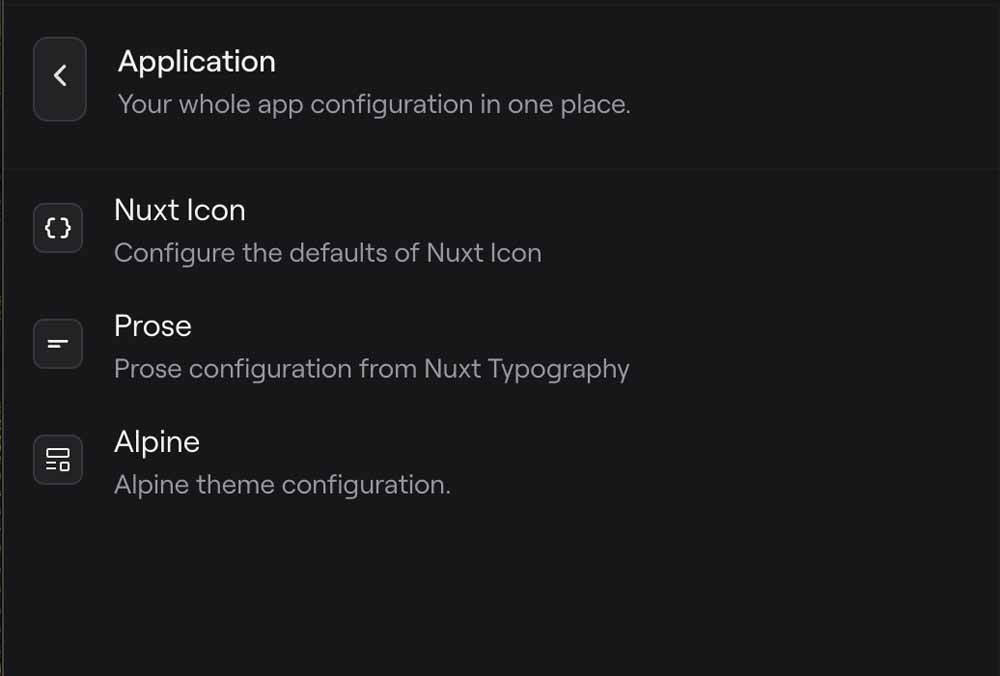
-
Nuxt Icon: The first option here allows us to modify everything relating to Nuxt Icon. This includes icon class, aliases, and default CSS class.
-
Prose: This part of the configuration is used to modify the Prose for our editor. You can configure any of the icons in the interface from here using any of the available icons in Studio.
-
Theme Configuration: This section allows you to modify parts of your project that have been set by your theme. Things like the meta title and description, links attached to your socials, header, footer, and cover image can be modified in this section.
Tokens Config
This TypeScript file serves as a means to globally configure CSS variables across your application. It operates similarly to the tailwind.config.js file used in Tailwind CSS and was introduced to empower developers to customize the appearance of websites.
In the context of Nuxt Studio, the tokens.config.ts file provides a user-friendly interface for making these modifications directly from your web browser. This interface is especially helpful for beginners who may need help figuring out where to start. It provides a list of valid options that can be used to configure the visual aspects of your application.
Nuxt Studio Themes
Themes are a crucial aspect of giving your website its unique look and layout. These pre-designed templates cover everything from colors and fonts, to how your pages are structured and designed. Themes provide an efficient way to revamp your website’s appearance without diving into complex design or development tasks. They’re an ideal kickstart for any project since they can save time and ensure a consistent, professional appearance.
Nuxt Studio themes are Nuxt applications that have been configured using Layers in Nuxt 3. With Layers, developers can extend a Nuxt application to reuse components, utils, and configurations. Layers also make it possible to create a components library using the components/ directory and Nuxt module presets.
Using this approach, Nuxt Studio developed some tailor-made themes made by NuxtLabs to help you get started with projects. They are free to use and each has different types of projects they are best suited for. They include:
- Alpine - Best suited for building blogs
- Content Wind - Best suited for building project portfolios
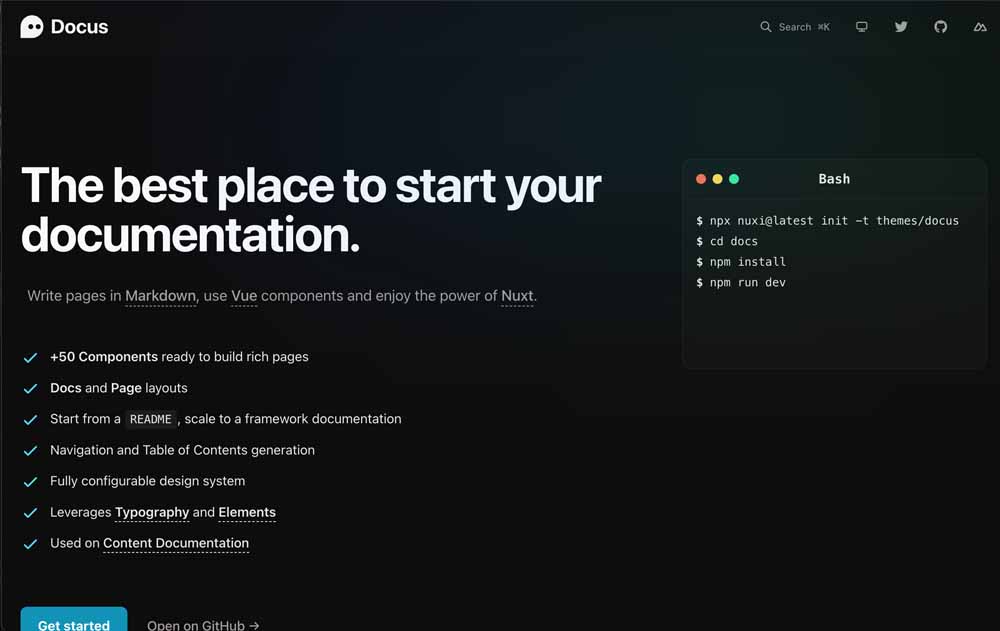
- Docus - Best suited for building documentation websites
- Minimal Starter - A minimal template for all use cases
Additionally, developers can create their own themes.
Creating a Nuxt Studio Theme
As part of the effort to encourage creating themes, Nuxt Studio has provided developers with a starter template which is a Nuxt application. You can also choose to create yours from scratch by following these instructions.
Here are a few things to note when creating your theme:
- Adding Princeau to your config allows your theme to be live-editable (but is also optional).
- Resolve your paths using the
nuxt.configas your root and also use thecreateResolverhelper provided by@nuxt/kit - The
public/directory cannot be extended. Therefore, images that are intended to be shipped with your themes must come from your.starters/directory instead.
After completing your theme, Nuxt Studio also offers the possibility to distribute your theme.
To publish your theme, the following conditions have to be met:
-
Include all files in your
package.jsonto ensure your users get all the features.{ "name": "my-theme", "files": [ "components", "layouts", "app.vue", "app.config.ts", "tokens.config.ts", "nuxt.config.ts", "nuxt.schema.ts" ] } -
Properly organize your dependencies by ensuring all your dependencies are under the
dependenciesand notdevDependenciesto ensure your users install them when they runnpm install. -
Since Studio generates new projects from themes using the
starters/directory, ensure you have at least one starter available in this directory.
Once the above conditions are met, your theme is ready to be published. You can do this using the command below:
npm publish --access public
Nuxt Studio Deployment
As we have covered earlier, there are currently two ways of deploying your projects:
- GitHub Pages.
- Self Hosting.
Self Hosting
With self-hosting, you can host your project on any of the popular platforms like Heroku, Vercel, Netlify, and others. This process is going to be quite similar to how a normal Nuxt project is deployed with a few additions.
The first step is to install the nuxt studio module. To do this, clone your repository on your computer if you haven’t already done so. After the cloning process is complete, open the repository in the terminal and execute the installation command.
npm i -D @nuxthq/studio
When installation is complete, the next step is to add this module to the list of modules for your project.

You will then choose a deployment platform. For this demo, we are going to use Netlify. Following the necessary steps for deploying on Netlify, our application becomes available after deployment.
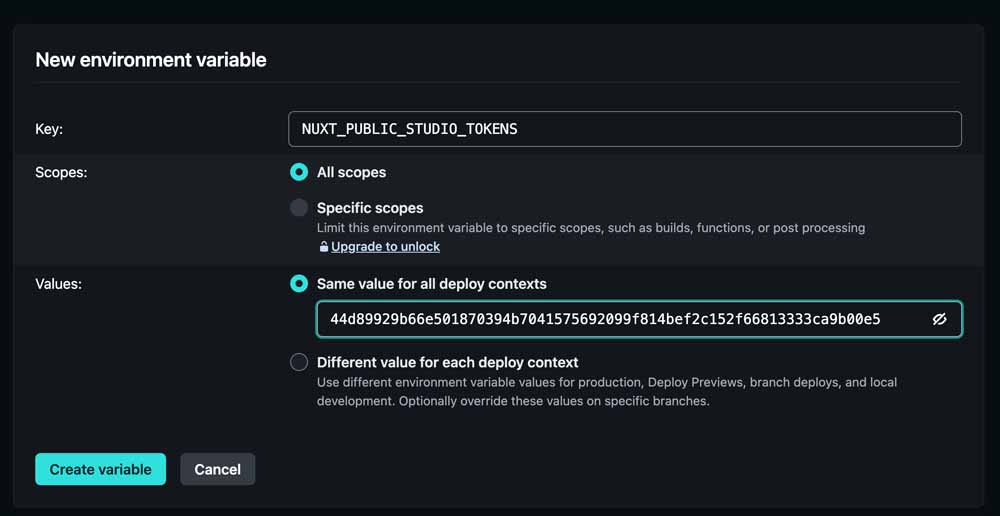
However, since we are deploying a Studio project to Netlify, Studio needs to verify that you own the domain being used for your project. For this reason, you are required to add an environmental variable NUXT_PUBLIC_STUDIO_TOKENS to your deployment platform.
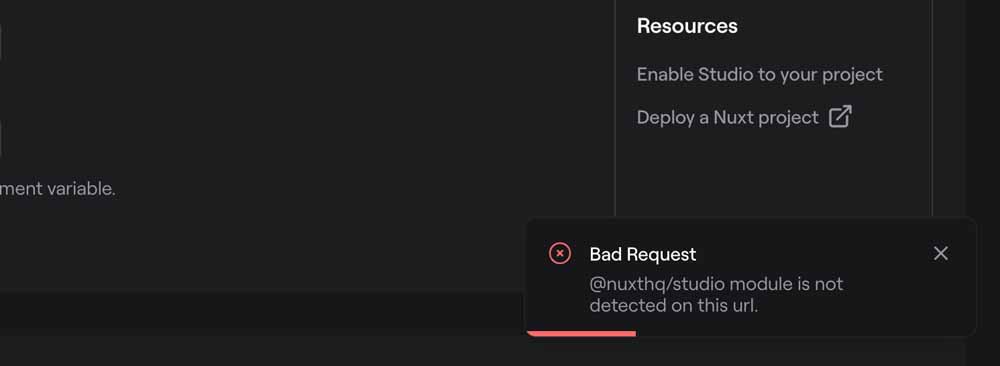
If you try deploying your project without adding the @nuxthq/studio module, you will get an error like this.
After installing the module and following the necessary steps, our URL has been successfully updated. Now, we can proceed to make changes to our project.

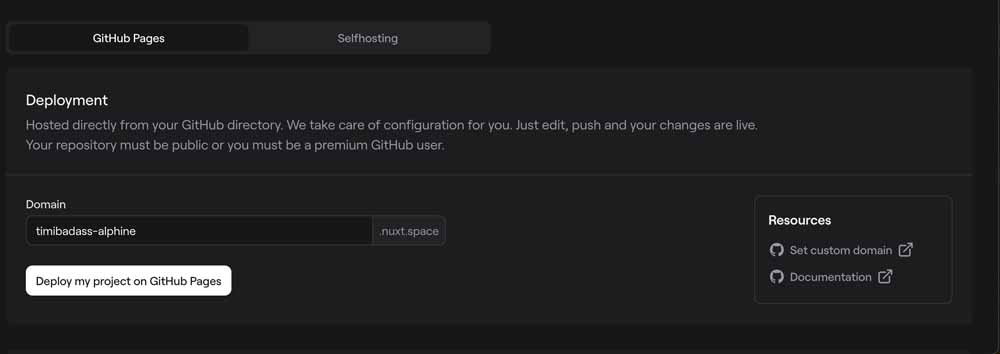
GitHub Pages
Users also have the option of deploying their projects using GitHub pages. This is the recommended approach because the Studio team helps you with the configuration of your application. You also get a free .nuxt.space domain to host your site on, however, you can use a custom domain of your choice.
Where to go from here?
Now that we understand how and what is Nuxt Studio and the compelling reasons to consider using it for your projects, we recommend you learn more about Nuxt Content itself by checking out Vue Mastery’s Build a Blog w/ Nuxt Content course, and check out the other Nuxt courses below.