The Nuxt Dev Tools offer a powerful set of features for Nuxt developers to gain more control, feedback, and clarity over their development experience.
In this article, we’ll explore the installation and configuration of the dev tools, as well as dive into each of the features offered, including viewing pages, components, imports, modules, plugins, runtime configs, payloads, hooks, and inspecting code. We’ll also cover how to extend the dev tools with custom tabs and functionality, and share some common debugging use-cases for dev tools features.
By the end of this article, you’ll have a solid understanding of how to leverage the Nuxt Dev Tools to take your Nuxt development to the next level.
Exploring the Nuxt 3 DevTools
The Nuxt DevTools supercharge the developer experience while building Nuxt.js applications. This is extremely relevant from the angle of debugging, refactoring code, or just monitoring the application’s behavior in general.
For context, under the routing section of the dev tool, we can manually change the route of the application by clicking on different route names. Plus, we can go further to edit the route parameters attached to dynamic routes in order to test different routes, directly in the browser.
Getting Started/Installation
To get started, we need to create a Nuxt project. Then, we can initialize the dev tools within the project.
Nuxt Installation
Initialize a new project by running the command below:
npx nuxi init <project-name>
Navigate into the project folder by running:
cd <project-name>
Nuxt DevTools Installation
We can install the Nuxt DevTools manually by running this in our terminal:
npm i -D @nuxt/devtools
And then adding this into our nuxt.config.ts file:
export default defineNuxtConfig({
  modules: [
    @nuxt/devtools',
  ],
})
Automatic Installation
Another way to initialize it is to opt-in to them on your project specifically.
npx nuxi@latest devtools enable
Similarly, you can disable in them your project by running this command in your terminal:
npx nuxi@latest devtools disable
Configuring the Nuxt Devtools
Customizing your DevTool configuration options can be important depending on the requirements of your project. In this section, we’ll go over a few custom DevTool options.
First, with the nuxt.config.ts file, we’ll simply enable DevTools within our project,
nuxt.config.ts
export default defineNuxtConfig({
  devtools: {
  // Enable DevTools (default: true)
  enabled: true,
  // VS Code Server options
  vscode: {},
  // ...other options
  }
})
Let’s explore some ways we can customize our DevTools configuration depending on our needs.
- Custom Tabs: This is used to add custom tabs to your DevTools.
//  Custom tabs
//  This is in static format, for dynamic injection, call nuxt.hook('devtools:customTabs') instead
customTabs?: ModuleCustomTab[]
export interface ModuleCustomTab {
//The name of the tab, must be unique
name: string
//Icon of the tab, support any Iconify icons, or a url to an image
icon?: string
//  Title of the tab
title: string
//  Main view of the tab
view: ModuleView
//  Category of the tab
//  @default 'app'
category?: TabCategory
//  Insert static vnode to the tab entry
//  Advanced options. You don't usually need this.
extraTabVNode?: VNode
//  Require local authentication to access the tab
//  It's highly recommended to enable this if the tab have sensitive information or have access to the OS
//  @default false
requireAuth?: boolean
}
- VS Code Options: This enables custom VSCode features for the VSCode tab on the Nuxt dev tools.
// VS Code Server integration options.
vscode?: VSCodeIntegrationOptions

export interface VSCodeIntegrationOptions {
// Enable VS Code Server integration
enabled?: boolean
// Start VS Code Server on boot
// @default false
startOnBoot?: boolean
//Port to start VS Code Server
//@default 3080
port?: number
//Reuse existing server if available (same port)
reuseExistingServer?: boolean
// Determine whether to use code-server or vs code tunnel
// @default 'local-serve'
mode?: 'local-serve' | 'tunnel'
// Options for VS Code tunnel
tunnel?: VSCodeTunnelOptions
}
- Component Inspector: This enables Vue devtools to inspect your components, under the components tab.
import type { VitePluginInspectorOptions } from 'vite-plugin-vue-inspector'

//Enable Vue Component Inspector
//@default true
componentInspector?: boolean | VitePluginInspectorOptions
- Vite Plugin Inspect: This enables vite-plugin-inspect for the inspect tab.
//Enable vite-plugin-inspect
//@default true
viteInspect?: boolean
- Disable Authorization
//Disable dev time authorization check.
//NOT RECOMMENDED--only use this if you know what you are doing.
//@see https://github.com/nuxt/devtools/pull/257
//@default false
disableAuthorization?: boolean
- Timeline
//Options for the timeline tab
timeline?: {
//  Enable timeline tab
//  @default false
enabled?: boolean,
// Track on function calls
  functions?: {
    include?: (string | RegExp | ((item: Import) => boolean))[],
    //  Include from specific modules
    //  @default ['#app', '@unheadvue']
    includeFrom?: string[],
    exclude?: (string | RegExp | ((item: Import) => boolean))[]
  }
}
- Experimental Features: This covers newer experimental features.
experimental?: {
// Timline tab
// @deprecated Use `timeline.enable` instead`
timeline?: boolean
}
You can find the full list of custom options here.
Nuxt DevTools Features
To view these features, open the app in your browser and click on the icon at the bottom of your screen to open the Nuxt DevTools.

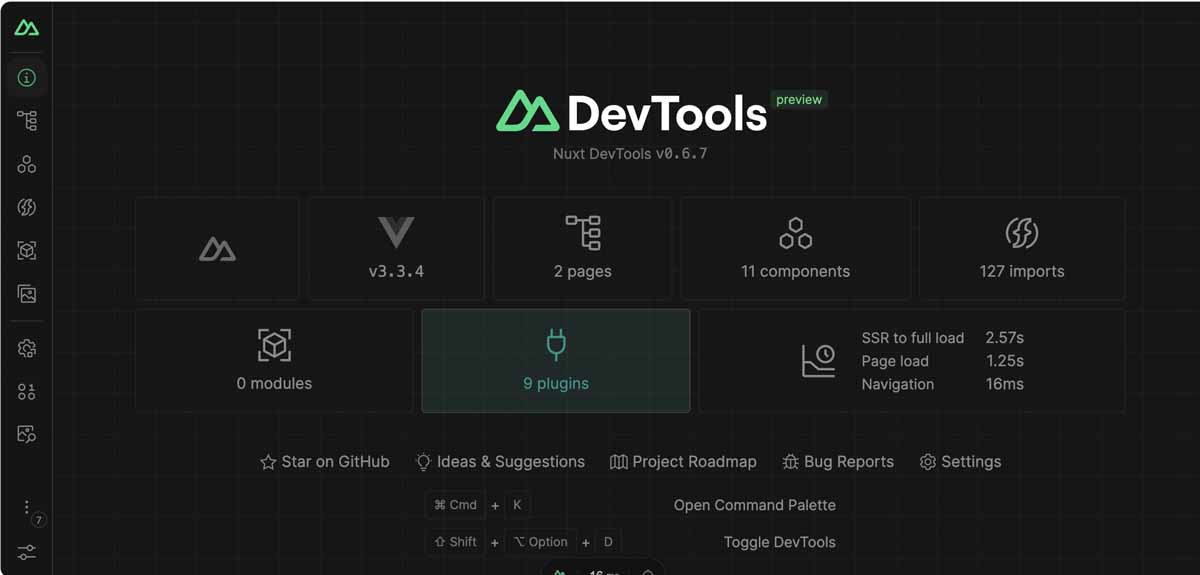
Overview
As the names suggest, this tab contains basic information about the application, including the Nuxt version, number of pages/components, imports, plugins, modules, etc.
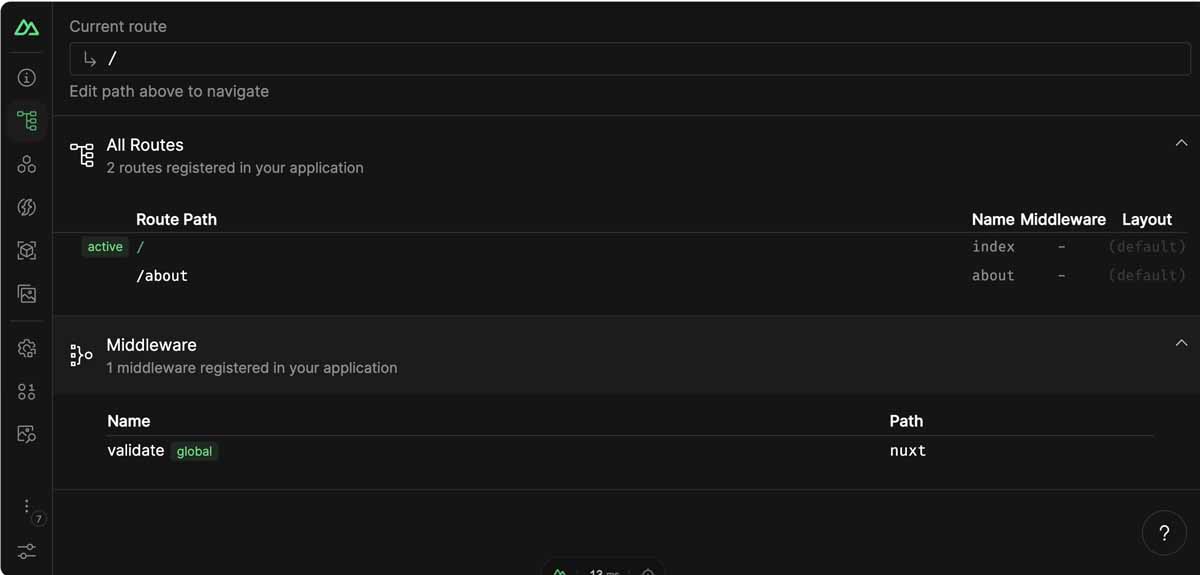
Pages
This tab contains the pages that we can route to within our app. Here, we can manipulate our app by switching routes or inputting route parameters.
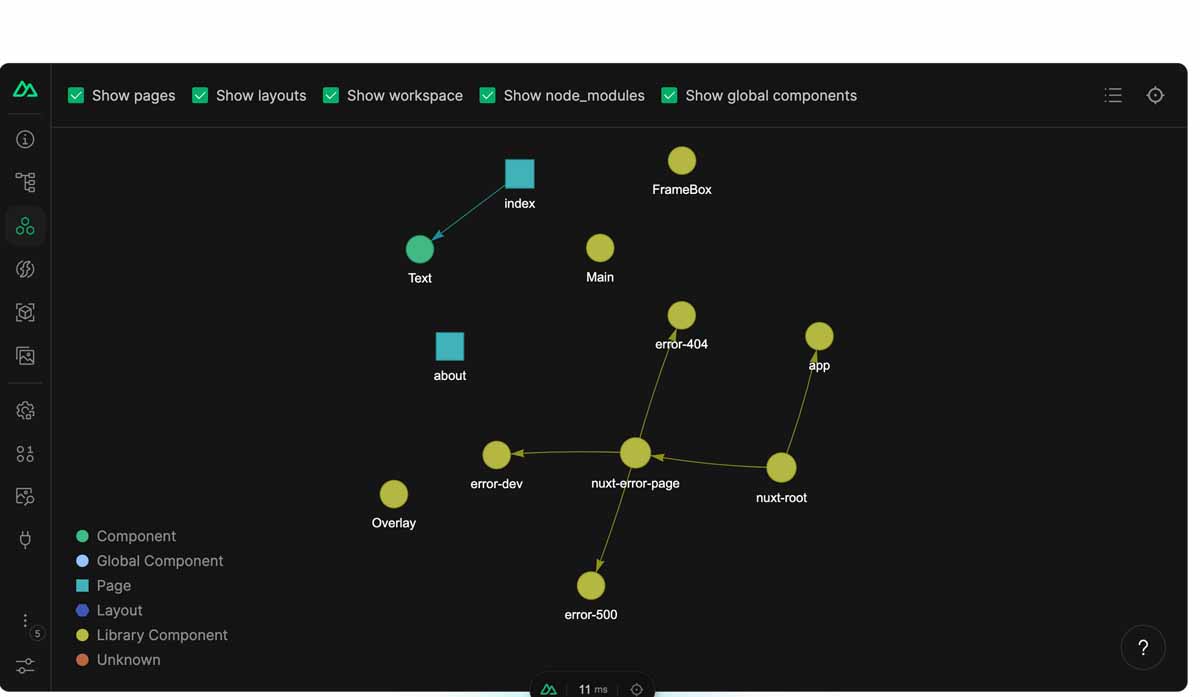
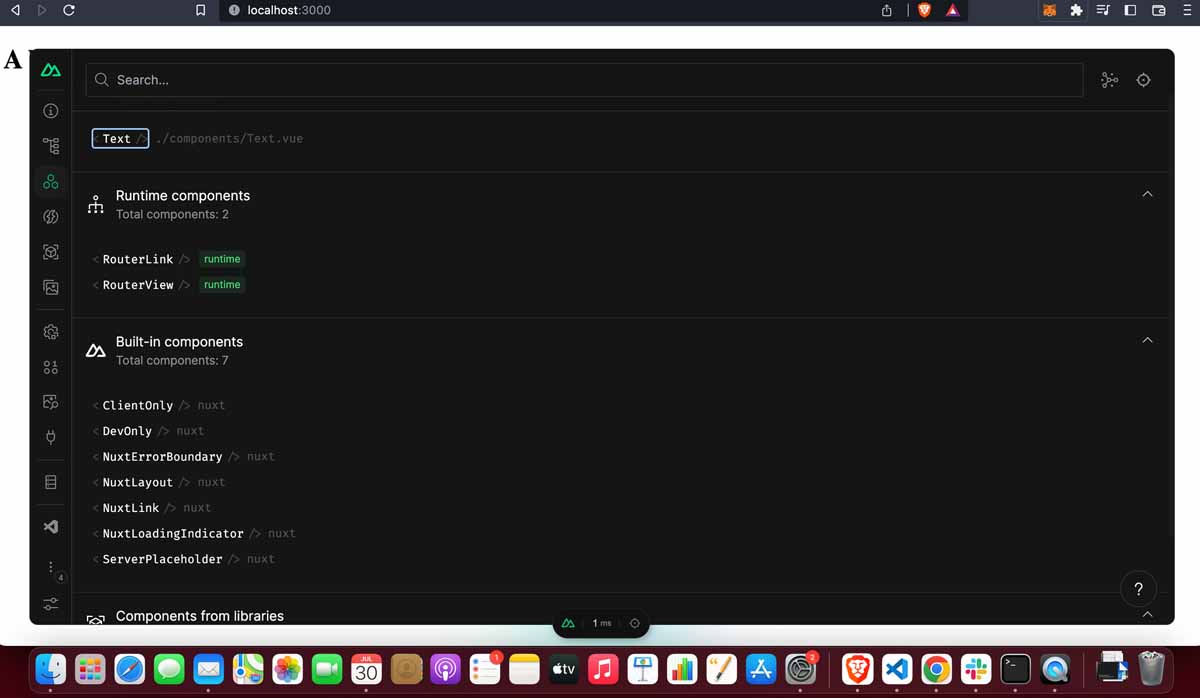
Components
This view shows us the number of components in the application. These include Nuxt built-in libraries and library components like <RouterLink /> and <RouterView />.
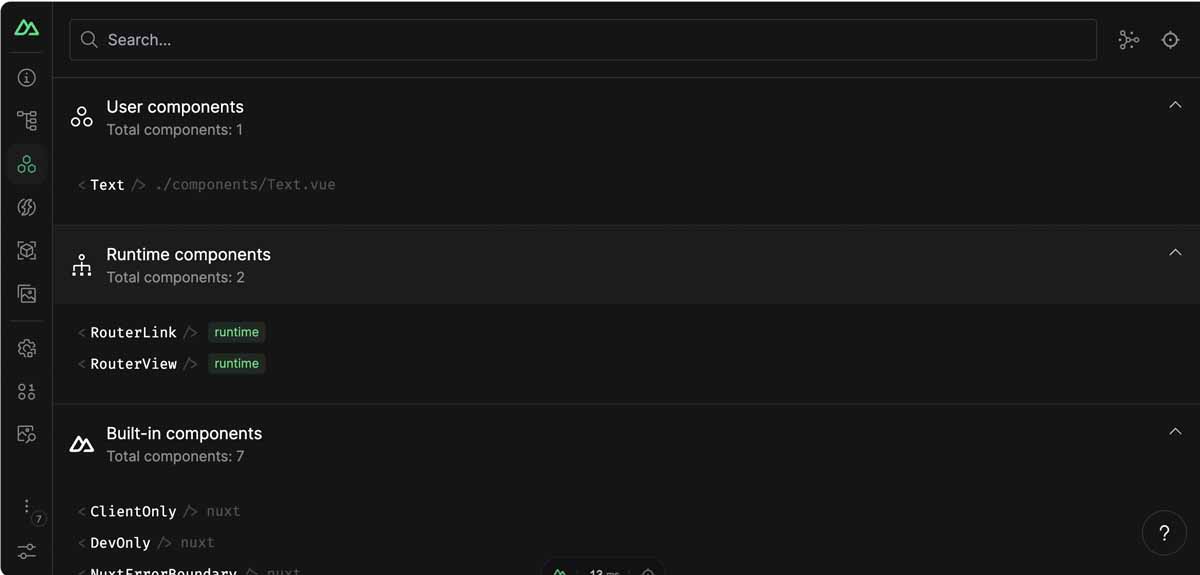
We can also view a chart to see the relationship between our components.
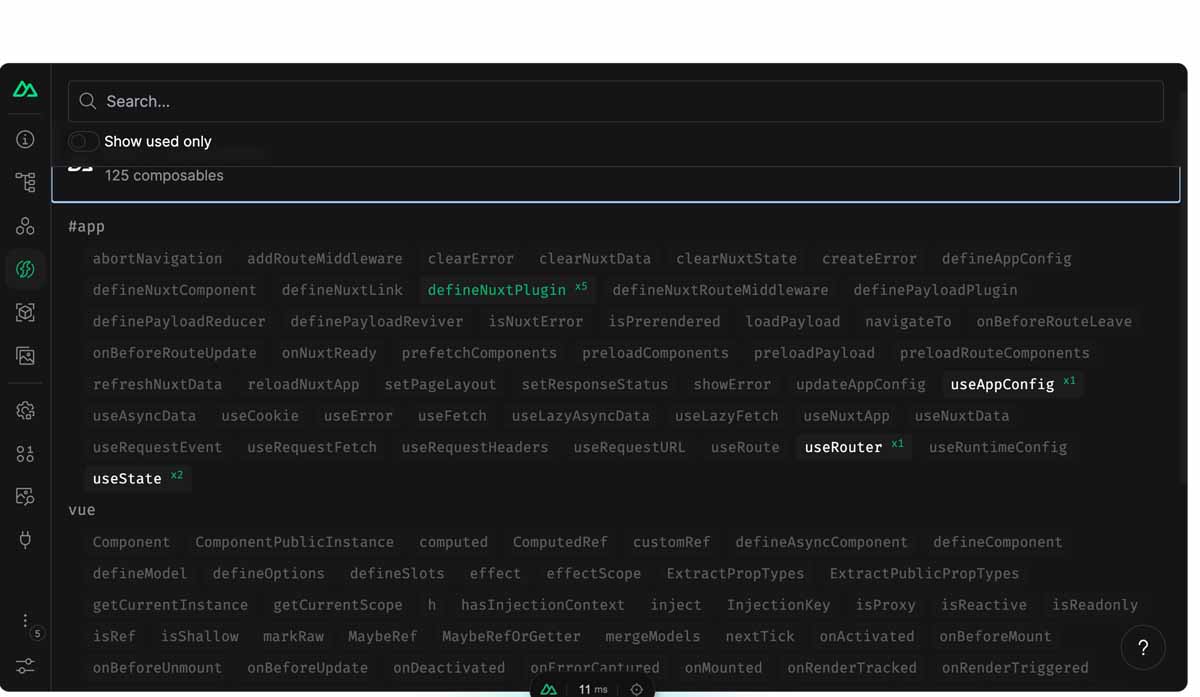
Imports
Under the Imports tab, we can view everything that we’ve imported into our app, either through third-party libraries or built-in with Nuxt. It also allows us to filter for the imports we’re actively using within our app.
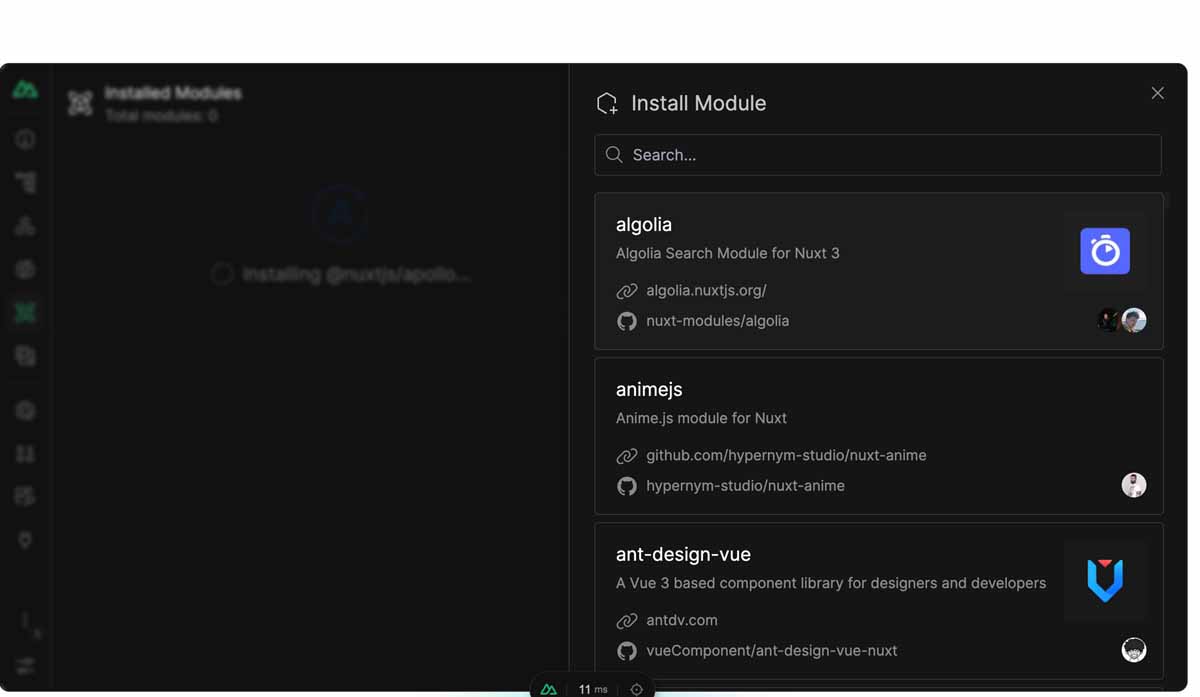
Modules
The modules tab displays a list of modules we have within our app. Each module can be installed right within the DevTools. Plus, it contains links to individual modules and their documentation.
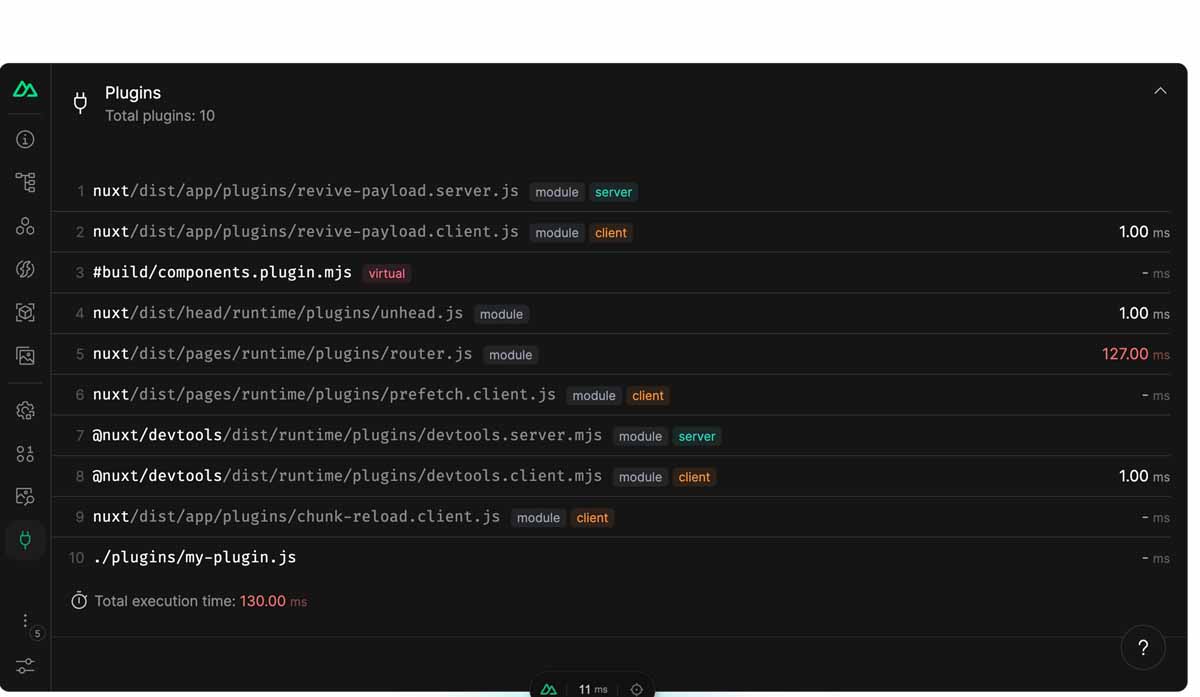
Plugins
This section will contain a list of all the plugins present in our app and as such, the number of files visible here will vary depending on our app. Ideally, it will include a list of all the files in the plugins folder of our application and allows us to see if it’s being run client-side, server-side, or both.
Runtime Configs
This allows us to view the config within our application. Runtime configs includes the ones defined within our app, and those defined by third-party libraries.
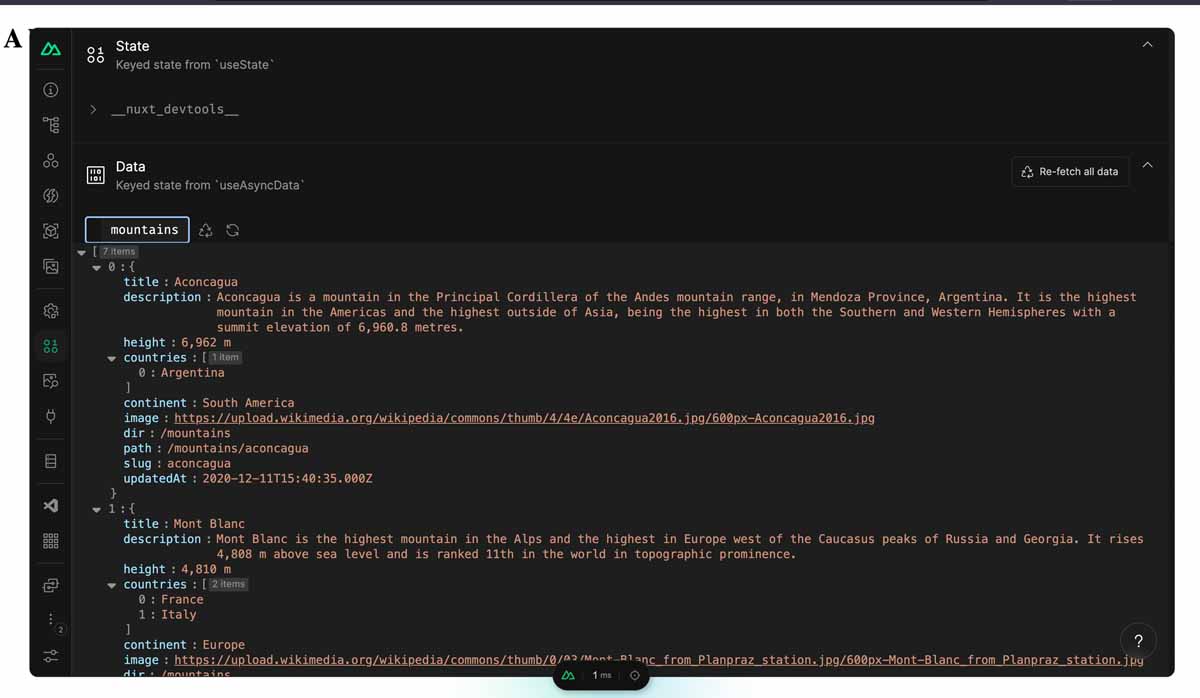
Payloads
I like to call this section the “state manager”. It allows us to monitor all states within the application, from useAsyncData. The data can be tracked and manipulated within our app.
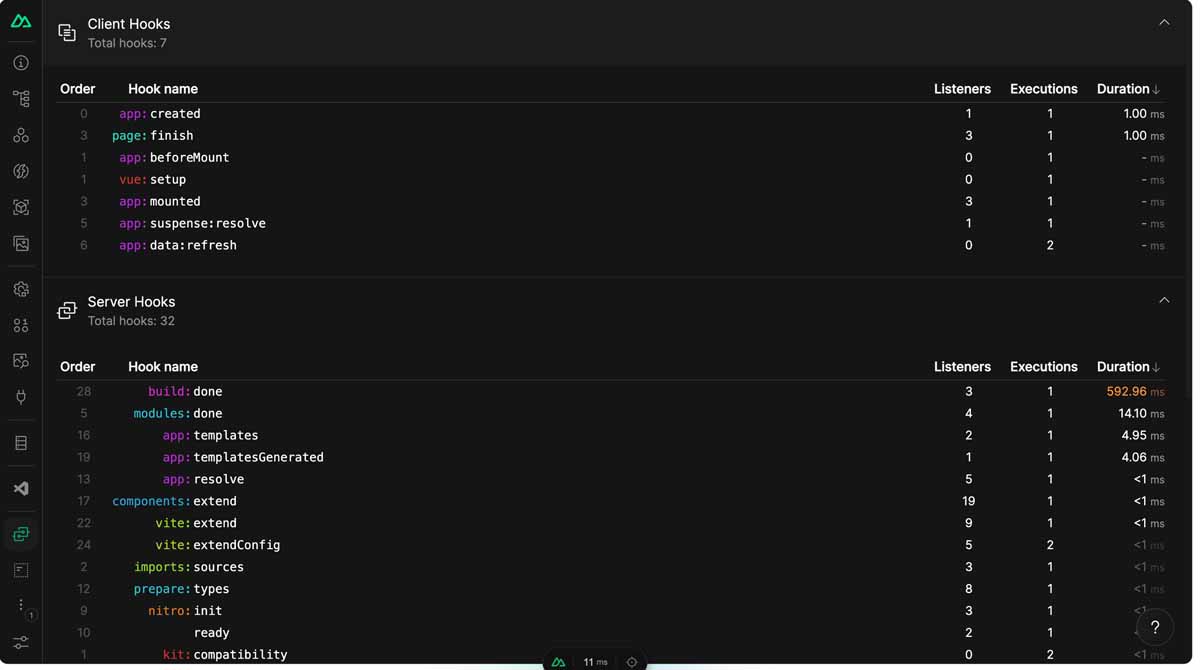
Hooks
This tab is especially great for monitoring performance. It allows us to monitor the time spent on each hook.
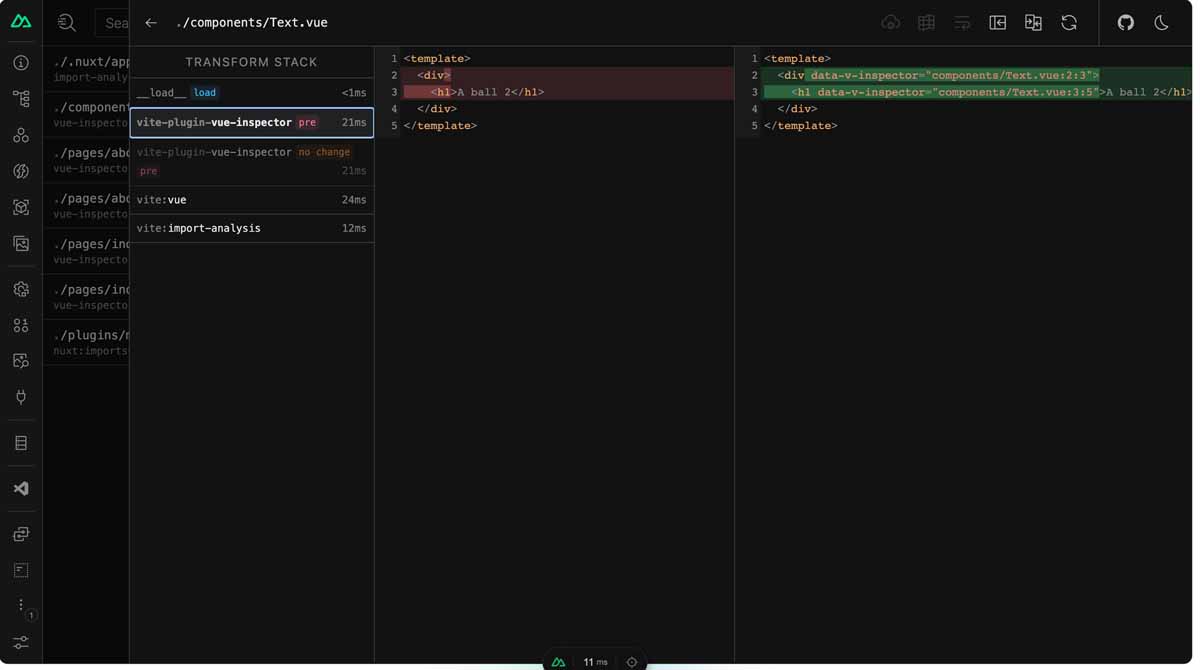
Inspect
This allows us to see how our code transforms and runs within the browser. It gives us a peek into how it works under the hood.
In the <Text/> component below, we can see the entire transform stack. We go from the exact written component in the codebase to the point of transformation. Technically, we achieve this through the vite-plugin-inspect library. It helps to display the transformation steps through Vite.
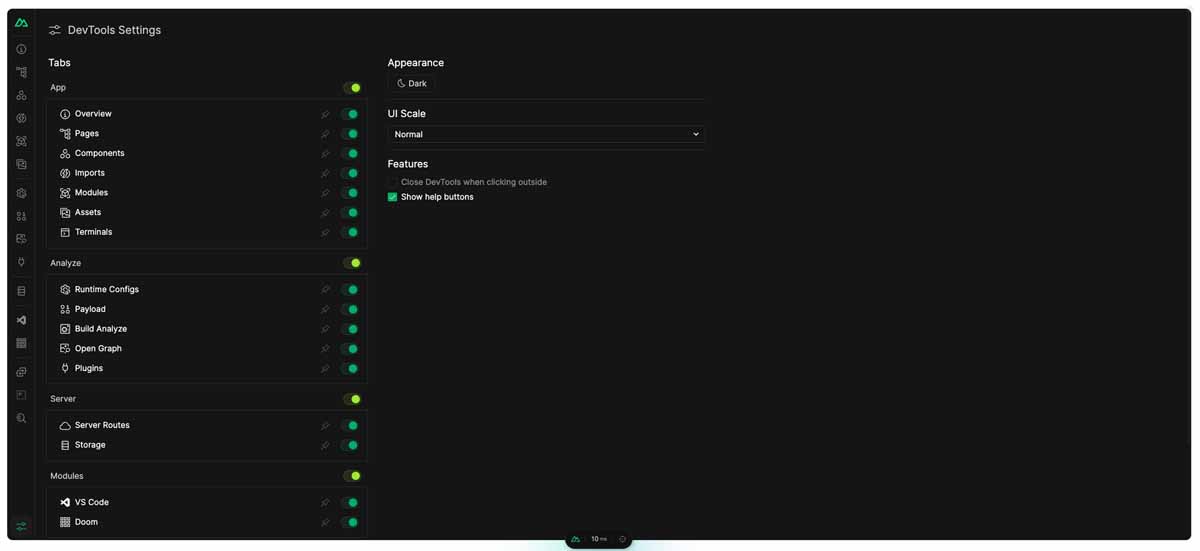
DevTools Settings
This simply allows us to control certain things within our DevTools, like toggling certain tabs on/off, changing fonts, or even implementing dark/light mode.
Extending Nuxt Devtools Capabilities
The best part about the Nuxt DevTools is that we can extend it with custom tabs and functionality.
This means we can have custom tabs that look like the features above. We can do this using an iframe in our nuxt.config.ts file.
export default defineNuxtConfig({
  modules: [
    "@nuxt/devtools",
    (inlineOptions, nuxt) => {
      nuxt.hook("devtools:customTabs", (tabs) => {
        tabs.push *
          {
            name: "custom-page",
            title: "Custom page",
            icon: "carbon:apps",
            view: {
              type: "iframe",
              src: "../../../",
            },
          };
      });
    },
  ],
  devtools: {
    enabled: true,
  },
});
This tab displays this custom view for us.
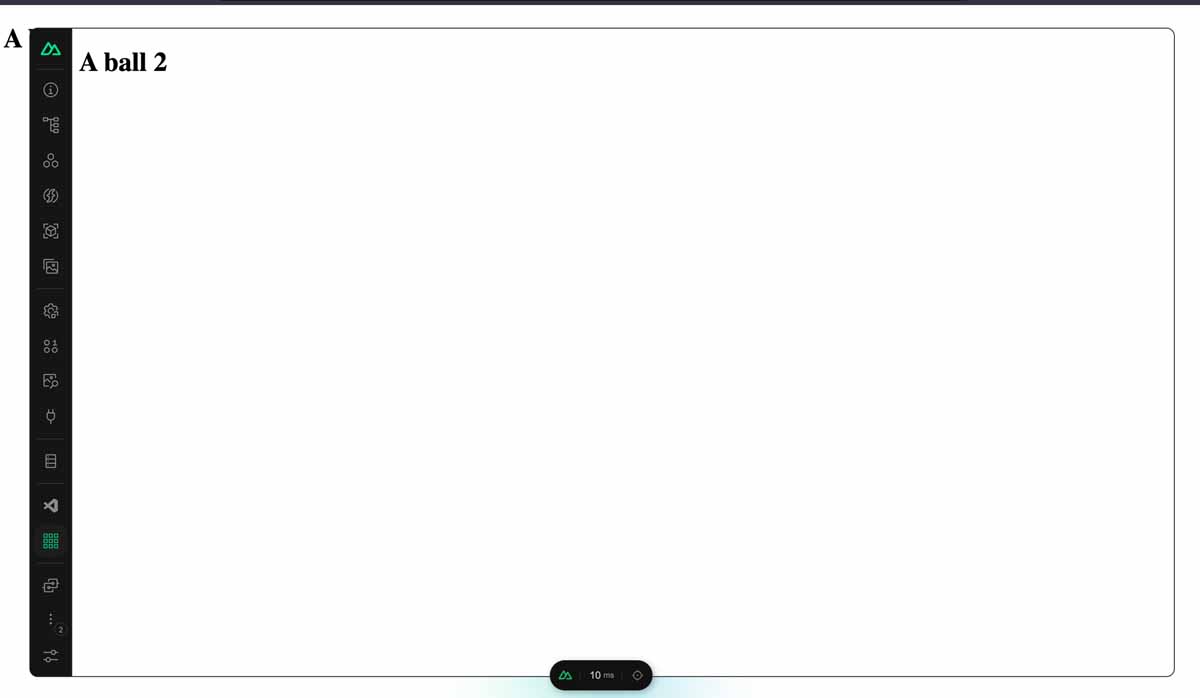
A custom view like this allows us to set up a custom tab from any Page in our app or any website using their URL as the view src.
Common Debugging Use Cases For DevTools Features
Components
Components are the basic building blocks of our application and this also reflects in our debugging process.
The DevTools allow us to view our components and their children. It even includes a graph that shows the relationship between each component and its parent/child.
They also allows us to see components from our third-party and built-in Nuxt libraries.
Payload
When debugging our app, the payload tab can help us decipher how we fetch and use our data. In a bigger application, we may have multiple moving parts making multiple API requests across different components. Payload aggregates these requests into a single place and lets us see their responses. You can also refetch the individual request and view their responses and errors.
<script setup lang="ts">
  const { data, pending, error, refresh } =
    (await useAsyncData)
    ("mountains", () => $fetch("https://api.nuxtjs.dev/mountains"));
</script>
;
Wrapping Up
In this article, we covered all the features of the Nuxt DevTools and how we can leverage them as developers. This can help reduce debugging time and improve our developer experience. Feel free to fork the repo and look at the code setup, and for more Nuxt.js content, check out the recommended tutorials below.