
There are times where you may find yourself in need of generating a whole form dynamically. Perhaps you are creating a form that can be modified by the user and the schema is stored in a database. Maybe you find yourself needing to modify the form so often that you decide the best approach is to store the schema in a static file with your code.
In case you need a quick refresher, a schema is a piece of organized data that tells your application how a screen, or form in this case, should be rendered and presented to the user. Usually, you will find these schemas in JSON format, but it is not uncommon to also find them in formats like XML.
Regardless of the reason, you probably want to validate that the final user’s input is what you expect. This helps ensure data consistency and reduce mistakes, but it presents a different problem: validating a form that is dynamically generated.
In this article we’re going to learn how to plug in Vuelidate to an existing schema-driven form and make sure that all the fields are getting correctly validated. These fields will be generated from a JSON file, and will include the required validation rules within it.
I have to assume that you have an understanding of concepts such as Vue’s component component, and a general understanding of what a schema-driven form is. I also have to assume a basic understanding of the Vuelidate library. If you don’t, I hear there’s a book out there that may help you, wink wink, nudge nudge as well as the Next-level Vue course here in Vue Mastery, which will show you the basics of form creation and validation with Vuelidate.
If you want to follow along with the finished project, you can check out/clone the repository at https://github.com/marina-mosti/dynamic-schema-vuelidate
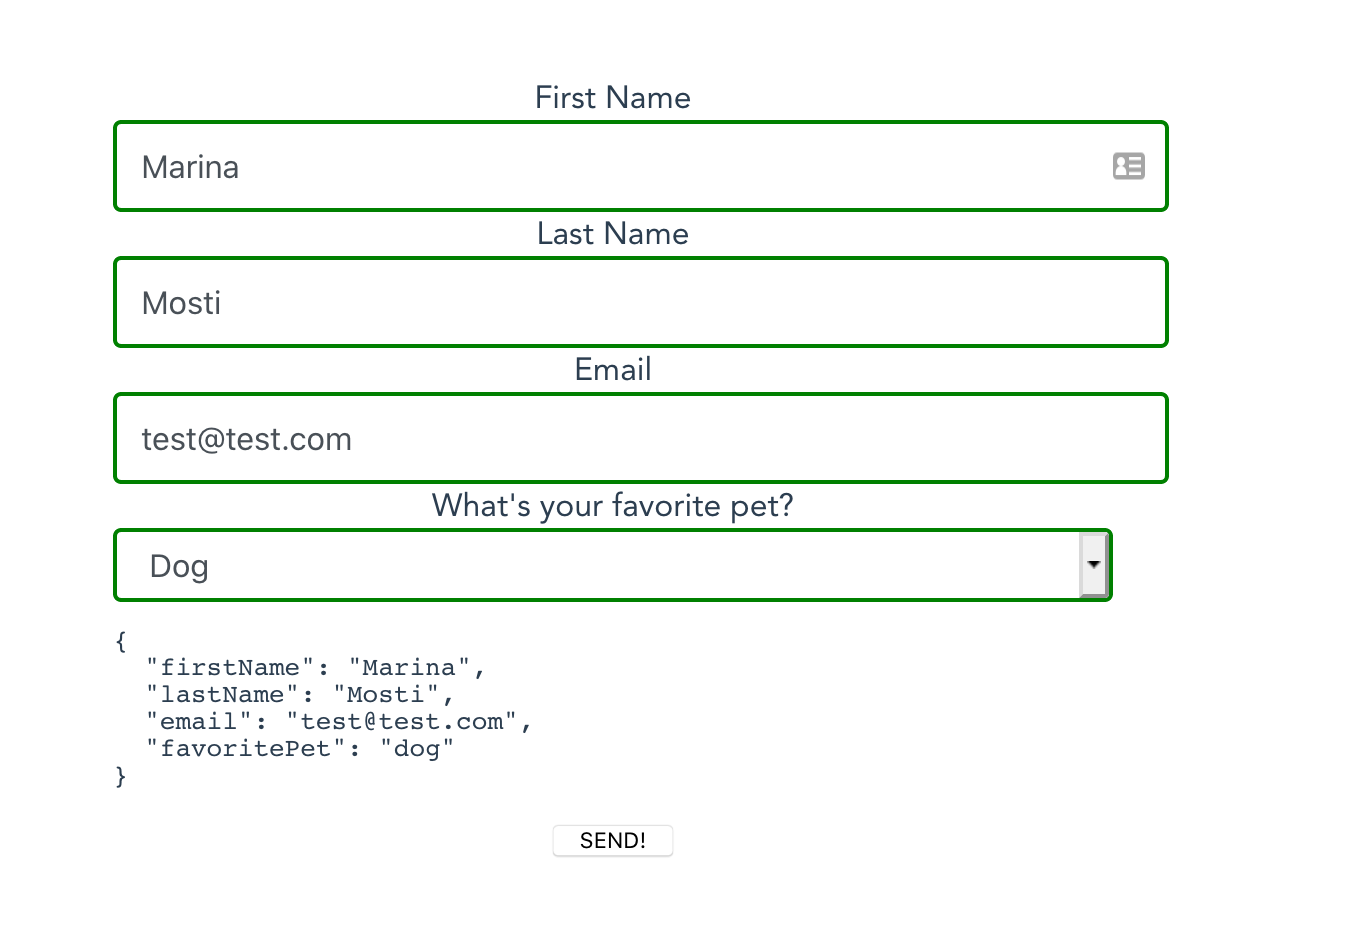
Here’s a little preview of what you’re going to be building today. This whole form is rendered by the schema found in the Setting up section ahead.
Setting up
To get started, let’s look at our base setup. We have a JSON file defining our schema.
{
  "firstName": {
    "component": "BaseInput",
    "label": "First Name",
    "validations": {
      "required": {
        "params": null,
        "message": "This field is required"
      },
      "minLength": {
        "params": 3,
        "message": "Please type at least 3 characters"
      }
    }
  },
  "lastName": {
    "component": "BaseInput",
    "label": "Last Name",
    "validations": {
      "required": {
        "params": null,
        "message": "This field is required"
      }
    }
  },
  "email": {
    "component": "BaseInput",
    "label": "Email",
    "type": "email",
    "validations": {
      "required": {
        "params": null,
        "message": "This field is required"
      },
      "email": {
        "params": null,
        "message": "This field needs to be a valid email"
      }
    }
  },
  "favoritePet": {
    "component": "BaseSelect",
    "label": "What's your favorite pet?",
    "options": [
      { "label": "Cat", "value": "cat" },
      { "label": "Dog", "value": "dog" },
      { "label": "Sea Otter", "value": "otter" }
    ],
    "validations": {
      "required": {
        "params": null,
        "message": "This field is required"
      }
    }
  }
}
Notice that each field defines a component, which will load the related component into the form.
More importantly, the schema defines a validations object for each one. This object defines each validation rule per property, such as required, or email.
Inside each one of these validation rules, we have both a params property, which we will use on validation rules like minLength that requires passing a value, and a message field that will define the error message in case the validation fails.
Next up, let’s look at our BaseInput and BaseSelect components. They’re both simple wrappers to make our life easier when dealing with a dynamically generated form.
📃BasicInput.vue
<template>
  <div class="input">
    <label :for="name">{{ label }}</label>
    <input
      v-bind="$attrs"
      :class="{
        'error': hasError,
        'green': !!value && !hasError
      }"
      :aria-describedby="`${name}-error`"
      :value="value"
      :name="name"
      :id="name"
      v-on="{
        ...$listeners,
        input: event => $emit('input', event.target.value)
      }"
    >
    <p :id="`${name}-error`" class="error" v-if="hasError && error">{{ error }}</p>
  </div>
</template>

<script>
export default {
  inheritAttrs: false,
  props: {
    value: {
      type: [String, Number]
    },
    name: {
      type: String,
      required: true
    },
    label: {
      type: String,
      required: true
    },
    error: {
      type: String,
      required: false
    },
    hasError: {
      type: Boolean,
      default: false
    }
  }
}
</script>

<style scoped>
[...]
</style>
There’s nothing particularly interesting about this component, but it’s important to take a close look at the props. We accept a value that will be the v-model value, a name and label that are just strings, and an error strings message and boolean hasError state.
Next, let’s take a peek at the BaseSelect component.
📃BasicSelect.vue
<template>
  <div class="input">
    <label :for="name">{{ label }}</label>
    <select
      :class="{
        'error': hasError,
        'green': !!value && !hasError
      }"
      :aria-describedby="`${name}-error`"
      :name="name"
      :id="name"
      @change="$emit('input', $event.target.value)"
    >
      <option value></option>
      <option
        v-for="opt in options"
        :key="opt.value"
        :value="opt.value"
        :selected="opt.value === value"
      >{{opt.label}}</option>
    </select>
    <p :id="`${name}-error`" class="error" v-if="hasError && error">{{ error }}</p>
  </div>
</template>

<script>
export default {
  props: {
    value: {
      type: [String, Number]
    },
    name: {
      type: String,
      required: true
    },
    label: {
      type: String,
      required: true
    },
    options: {
      type: Array,
      required: true,
      validator (opts) {
        return (
          opts.find(opt => {
            return !opt.hasOwnProperty('label') || !opt.hasOwnProperty('value')
          }) === undefined
        )
      }
    },
    hasError: { type: Boolean, default: false },
    error: { type: String, required: false }
  },
  data () {
    return {
      val: null
    }
  }
}
</script>

<style scoped>
[...]
</style>
The BaseSelect component is very similar to its input counterpart in terms of props, we just add an extra options prop that takes an array with some children to define the <option> tags.
Finally, let’s take a look at the component that we’re going to use to dynamically generate the form. This one is called the DynamicForm.
📃DynamicForm.vue
<template>
    <div>
        <component
            v-for="(field, key) in schema"
            :key="key"
            :name="key"
            :is="field.component"
            v-bind="{ ...field }"
            :value="value[key]"
            @input="update(key, $event)"
        >
        </component>
    </div>
</template>

<script>
export default {
  props: {
    schema: { type: Object, required: true },
    value: { type: Object, required: true }
  },
  data () {
    return {
      form: {}
    }
  },
  methods: {
    update (key, value) {
      this.form[key] = value

      this.$emit('input', {
        ...this.value,
        [key]: value
      })
    }
  },
  created () {
    for (let name in this.schema) {
      this.$set(this.form, name, null)
    }
  }
}
</script>
This component will render all the fields in our loaded schema, in order to allow for that we will use a <component> with a v-for and :is combo. Note that this component gets the schema passed down as a prop to it, which is the JSON file we saw earlier in the article.
Next, notice the created method.
The for...in syntax allows us to obtain the property of each object in our name variable, and loop through it one by one.
We are going to loop each one of the fields that are in the schema and add them dynamically to the this.form state using Vue.set to ensure they are reactive.
If you need a refresher on Vue.set check out this article explaining what Vue.set is and the importance of using it to maintain reactivity.
Finally, instead of a direct v-model we’ve chosen to use the value binding and to call an update method on the component. Notice that inside the update method we are going to first assign the updated value to our this.form state, and then we’re going to $emit an input event that includes the current value that the parent is binding to, and we overwrite the value of the key that is being updated.
Wondering about the [key]: value syntax? JavaScript allows us to dynamically target the property of an object by using array syntax. For example, if our key was equal to firstName and our value to Marina this bit of code would be interpreted as firstName: Marina.
Here’s the first gotcha: did you notice that this.form at this point is virtually useless? We are keeping an internal copy of the whole state of the form because in a bit we’re going to use that to hook it up to Vuelidate.
Injecting Vuelidate
Now that our demo project is set up, we’re ready to finally start making changes to our files so that our component can use and understand our validation rules.
Make sure that you add Vuelidate to your project by doing npm install vuelidate or yarn add vuelidate, and open up DynamicForm.vue.
The first step in any Vuelidate-powered form is to add a validations property to the component that will be handling all the validations.
📃DynamicForm.vue
[...]

<script>
export default {
  [...]
	validations () {
    return { form: validationRules(this.schema) }
  }
}
</script>
Vuelidate is expecting you to return a an object identical your state that includes the validation rules for each part of your state. We currently have a form property with our fields inside, so we have to re-create it but instead of the definition of each field, we will return the rules.
In this case we have to return an object that has a single property form, and inside that form property a dynamically generated object with all the fields in our schema.
The tricky part comes here. Remember that inside our schema.json we are declaring our rules inside our validations property, using props and values? Vuelidate is actually expecting us to be passing down functions, most of them already built-in to the library.
What we’re going to do here is create a Parser. This parser will be a regular .js file, and will export a single function validationRules, we will pass down our schema as the only parameter, and it will parse it down to the format that Vuelidate is expecting.
Ready? Create a ValidationsParser.js file.
📃ValidationsParser.js
import * as Validators from 'vuelidate/lib/validators'

export const validationRules = schema => {
  return Object.keys(schema).reduce((rules, elementName) => {
    const item = schema[elementName]
    if (!item.hasOwnProperty('validations')) return rules

    const validations = {}
    for (let rule in item.validations) {
      const params = item.validations[rule].params

      if (params) {
        validations[rule] = Validators[rule](params)
      } else {
        validations[rule] = Validators[rule]
      }
    }

    rules[elementName] = validations
    return rules
  }, {})
First, we’re going to import the validation functions from Vuelidate.
We export a single function, validationRules, which takes the schema just as we saw before. Now bare with me because there’s a lot happening here!
First, we are going to get the keys of the schema object, because in our JSON file, the keys for each of the properties are each of the fields. So each key will be the field name.
Once we have an array of these keys, we will use Array.reduce on it to create the rule set.
Inside the reduce loop, we extract the item we’re working on and assign it to item for easy access. We first check if this new item has a validations property, and if it doesn’t we won’t process it.
Now, we are going to loop through each of the validations that we find inside the validations object, because a field can have multiple validations.
We extract into a params constant for easy access to the rule’s params and we check if it has any rules. If it does, we have to make sure that we pass them down and execute the validation function. So inside the if/else check we are going to find the current rule inside our imported Validators, and then pass in the params if needed.
We store the result of this call in the validations object that we created earlier, and finally assign the validations object itself to the rules that we’re building.
Whoa. Let’s put this to use, that way you can explore the results in the browser.
Go back to DynamicForm and import the file at the top of the script. Our validations function is already using it so that’s all we have to do with the parser.
📃DynamicForm.vue
<script>
import { validationRules } from '@/parsers/ValidationParser'

export default {
  [...]
	validations () {
    return { form: validationRules(this.schema) }
  }
}
</script>
Trigger validations
The next step is to actually tell our DynamicForm how to use the new validations, or rather, when.
Remember the update method that we created in the beginning? We’re going to modify it to fire the $touch events that Vuelidate needs, to know when to revalidate and recalculate each field.
📃DynamicForm.vue
<script>
import { validationRules } from '@/parsers/ValidationParser'

export default {
  [...]
	methods: {
     update (key, value) {
      this.form[key] = value
      this.$v.form[key].$touch()

      this.$emit('input', {
        ...this.value,
        [key]: value
      })

      this.announceStatus()
    },
    announceStatus () {
      this.$emit('status', {
        invalid: this.$v.$invalid
      })
    }
  }
}
</script>
First we’re modifying the update method by adding a call to $touch on the respective Vuelidate form element. This will make sure that particular input’s validation rules that we created earlier are run, and any state is updated within $v.
We’re also going to call this new function announceStatus that will $emit the overall status of our form, that way our parent can listen to status changes and react accordingly.
Displaying the errors
As you remember, both of our components are capable of displaying errors to the user through the hasError and error props, but so far we haven’t used either.
Let’s start by updating our component with the hasError property, since that is pretty straightforward.
📃DynamicForm.vue
<template>
    <div>
        <component
            v-for="(field, key) in schema"
            :key="key"
            :name="key"
            :is="field.component"
            v-bind="{ ...field }"
            :value="value[key]"
            @input="update(key, $event)"
            :hasError="$v.form[key].$error"
        >
        </component>
    </div>
</template>

[...]
We have added the :hasError binding. We look inside our $v object for the corresponding element’s model, and we pass down the $error status. If the component has a validation problem, this will be true and the component will receive the status as a boolean.
Now, we need to figure out a way to pass down the custom messages for errors that we defined inside our schema for each of the validations. For that we’re going to use a computed property called errorMessages.
📃DynamicForm.vue
<template>
    <div>
        <component
            v-for="(field, key) in schema"
            :key="key"
            :name="key"
            :is="field.component"
            v-bind="{ ...field }"
            :value="value[key]"
            @input="update(key, $event)"
            :hasError="$v.form[key].$error"
            :error="errorMessages[key]"
        >
        </component>
    </div>
</template>

<script>
import { validationRules } from '@/parsers/ValidationParser'

export default {
  [...]
  computed: {
    errorMessages () {
      const validations = this.$v.form

      return Object.keys(this.schema).reduce((messages, key) => {
        const rules = this.schema[key].validations
        const rulesKeys = Object.keys(this.schema[key].validations)
        const validator = validations[key]

        if (!validator) return messages

        for (let rule of rulesKeys) {
          if (validator[rule] !== false) continue

          messages[key] = rules[rule].message
          return messages
        }

        return messages
      }, {})
    }
  },
  [...]
}
</script>
First, notice that the template also changed. We are now passing down the :error binding, we will use this new computed property errorMessages that will give us an object with keys for properties, and messages for values.
Let’s go deep into the errorMessages function.
First we store this.$v.form which holds all of our current form status into a validations const for readability.
We are going to use the same approach that we did on the parser here, and loop through the keys of the schema and reduce the array.
First, we extract the current key rules into a constant.
After, we extract the names of the validations as ruleKeys.
Finally, we look inside of our current validations to see if the validator exists, if not, we move on.
Now, we loop through the rulesKeys (rule names) and for each rule we are going to check if the rule in the validator is false, if this happens it means that the validation for this particular rule is failing. For example, the user didn’t complete the required field.
Finally, we assign the correct message to the messages object using the key and return.
Still with me? We’re almost done! At this point we have a fully working component that renders a validated schema driven form, let’s just put it to use!
Using the component
Open up App.vue or whatever component you’re going to use as the parent, and import our DyanmicForm component, as well as the schema.
📃App.vue
<template>
  <div id="app">
      <form @submit.prevent="submitForm">
        <DynamicForm
          :schema="schema"
          v-model="form"
          @status="saveStatus"
          ref="dynamicForm"
        />

        <pre>{{ form }}</pre>
        <button type="submit">SEND!</button>
      </form>
  </div>
</template>

<script>
import schema from './schema.json'
import DynamicForm from './components/DynamicForm'

export default {
  name: 'app',
  components: { DynamicForm },
  data () {
    return {
      schema,
      form: {},
      status: null
    }
  },
  methods: {
    submitForm () {
      this.$refs.dynamicForm.validate()
      if (this.status.invalid) {
        return
      }

      alert('Form submitted')
    },
    saveStatus (status) {
      this.status = status
    }
  }
}
</script>
In the template, we are wrapping our DynamicForm inside a form tag and catching the submit event. We pass in the loaded schema through the property, and v-model it to a local form state.
We are also going to listen to the status events that we created earlier, and add ref to the component—I’ll explain this in a minute.
In the script, you can see that in the saveStatus method we’re just updating the status on the local state.
In the submitForm however, we’re going to have to somehow check to see if the WHOLE form is valid. This means we’re going to have to expose a method inside our DynamicForm component called validate that does this exact job. It should trigger our status update in the end, so that we prevent the submission of an invalid form.
Now let’s go back to DynamicForm and add this method.
📃DynamicForm.vue
<script>
import { validationRules } from '@/parsers/ValidationParser'

export default {
  [...]
  methods: {
    [...]
    validate () {
      this.$v.$touch()
      this.announceStatus()
    },
    announceStatus () {
      this.$emit('status', {
        invalid: this.$v.$invalid
      })
    }
  },
  [...]
}
</script>
As you can see, the validate method is quite simple. It asks Vuelidate to trigger $touch on the whole form, and then uses the announceStatus method to re-emit the status of the form to the parent.
Finally our dynamic, validated form is ready!
Wrapping up
Validating schema generated forms can seem highly daunting at first, it requires some careful planning and understanding of your schema and of the inner working of the validation library that you’re using. Thankfully Vuelidate’s ability to hook into any type of state makes this a relatively simple task!