
Vue is finally available on the Ionic Framework! And it’s compatible with Vue 3’s Composition API.
But first, let’s talk about what Ionic is. Ionic is a popular framework for developing mobile apps using only web technologies (JavaScript, CSS, HTML). The primary advantage of this type of mobile app over native platform apps is productivity. Not only do you not have to learn a new language/API/framework to make mobile apps, you also have all the existing JavaScript libraries at your disposal.
Ionic Vue
At its core, Ionic is a collection of UI components such as button, layout, tabs, top bar, etc. We could just use vanilla JavaScript to create apps with Ionic’s UI toolkit. But for more serious projects, we can use a frontend framework like Vue.js on top of the Ionic Framework.
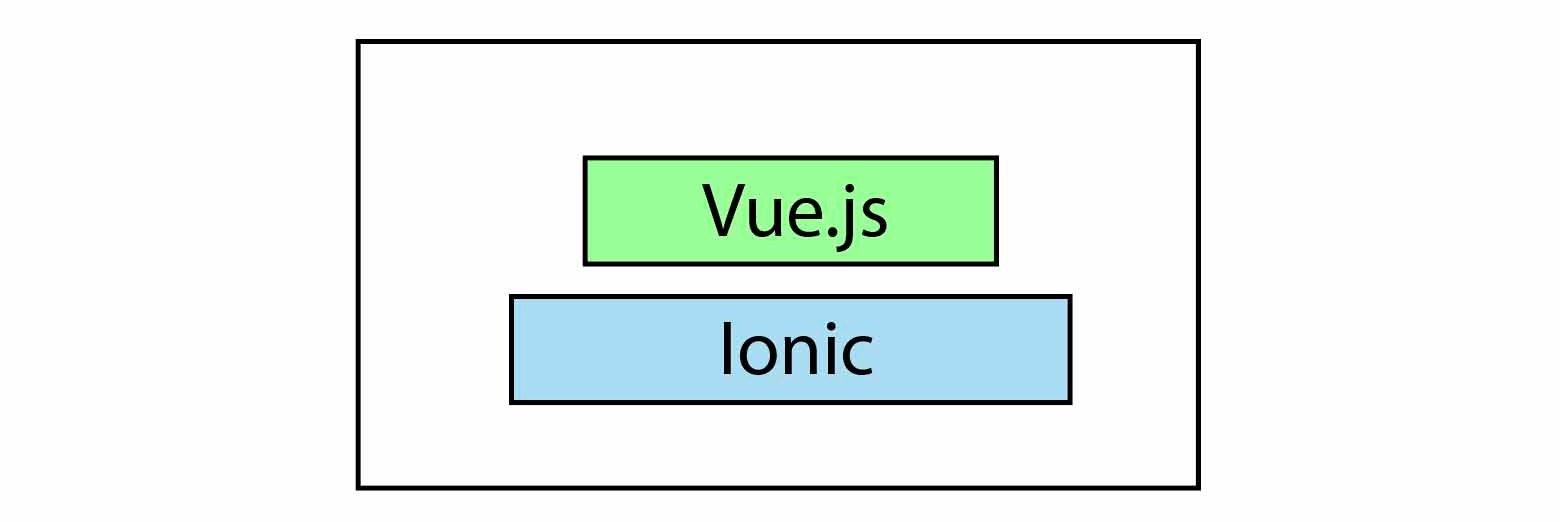
As of December 2020, Ionic Vue is the latest integration library added to the Ionic family. What this means is: we can create Ionic apps the way we write Vue.js code. The Ionic UI toolkit will be available as Vue components. And for ease of development, Ionic’s CLI also comes with an Ionic Vue template generator.
Trying out Ionic
Let’s install the CLI and take it out for a spin:
npm install -g @ionic/cli@latest
(Depending on your NPM configuration, you might need to run the above command with sudo)
Create a new Ionic Vue app using the CLI:
ionic start cool-app tabs --type vue
This command is for creating a new application using the tabs template (a starter app that features a tabbed interface). And the type flag is telling Ionic that we want to generate this as a Vue app.
If you take a look at the src folder, it should look similar to a regular Vue app.
But in the root directory, there are some unfamiliar faces, such as the cypress.config and capacitor.config.json. Cypress is an end-to-end testing framework. And Capacitor is Ionic’s cross-platform runtime. All of Ionic’s cross-platform magic is made possible by Capacitor.
For production, the Ionic app will be packaged in Capacitor and the app will be able to run on various targeted platforms, such as web, Desktop, Android, and iOS.
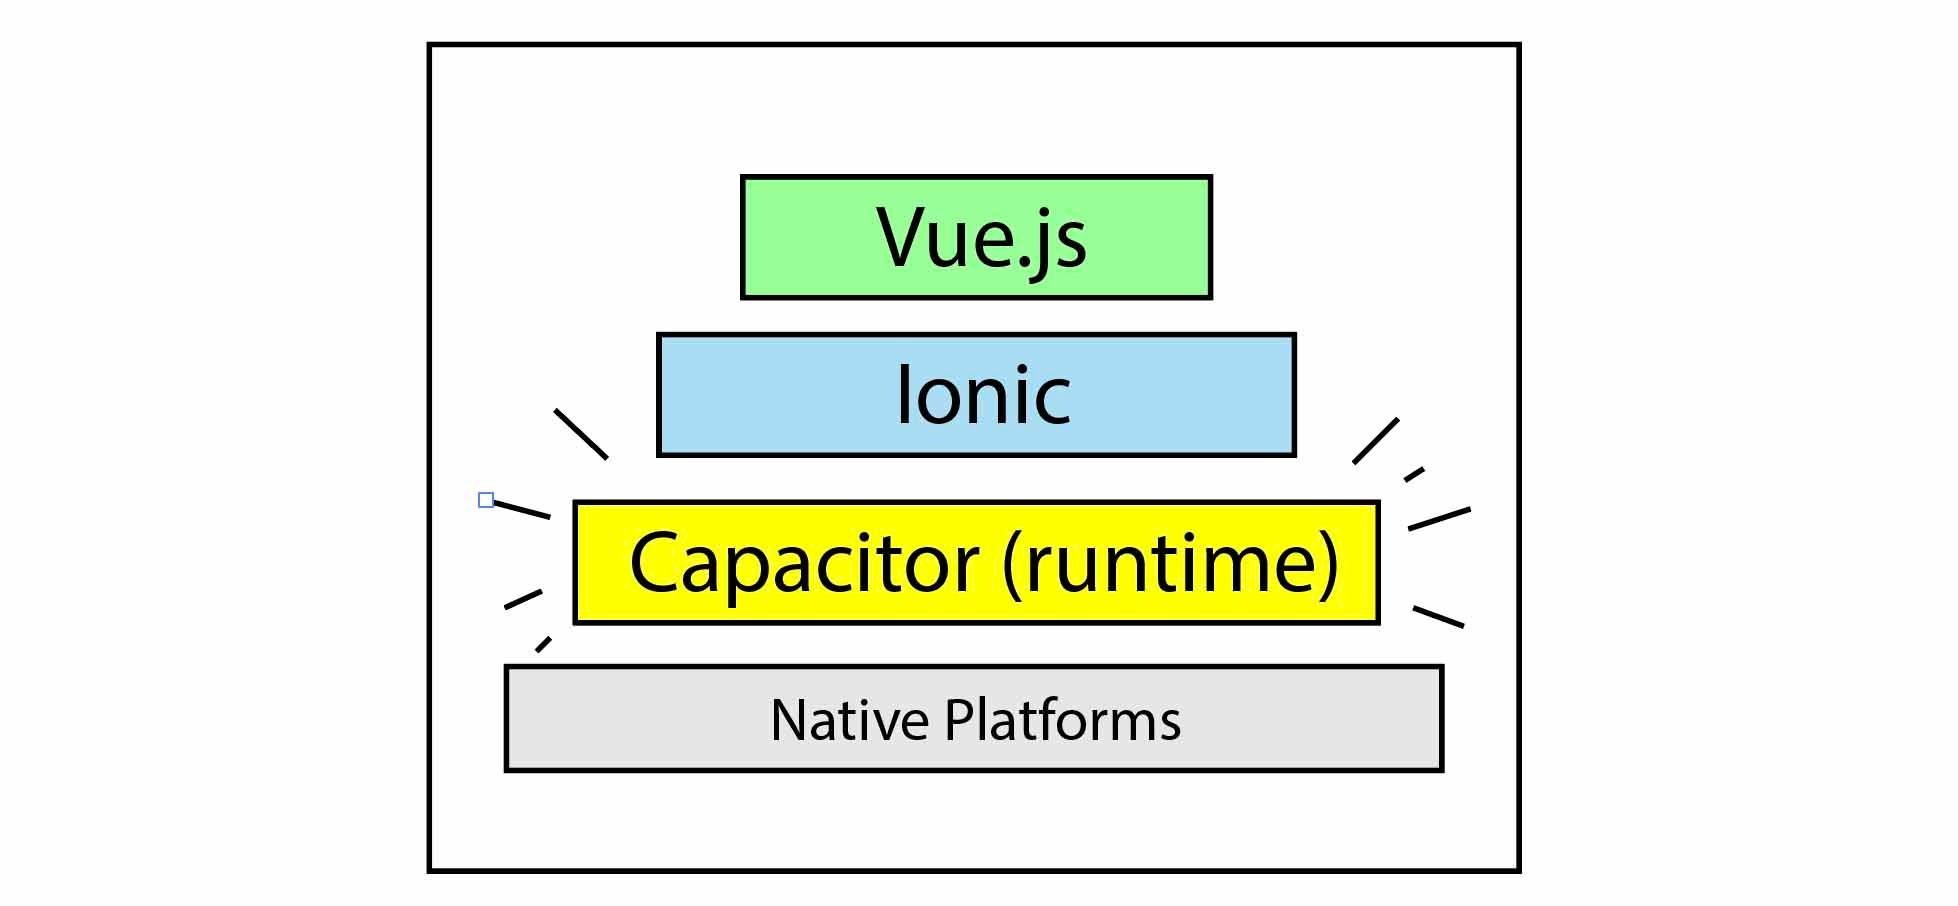
Capacitor is a powerful abstraction that allows the same app code to run on all of these platforms. (You can think of it as a more modern version of Cordova/PhoneGap)
Using the same old JavaScript
Checking out the files, you should see that Ionic is using TypeScript by default. We can remove TypeScript from the project by uninstalling some dependencies.
npm uninstall typescript \
              @types/jest \
              @typescript-eslint/eslint-plugin \
              @typescript-eslint/parser \
              @vue/cli-plugin-typescript \
              @vue/eslint-config-typescript
Then rename src/main.ts to src/main.js, src/router/index.ts to src/router/index.js.
Remove the typescript extension from ESLint:
📃 /.eslintrc.js
...
'extends': [
  'plugin:vue/vue3-essential',
  'eslint:recommended',
  // '@vue/typescript/recommended'
],
Finally, remove <RouteRecordRaw> from the router’s type in src/router/index.js, both the annotation and the import.
📃 /src/router/index.js
// import { RouteRecordRaw } from 'vue-router';
import Tabs from '../views/Tabs.vue'

const routes /*: Array<RouteRecordRaw> */ = [
{...
Now we should be able to develop the app with plain old JavaScript instead of TypeScript.
Run the following command in the terminal to start the development server.
ionic serve
In the browser, you should see the sample app with a default tab interface.
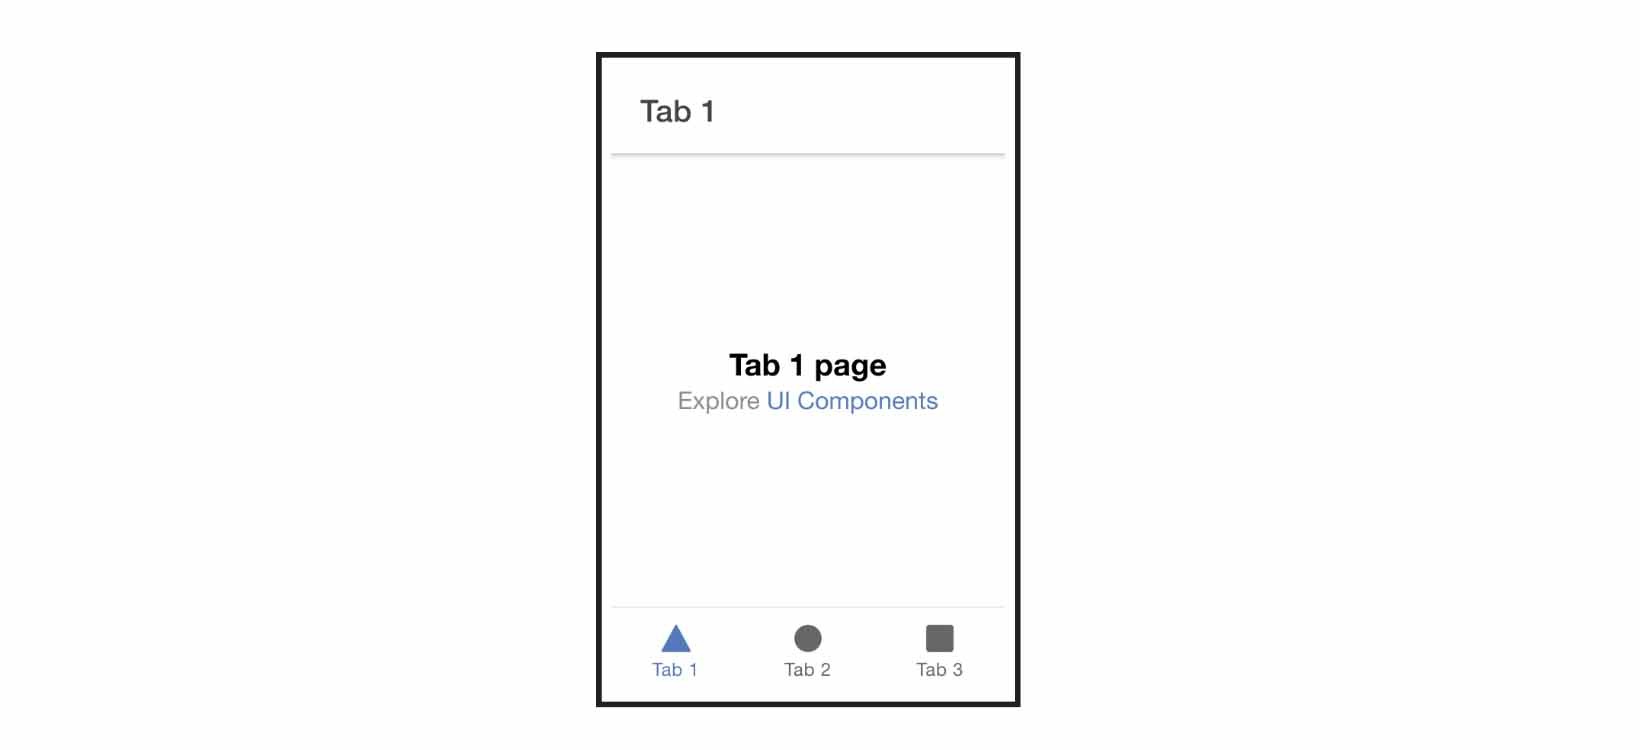
(You have to resize the width of the browser window to see it in a “mobile” style.)
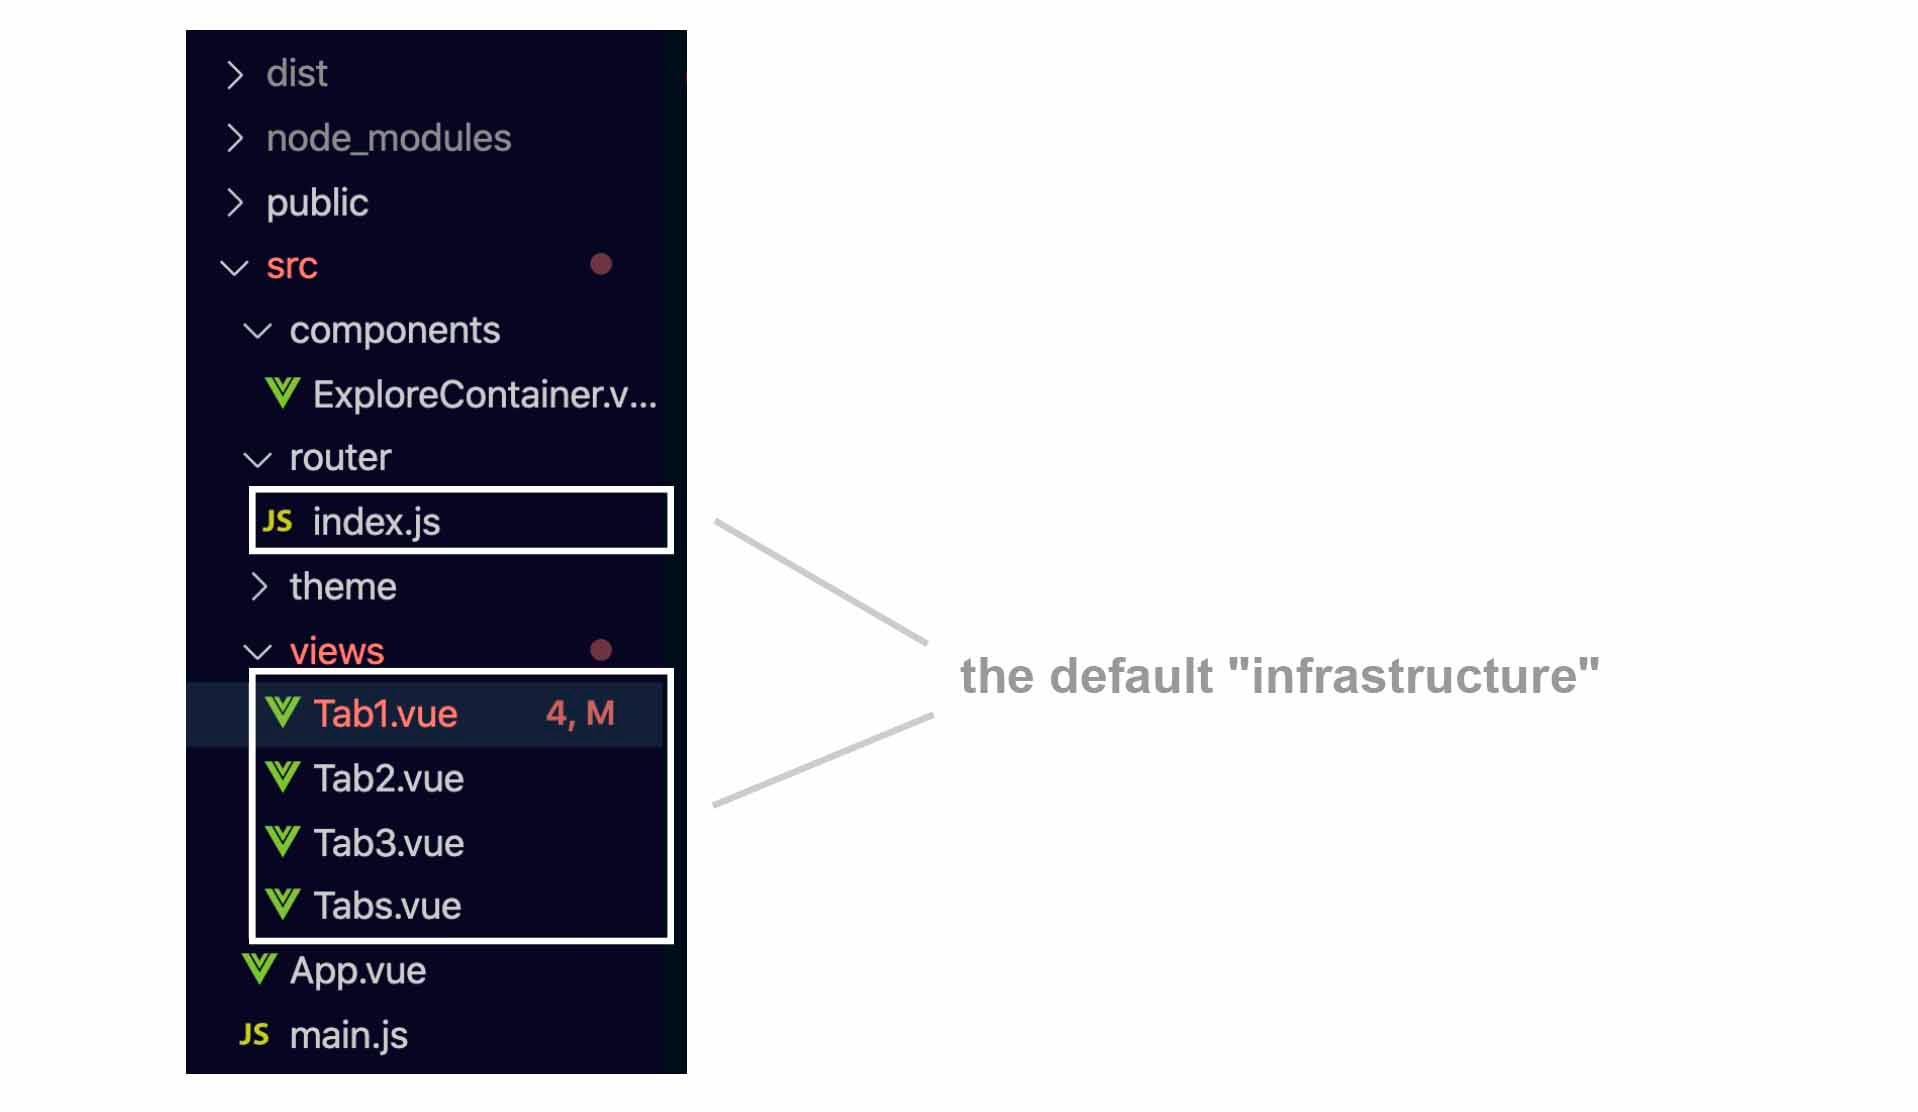
All of this default “infrastructure” is done in the src/router/index.js file and its dependencies—the tab .vue files inside src/views.
Todo App
To get familiar with the basics of Ionic, let’s create a todo list inside the first tab screen. We’ll be working inside the src/views/Tab1.vue file.
First, prepare some todos data in the component options:
📃 /src/views/Tab1.vue
export default  {
...
  data: () => ({
    todos: [
      { id: 1, content: "Do the laundry" },
      { id: 2, content: "Buy Christmas gifts" },
      { id: 3, content: "Spellcheck my draft" },
    ]
  })
}
Import IonList, IonItem, and IonLabel, and add them to the components object:
📃 /src/views/Tab1.vue
import { IonList, IonItem, IonLabel } from '@ionic/vue';

export default  {
  name: 'Tab1',
  components: { IonList, IonItem, IonLabel, ...
(By default, these components are locally registered. If you don’t like importing a component every time you use it, you can also choose to register the components globally.)
In the template, replace the <ExploreContainer> component with <ion-list> and <ion-item>:
📃 /src/views/Tab1.vue
...
  <ion-list>
    <ion-item :key="t.url" v-for="t in todos">
      <ion-label>{{ t.title }}</ion-label>
    </ion-item>
  </ion-list>
</ion-content>
This code is just a mix of Ionic components and a Vue-style for loop. This will render the data in a mobile-themed list.
We’re starting with ion-list and ion-item because they are simple and commonly used. For a full list of all Ionic components, take a look at this catalogue on the Ionic website.
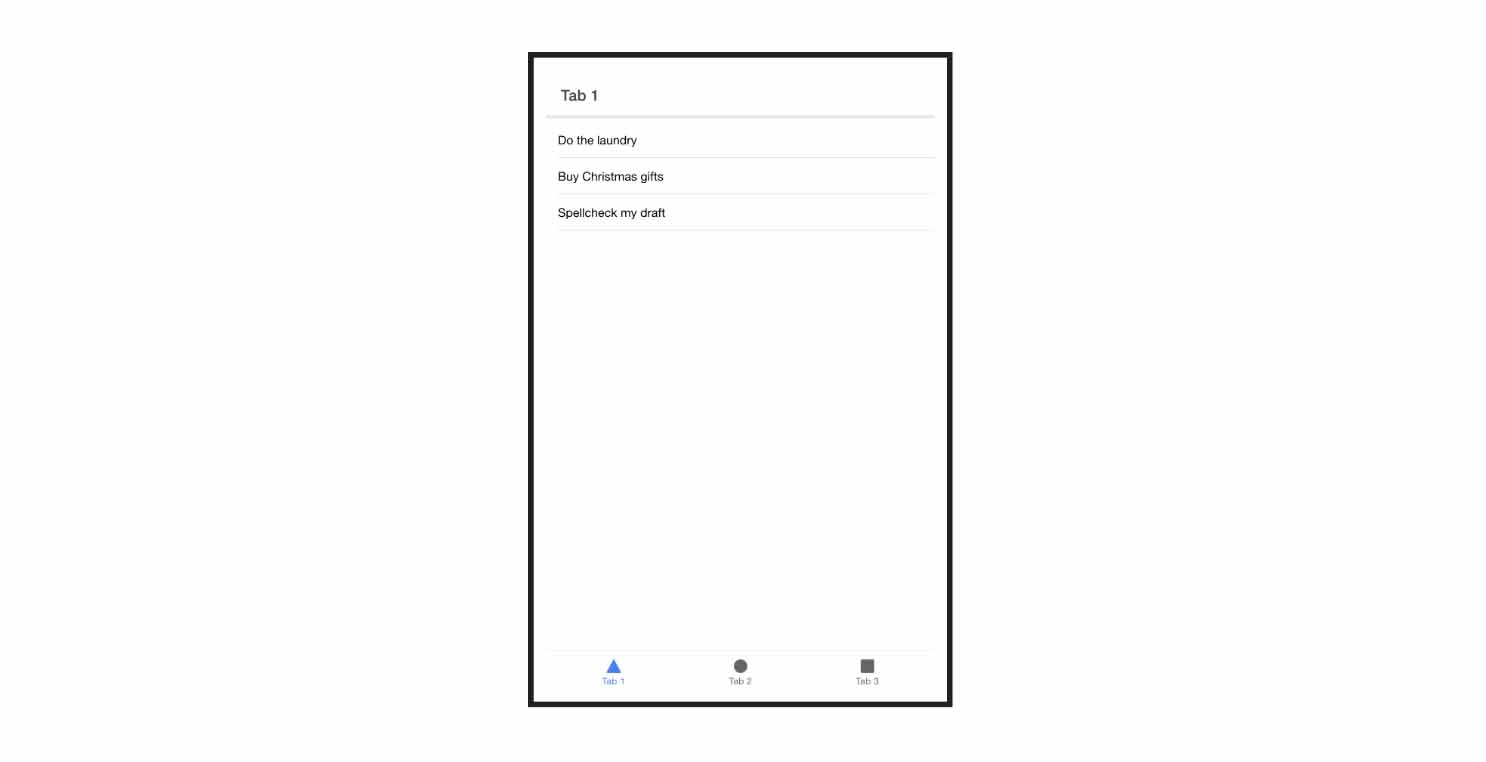
Now check the browser again, and you should see a list of todo items.
Let’s add an ion-input and an ion-button component so that we can create new todos. We’ll add them right below the existing ion-list.
📃 /src/views/Tab1.vue
<ion-footer>
  <ion-toolbar>
    <ion-input placeholder="Enter Item"></ion-input>
    <ion-button slot="end">Add</ion-button>
  </ion-toolbar>
</ion-footer>
Since we’re using a bunch of new components, we have to import them.
📃 /src/views/Tab1.vue
import { IonFooter, IonToolbar, IonButton, IonInput, ...

export default  {
  name: 'Tab1',
  components: { IonFooter, IonToolbar, IonButton, IonInput, ...
To customize the IonInput or the IonButton, we can set various attributes inside their tag.
The slot attribute we’re using in the ion-button element is for positioning the button (not to confuse with Vue’s deprecated slot attribute). Setting it to end will make it sit on the right. (The slot attribute only works under certain contexts, such as having the ion-button inside an ion-toolbar element, like it is here.)
For more info on how to customize ion-button and ion-input, you can take a look at the button’s page and the input’s page in the docs.
Now check the browser again. You should see an input box and a button below the todo list.
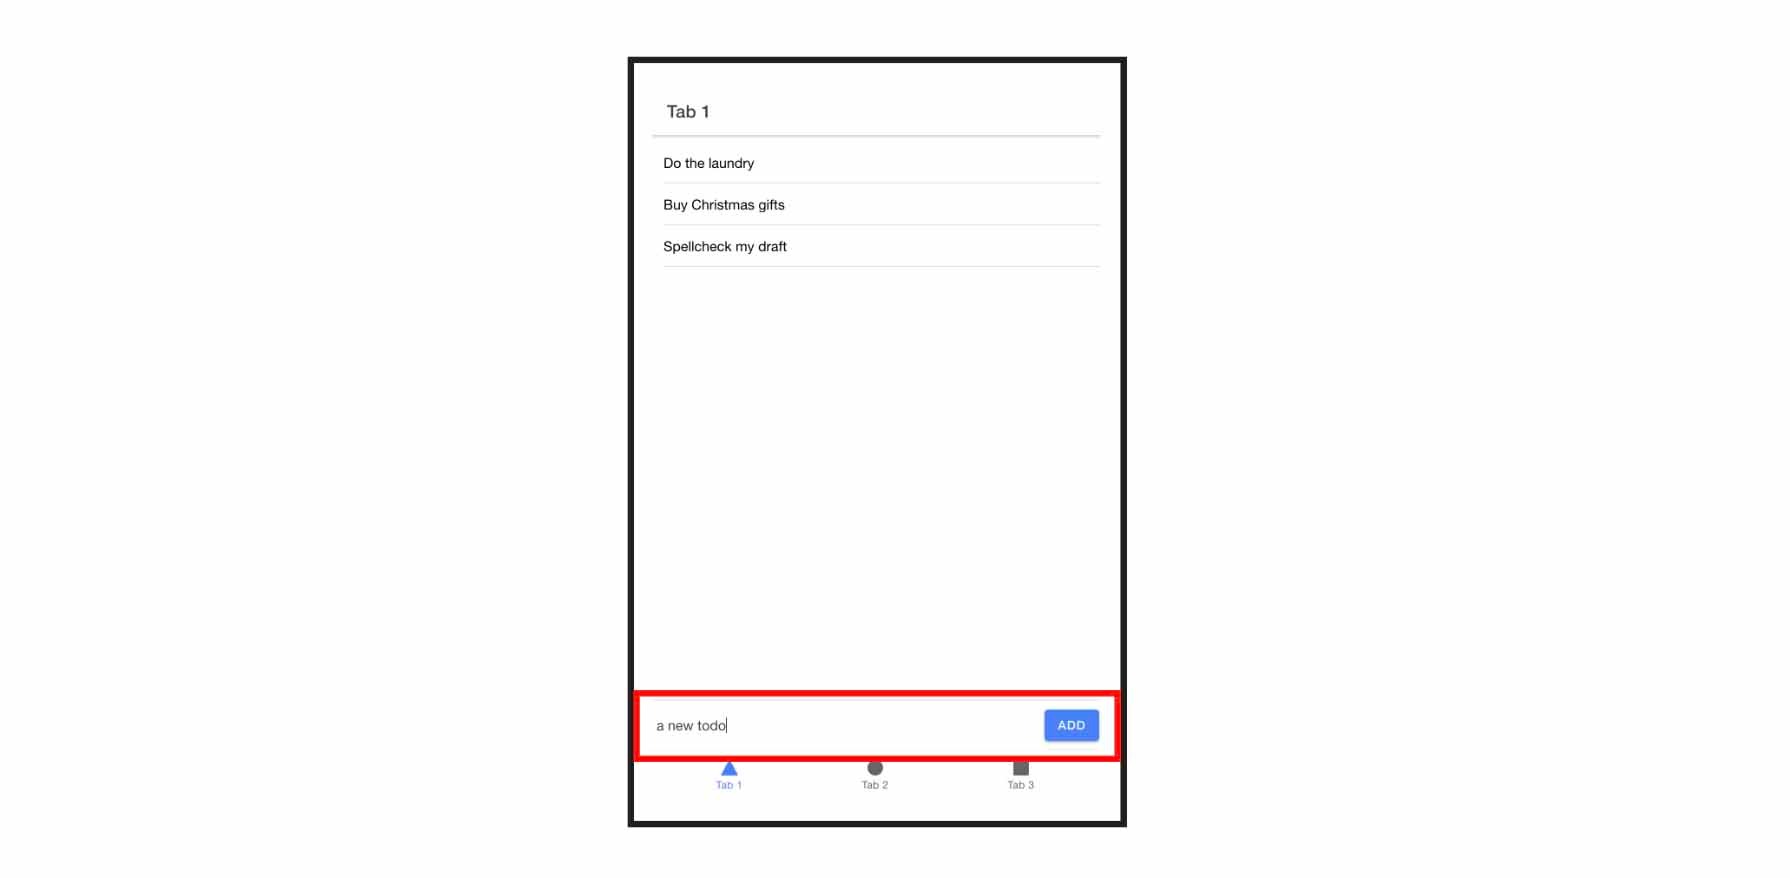
The input box is sitting at the bottom of the page because we’re wrapping it inside ion-footer.
Now we have all the visual elements ready, and we just need them to be able to “do things.” We want the button to be responsive to clicks, and when it’s clicked it will add a new todo to the list.
We’ll do this the same way we would do it in a regular Vue app.
Create a state for the input box by setting the v-model attribute on the ion-input element:
📃 /src/views/Tab1.vue
<ion-input placeholder="Enter Item" v-model="inputState"></ion-input>
And add the new inputState to the data:
export default  {
...
  data: () => ({
    todos: [
      { id: 1, content: "Do the laundry" },
      { id: 2, content: "Buy Christmas gifts" },
      { id: 3, content: "Spellcheck my draft" },
    ],
    inputState: '' // ADD THIS
  })
}
Create an event handler for adding the new todo (and clearing the input box after the todo is added):
📃 /src/views/Tab1.vue
...
}),
methods: {
  addTodo() {
    this.todos.push({
      id: this.todos.length,
      content: this.inputState
    })
    this.inputState = ''
  }
}
And finally, set a click event on the button to trigger the addTodo method:
📃 /src/views/Tab1.vue
<ion-button slot="end" v-on:click="addTodo">Add</ion-button>
Now you should be able to add new todo items, using the input box and Add button.
Aside from utilizing all the ion- components, what we’ve been doing so far isn’t much different from our normal Vue development experience.
Here’s all the code for our todo list:
📃 /src/views/Tab1.vue
<template>
  <ion-page>
    <ion-header>
      <ion-toolbar>
        <ion-title>Tab 1</ion-title>
      </ion-toolbar>
    </ion-header>
    <ion-content :fullscreen="true">
      <ion-header collapse="condense">
        <ion-toolbar>
          <ion-title size="large">Tab 1</ion-title>
        </ion-toolbar>
      </ion-header>
      <ion-list>
        <ion-item :key="t.id" v-for="t in todos">
          <ion-label>{{ t.content }}</ion-label>
        </ion-item>
      </ion-list>
    </ion-content>
    <ion-footer>
      <ion-toolbar>
        <ion-input placeholder="Enter Item" v-model="inputState"></ion-input>
        <ion-button slot="end" v-on:click="addTodo" >Add</ion-button>
      </ion-toolbar>
    </ion-footer>
  </ion-page>
</template>

<script>
import { IonButton, IonFooter, IonInput, IonList, IonItem, IonLabel, IonPage, IonHeader, IonToolbar, IonTitle, IonContent } from '@ionic/vue';

export default  {
  name: 'Tab1',
  components: { IonButton, IonFooter, IonInput, IonList, IonItem, IonLabel, IonHeader, IonToolbar, IonTitle, IonContent, IonPage },
  data: () => ({
    inputState: '',
    todos: [
      { id: 1, content: "Do the laundry" },
      { id: 2, content: "Buy Christmas gifts" },
      { id: 3, content: "Spellcheck my draft" },
    ]
  }),
  methods: {
    addTodo() {
      this.todos.push({ id: this.todos.length, content: this.inputState })
      this.inputState = ''
    }
  }
}
</script>
Cross-Platform Build
The main point of Ionic is cross-platform development, so let’s talk more about that.
What we have right now is a web app. To convert this into a mobile app, it’s only a matter of building the project using Capacitor, without any code change.
As an example, we’re going to build our app for iOS. This means if you’re following along, your computer has to be configured and installed with iOS development tools such as CocoaPods. You can find more info in this Capacitor guide for iOS.
To build the project, we’ll run this in our terminal:
ionic build
Add the native platform that you want to target, which is ios in our case:
ionic cap add ios
The above command will generate an iOS project in the root directory. Next, we have to copy the app code into this iOS project.
ionic cap copy
We would do this “copy” step every time we perform the build command.
Capacitor’s design philosophy is to let the developers configure the project using the native project’s configuration files. So for example, with iOS, we would need to configure the project using Xcode running on macOS. And the native project code should be checked-in for source control along with the main Vue code.
There’s more …
We’ve only scratched the surface in terms of what Ionic offers.
Aside from the huge selection of UI components, there are plenty of native features (such as camera and photo gallery) that are made possible through Capacitor. For example, you can check out the official Ionic Vue tutorials for a camera app implementation.