

The best IDE for Vue.js development
A code editor is the most important tool in a developer’s day-to-day workflow. It has a tremendous impact on a programmer’s happiness and productivity.
VS Code is currently the most popular code editor among web developers. It was able to achieve this status because of its flexibility to accommodate different communities through its impressive array of extensions.
For Vue.js development, we can get the best experience by using the Volar extension. This is the go-to VS Code extension for Vue.js.
Together with other standard JavaScript-related extensions, VS Code can be fashioned into the best IDE for Vue.js development, giving us:
- JavaScript Support (auto-complete, IntelliSense, and error checking)
- An Integrated Terminal
- Volar (vue file syntax highlighting)
- Snippets
- And more
We’ll talk about how to set this up step by step.
JavaScript Support
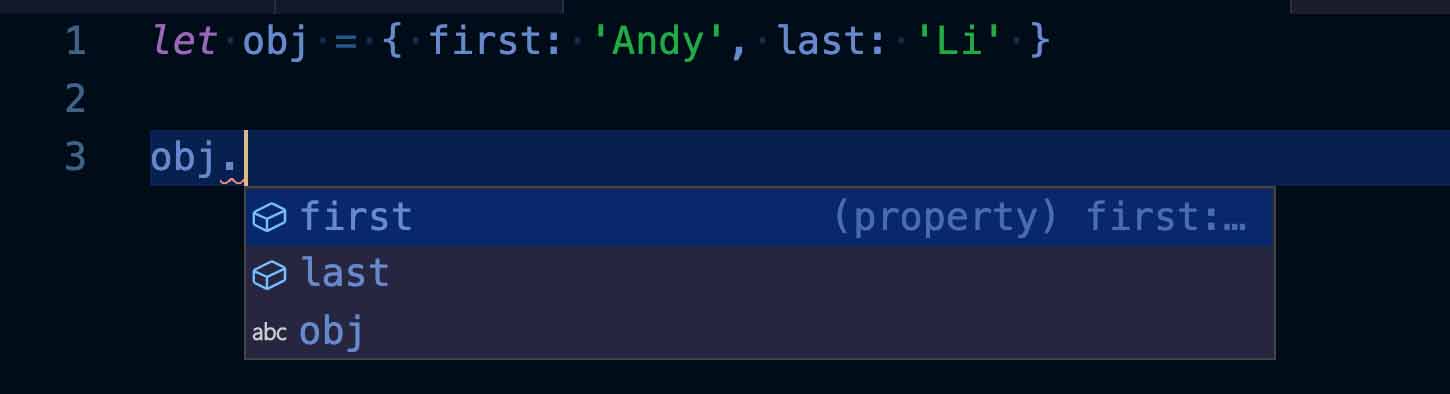
One of the main benefits of using VS Code is that it comes with support for JavaScript and TypeScript right out of the box. This support include auto-complete, IntelliSense, and error checking.
For example, if you create an object, and type a dot after the variable, the IntelliSense will show you a list of valid properties inside that object.
By default, this only works in JavaScript and TypeScript files. If you do the same thing in Ruby or Python, it wouldn’t work (though you can make it work with extensions).
As you can see, VS Code has a special love for JavaScript and TypeScript. This has to do with the fact that VS Code itself was written in JavaScript/TypeScript.
But Vue components are usually written in .vue files, not .js files. So what about VS Code support for .vue files?
For demonstration, we’re going to create a new Vue app.
If you don’t have VS Code already, you can get from its official website.
Integrated terminal
To use the Vue CLI, we don’t need to open the default terminal. Instead, we can just use the built-in terminal called the “integrated terminal” right inside VS Code. In the top menu bar, go to View > Appearance > Show Panel. (Then select the Terminal tab if it isn’t selected already.)
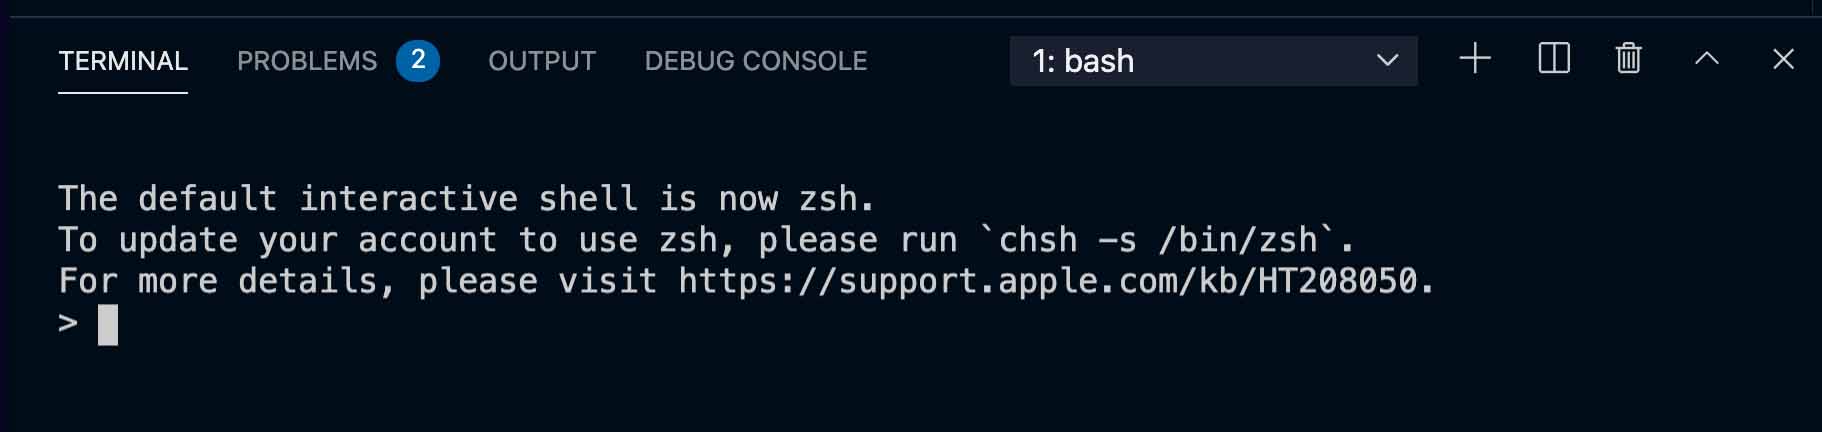
This built-in terminal is functionally similar to the default one. We can do all the usual terminal stuff here.
Let’s create a new Vue app:
cd Desktop
vue create my-vue-app
(Like the normal terminal, this integrated terminal’s default directory is the home directory of the current user.)
Choose Vue 3 in the prompt:
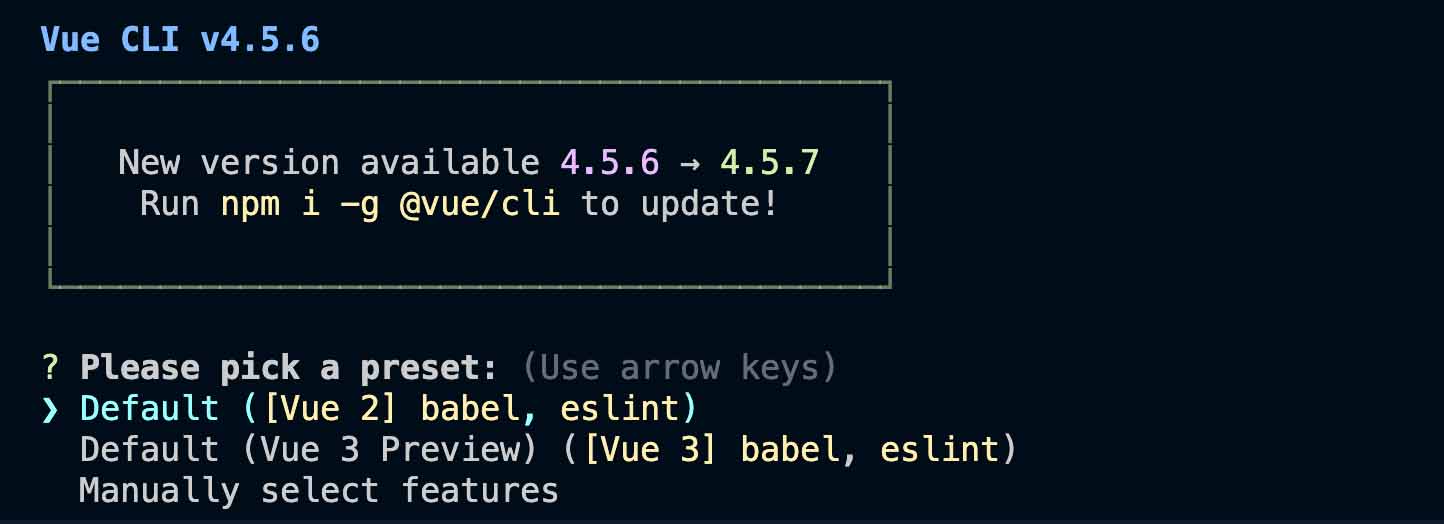
(Make sure that your Vue CLI installation is up to date. Otherwise, it might not have the Vue 3 Preview option.)
After the app is created, we can open the app folder in VS Code by dragging/dropping the folder on the editor, or clicking Open folder in the Welcome screen.
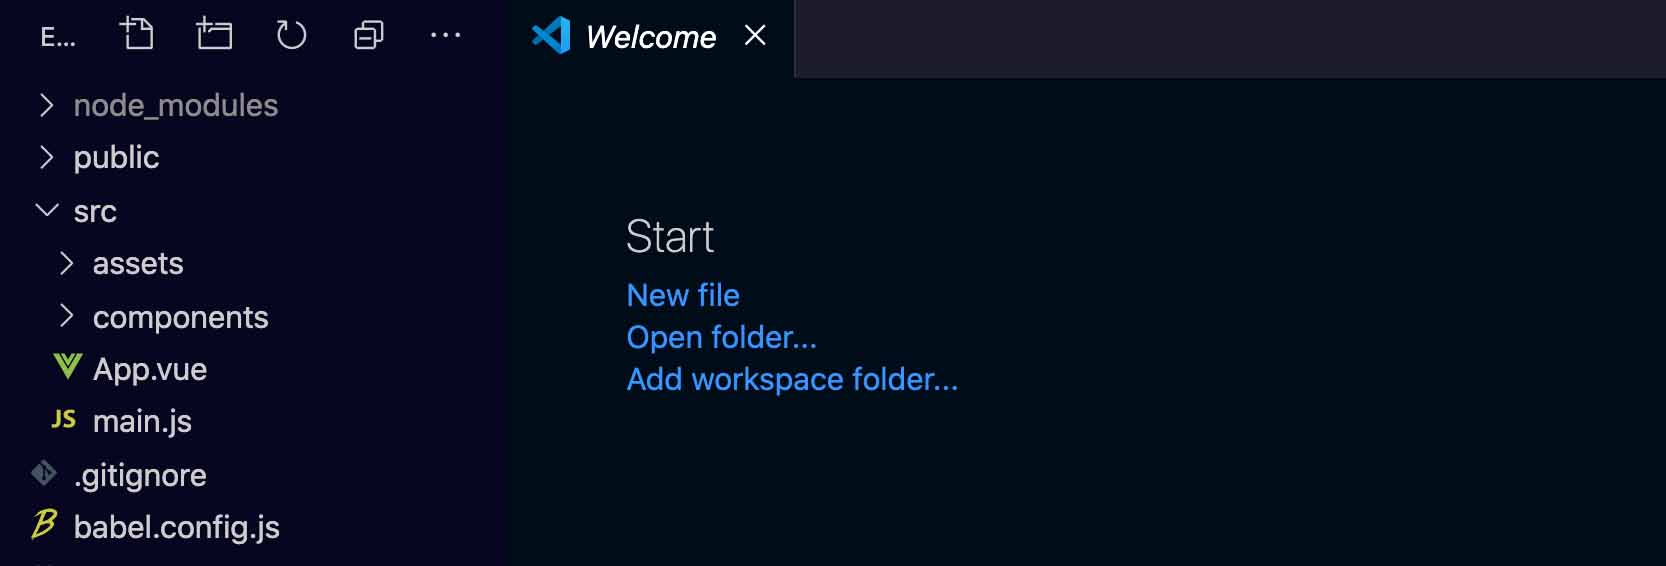
Now you should see the sidebar showing the Vue app folder. If you open up the terminal again (View > Appearance > Show Panel), the default directory becomes the app’s folder, not the home directory.
We can confirm this using pwd:
pwd
/Users/andy/Desktop/my-vue-app
The integrated terminal’s default directory is always the location of the currently opened app.
Volar
Now if we open up a single file Vue component such as App.vue, we’ll see the code displayed without any syntax highlighting.
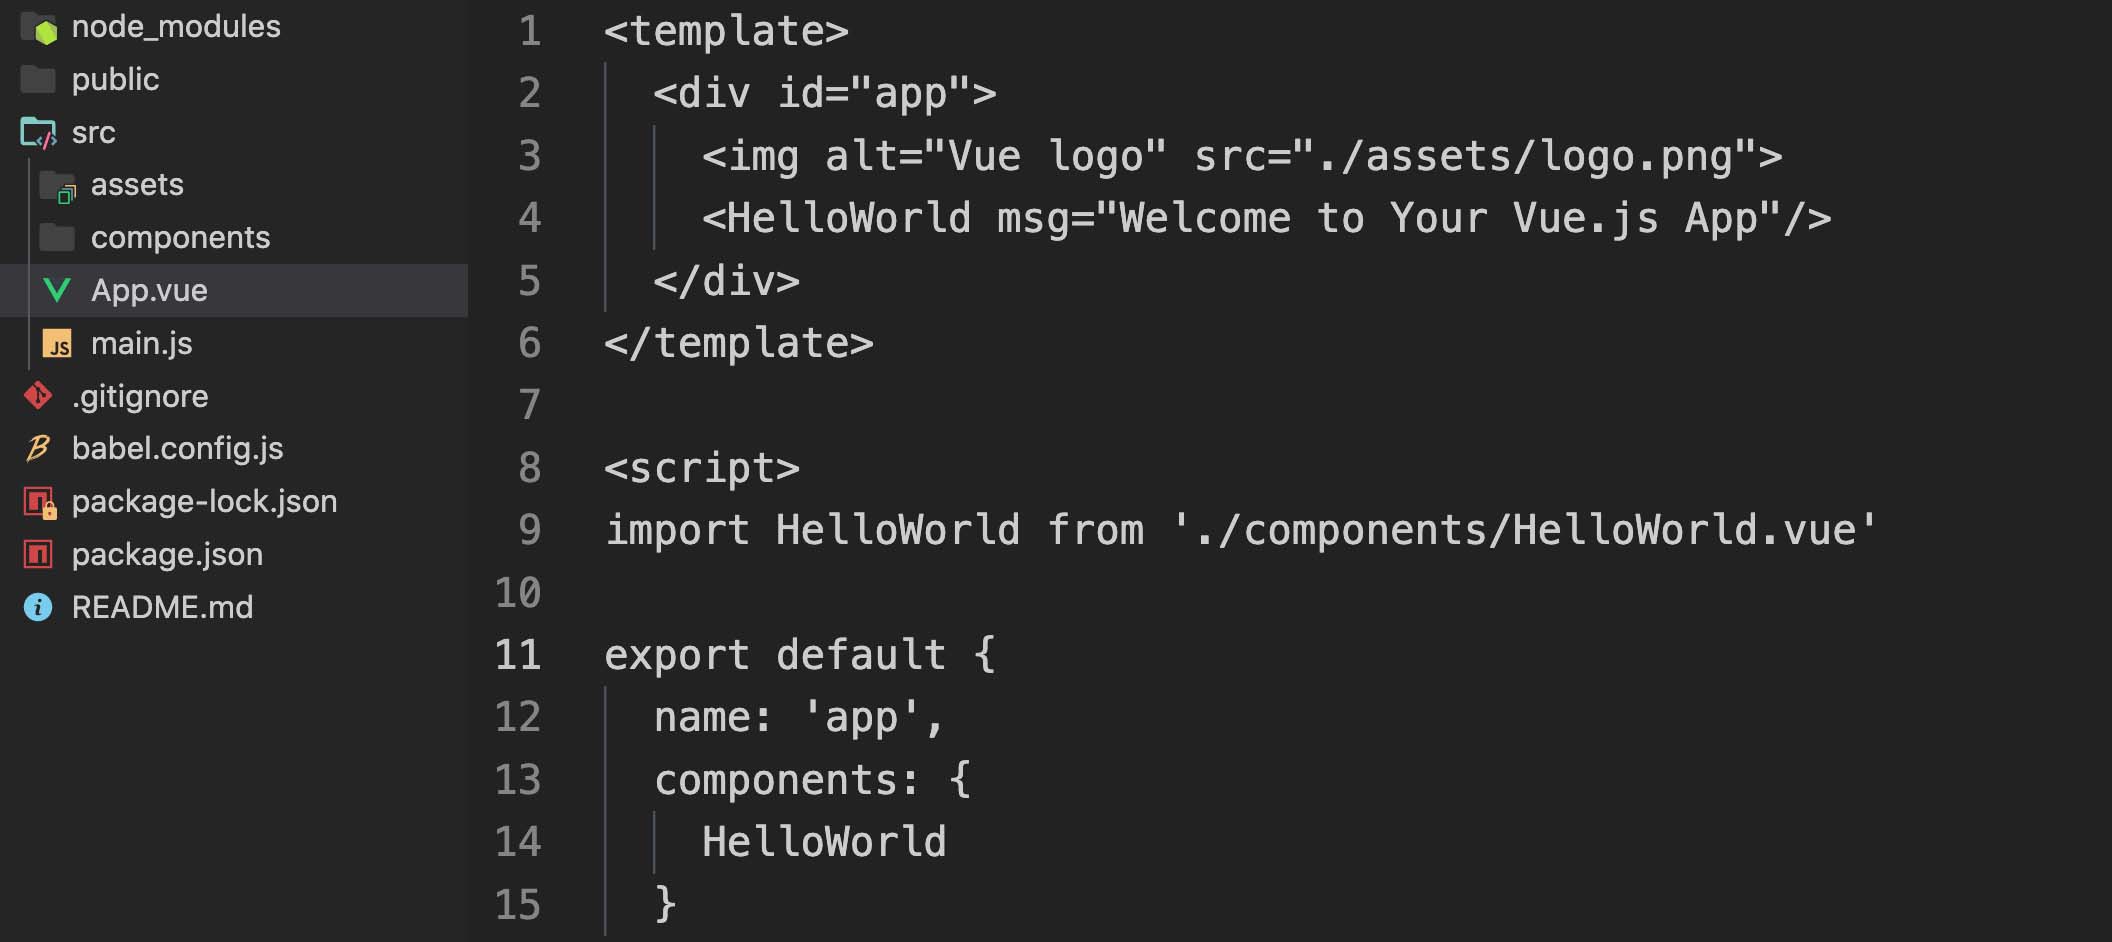
To get editor supports such as syntax highlighting and IntelliSense for .vue files, we have to install the Volar extension.
Go to View > Extensions, and search “volar”
The full name of the plugin is “Vue Language Features (Volar).” It’s a very popular plugin so it should be on the top of the search results.
After installing it, the Vue code should be getting some standard syntax highlighting:

Emmet
Emmet is a tool that allows us to use shortcut commands (abbreviations) to generate HTML code.
For example, this abbreviation:
div>span
It would generate the following HTML code:
<div>
  <span></span>
</div>
This is a huge timesaver when working on HTML templating code.
VS Code comes with Emmet by default, so we don’t even have to install any extension to get this feature. However, we do need the Volar extension to use Emmet within a Vue template.
So, just type the Emmet abbreviation in the template tag:
📃 /src/App.vue
<template>
  ul>li*3>span{Item $}.
</template>
...
Syntax Explanations: The *3 means you want three copies of an element. The curly braces are used for putting content inside an element. The dollar sign is a dynamic number between number 1 and whatever the number of <li> elements here. The period is for letting VS Code know that the abbreviation ends there.
When you hit the tab key, here’s the HTML content you’ll receive:
📃 /src/App.vue
<template>
  <ul>
    <li><span>Item 1</span></li>
    <li><span>Item 2</span></li>
    <li><span>Item 3</span></li>
  </ul>
</template>
...
Pretty cool.
However, if you copied and pasted the command into your Vue file, this auto code generation feature wouldn’t work because the tab requires the Emmet dropdown list, and the only way to get the dropdown list is by typing the command yourself.
If the command is too long and you really need to copy and paste, a quick workaround is to paste the command and delete the last character (in the above example, the period is the last character), then type the same character again to trigger the dropdown list.
You can learn more using Emmet from its official website https://emmet.io
Installing ESLint and Prettier
A Vue app is still a JavaScript app, so let’s talk about some extensions that are useful universally for JavaScript. ESLint and Prettier are two popular JavaScript-related extensions.
ESLint is for validating the quality of your code, for bug prevention. For example, making sure there are no unused variables. ESLint is also for validating the stylistic format of your code. For example, making sure there’s a space after the if keyword. This part overlaps with what Prettier is designed to do, but Prettier is much more opinionated on its style rules.
To get ESLint and Prettier supports in VS Code, we just need to install the extensions.
Go to View > Extensions. You’ll get a search box in the sidebar where you can search for third-party extensions and themes in the Marketplace.
Search for “ESLint” and choose the first result (by Dirk Baeumer):
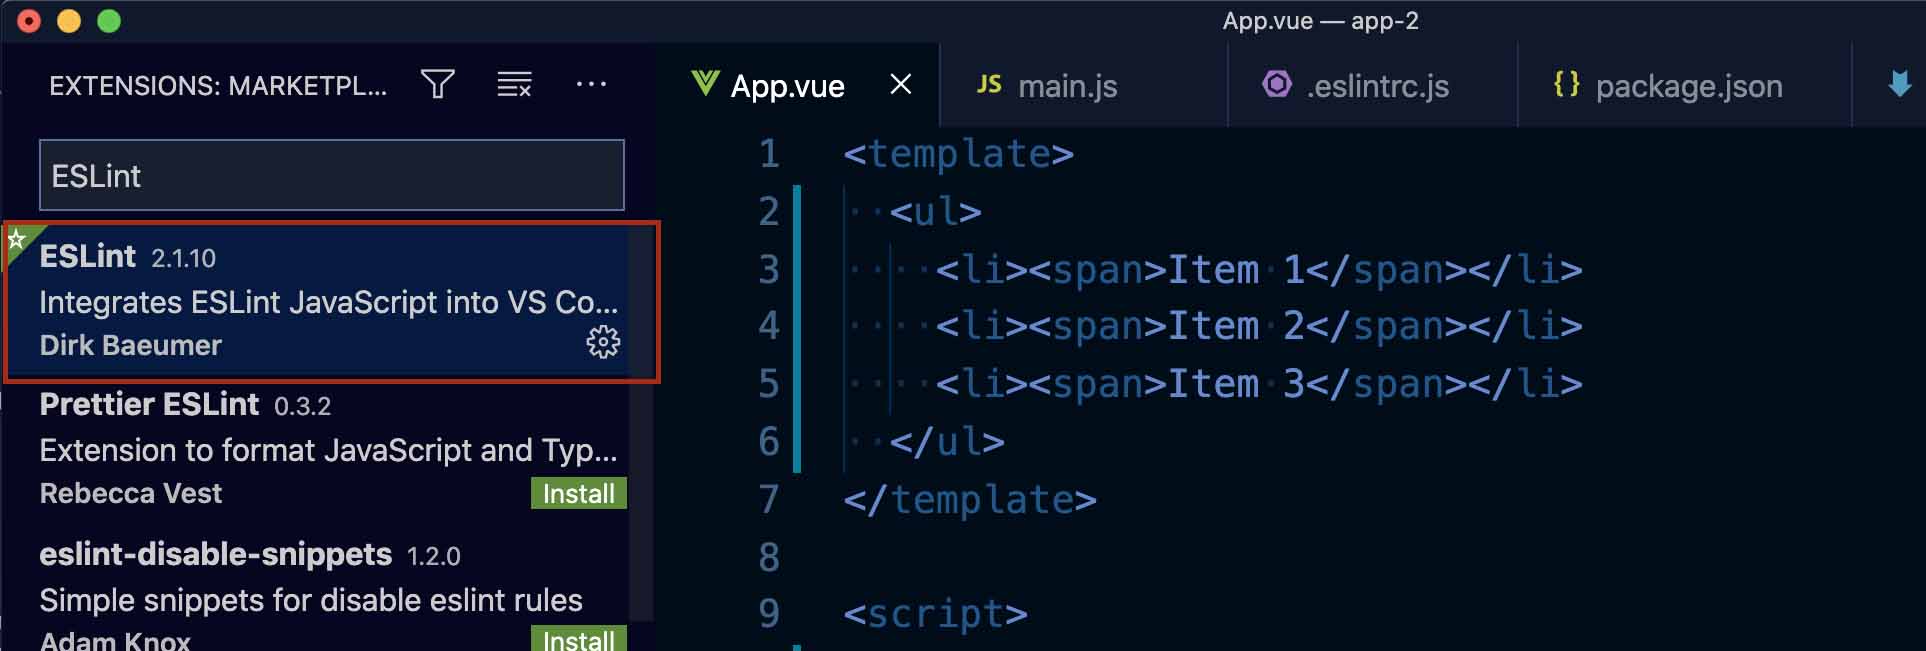
And then click the Install button to install the ESLint extension:

We don’t actually have to install the Prettier extension, we can just use the ESLint extension with Prettier configurations (we’ll see how this works in a bit).
Once you’re done with installing the extension, you can get back the files/folders explorer in the sidebar by choosing View > Explorer.
Using ESLint
We’re going to look at ESLint first, and then we’ll move on to Prettier.
ESLint by default doesn’t enforce anything, we have to configure it by adding the rules we need. A default Vue app generated using the Vue CLI comes with some ESLint configurations in the package.json file.
📃 /package.json
...
"eslintConfig": {
  "root": true,
  "env": {
    "node": true
  },
  "extends": [
    "plugin:vue/vue3-essential",
    "eslint:recommended"
  ],
  "parserOptions": {
    "parser": "babel-eslint"
  },
  "rules": {}
},
...
The extends option allows us to specify the rules we want the linter to use. Currently, we’re using the vue3-essential package and the eslint:recommended package. So we don’t have to do anything else to get ESLint working.
We can also create an .eslintrc.js file as a dedicated configuration file, that way ESLint will use the config file instead of the eslintConfig option from package.json. One of the benefits of having an individual config file is that it can be written in JavaScript, and JavaScript syntax is more flexible than JSON.
Let’s extract the eslintConfig option into an .eslintrc.js file:
📃 /.eslintrc.js
module.exports = {
  "root": true,
  "env": {
    "node": true
  },
  "extends": [
    "plugin:vue/vue3-essential",
    "eslint:recommended"
  ],
  "parserOptions": {
    "parser": "babel-eslint"
  },
  "rules": {}
}
(Since we added module.exports =, this is technically a Node.js module.)
Next, we have to restart VS Code to let the config file to take effect.
There’s a shortcut to restart VS Code through the Command Palette. You can access that through View > Command Palette. And search for “reload window.”
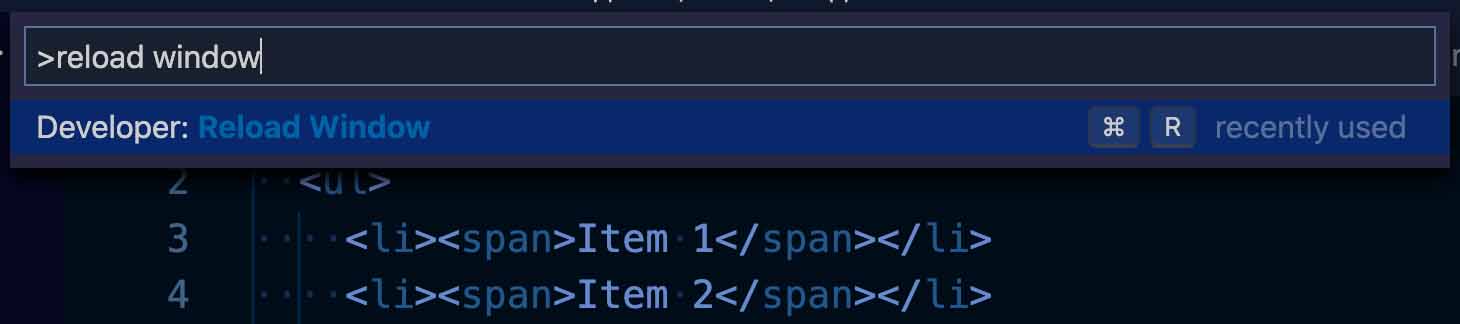
Then hit enter to restart VS Code.
Now you should be getting ESLint errors whenever your code is breaking linting rules.
For example:
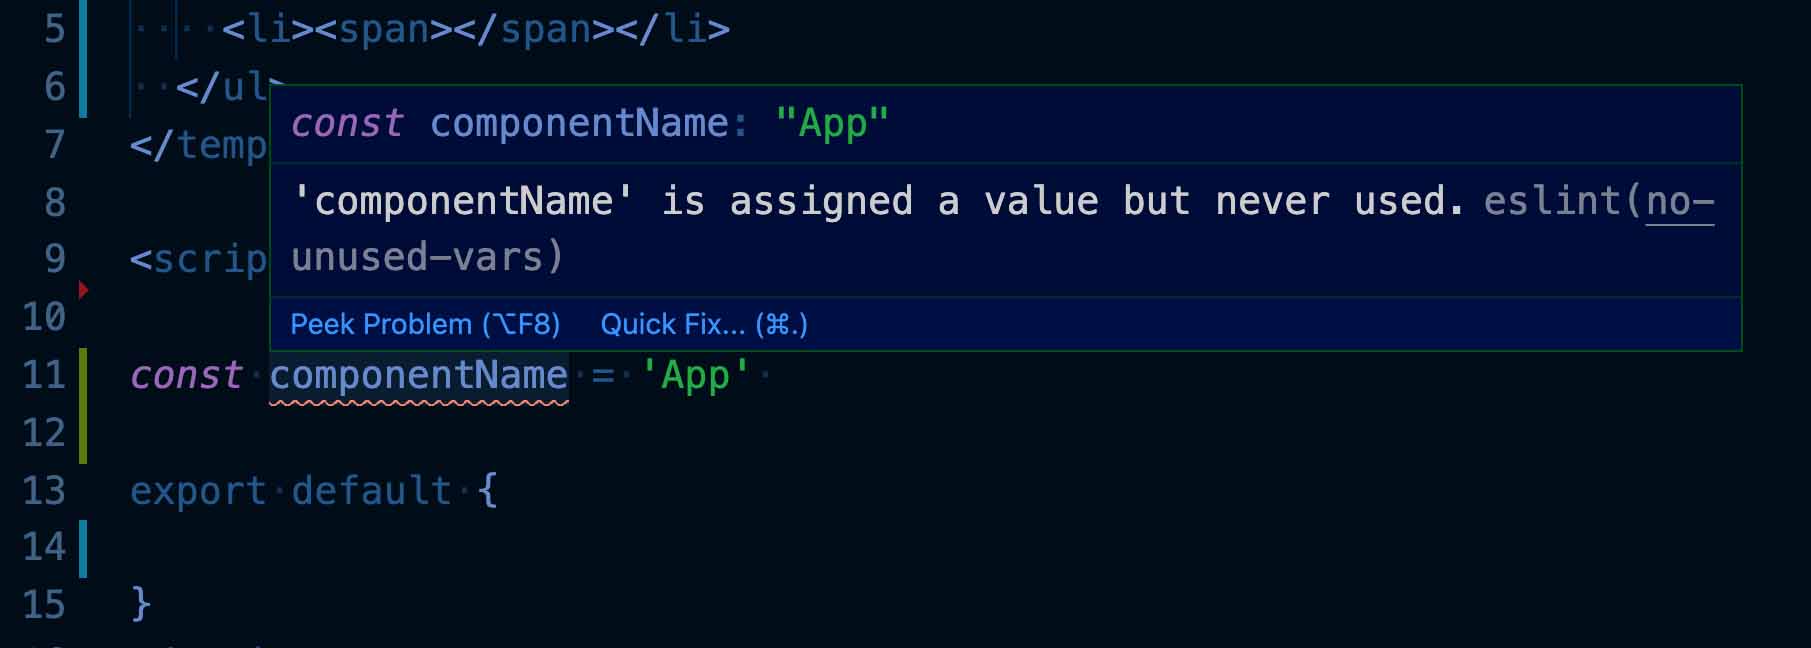
This is a common linting error, a variable is created but never used. We can fix it by simply using the variable somewhere in the code.
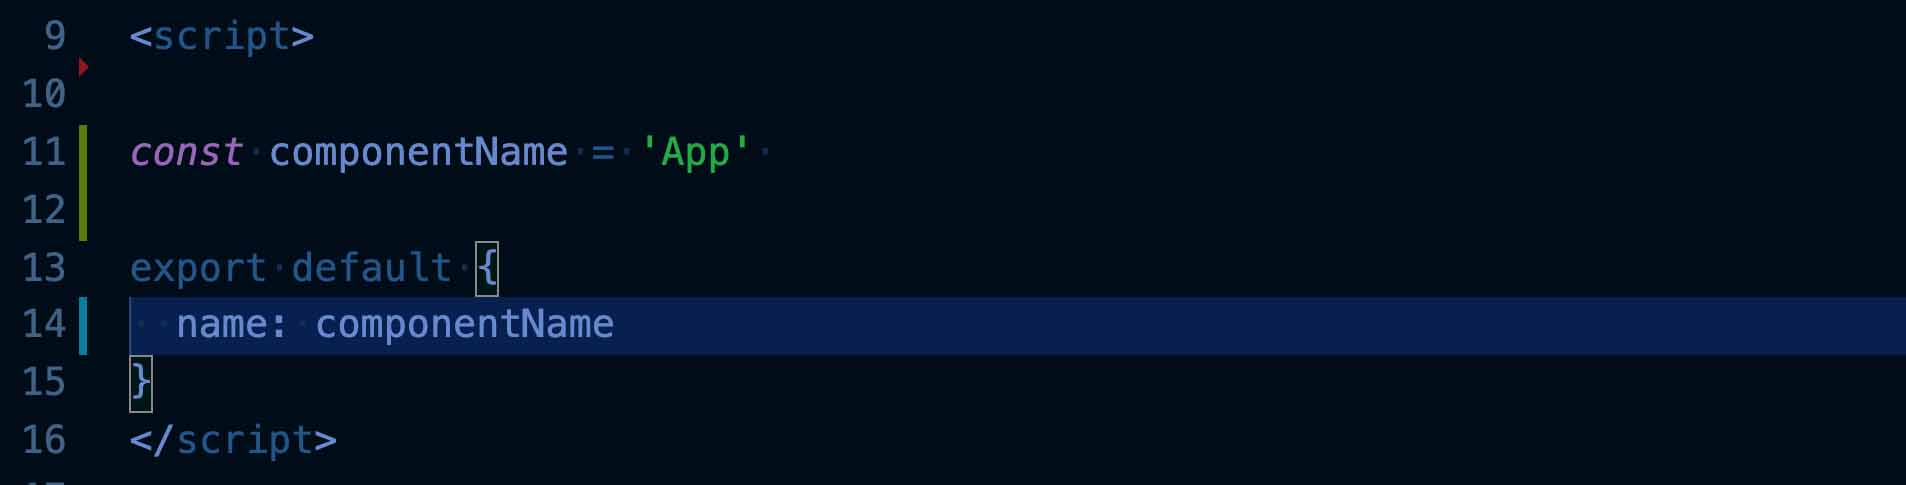
Now the red underline should be gone.
As you can see, the whole linting experience is carried out within the code editor. We didn’t have to rely on the terminal to give us linting errors.
Using Prettier with ESLint
Now let’s integrate Prettier into our ESLint setup.
As I mentioned, there are some overlaps between ESLint’s stylistic rules and Prettier’s rules. These overlaps can also mean conflicts and clashes. The standard practice is to use a set of ESLint rules that is rid of the stylistic rules. And we’ll just rely on Prettier to handle stylistic issues.
So once again, ESLint will watch out for the potentially buggy issues, while Prettier will look for things that are just not pretty.
Usually configuring Prettier and ESLint to work together is a bit of a hassle, but the good news is that Vue offers an ESLint configuration package that we can just plug and play.
First, install the configuration package:
npm install --save-dev @vue/eslint-config-prettier
(We’re using the --save-dev flag instead of --save because this is only a dependency for development, a Vue app doesn’t actually use ESLint during production.)
The eslint-config-prettier will take care of disabling the stylistic checking in ESLint and register the prettier plugin with ESLint.
So we still have to install the actual Prettier package and the Prettier plugin package.
npm install --save-dev prettier eslint-plugin-prettier
These two packages are responsible for doing the actual work of syntactic checking, but we don’t have to work with them directly. The eslint-config-prettier package that we installed earlier will be used to tie everything together.
Now, let’s add eslint-config-prettier to our config file:
📃 /.eslintrc.js
...
"extends": [
  "plugin:vue/vue3-essential",
  "@vue/prettier", // ADD
  "eslint:recommended"
],
(@vue/prettier is short for @vue/eslint-config-prettier.)
Reload VS Code to let the new configuration take effect.
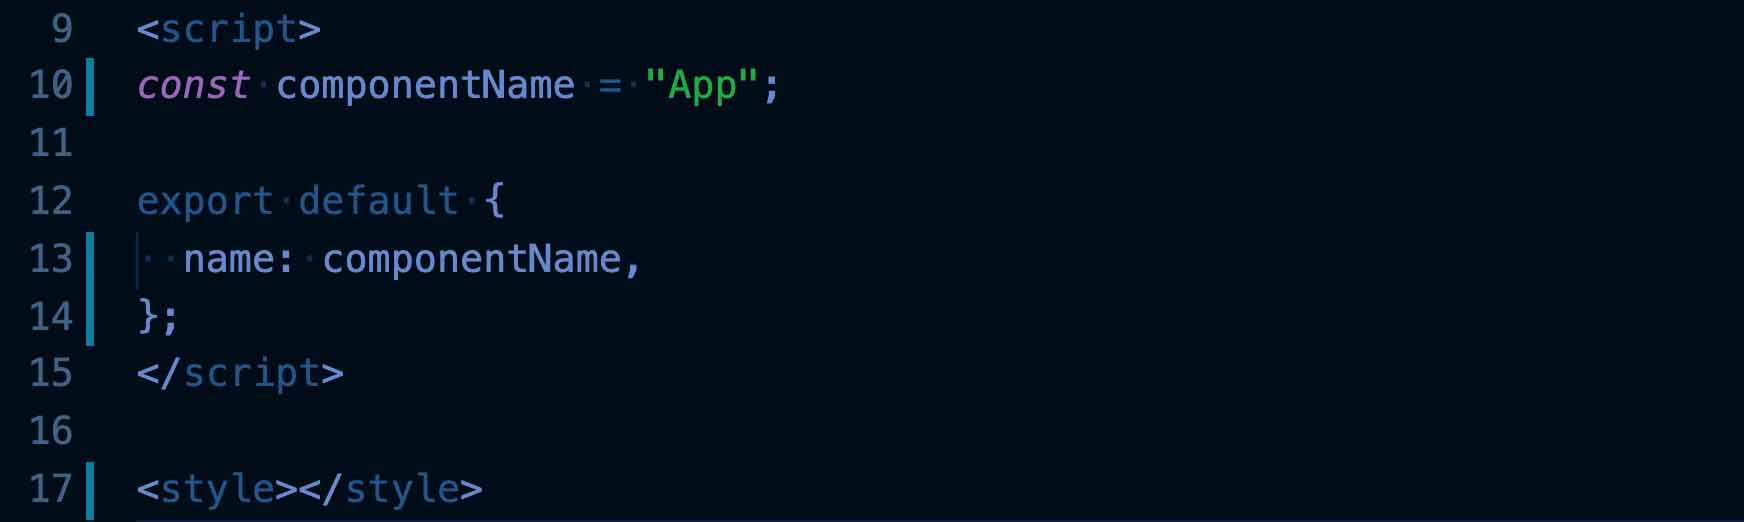
Now go back to App.vue, you should see new warnings on our code that weren’t there previously.
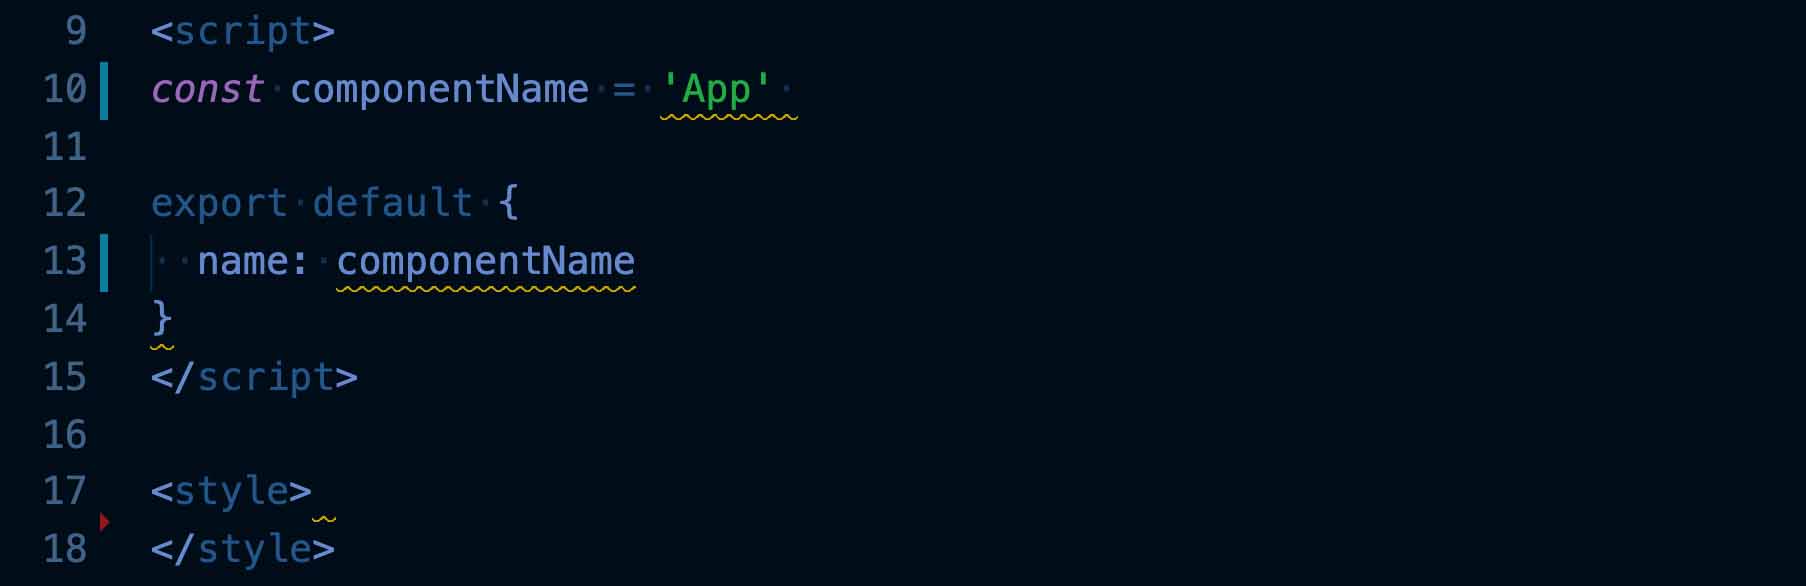
Prettier is reporting stylistic errors based on its own opinionated rules. In this case, it’s complaining that 1) some lines are missing semicolons, 2) the name property is missing a comma, 3) we need to use double quotes instead of single quotes, and 4) the empty <style> tags should be on the same line. You can rollover your cursor to the underlines for more details.
Once again, these are opinionated rules.
To fix the code, we can just go through each error and knock them out one by one. Or we can rely on VS Code’s "auto fix on save" feature, so when we press save on a file, it will automatically fix all the formatting errors.
Auto fix on save
To set this up, we have to open settings again. So go to Code > Preferences > Settings, search for “Code Actions On Save,” and click “Edit in settings.json.”
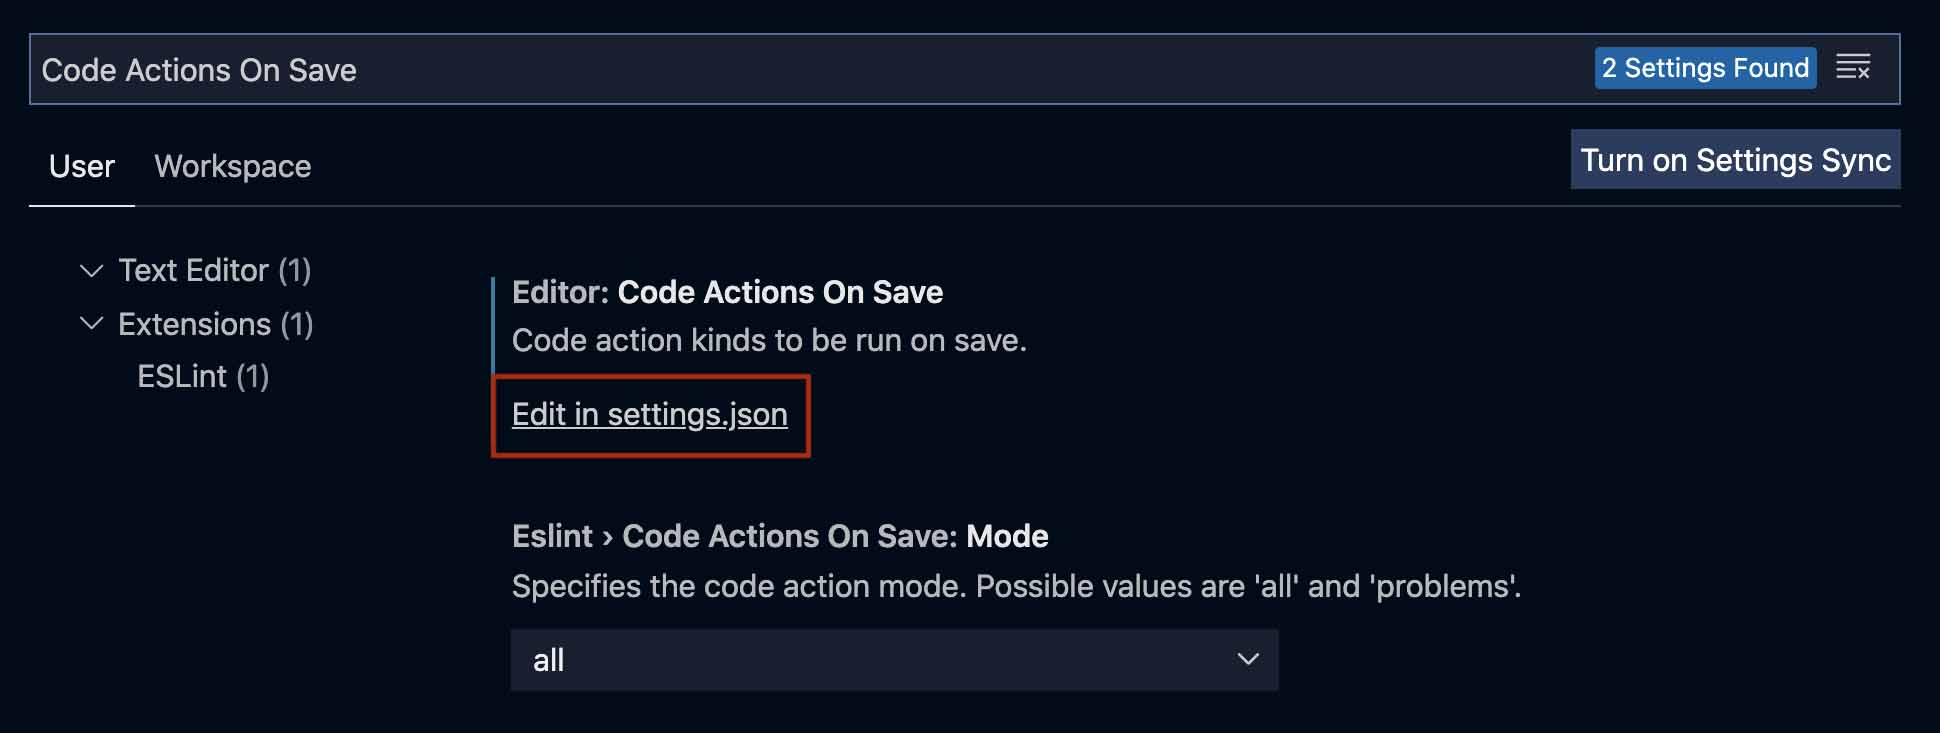
And then set source.fixAll.eslint to true in the JSON:
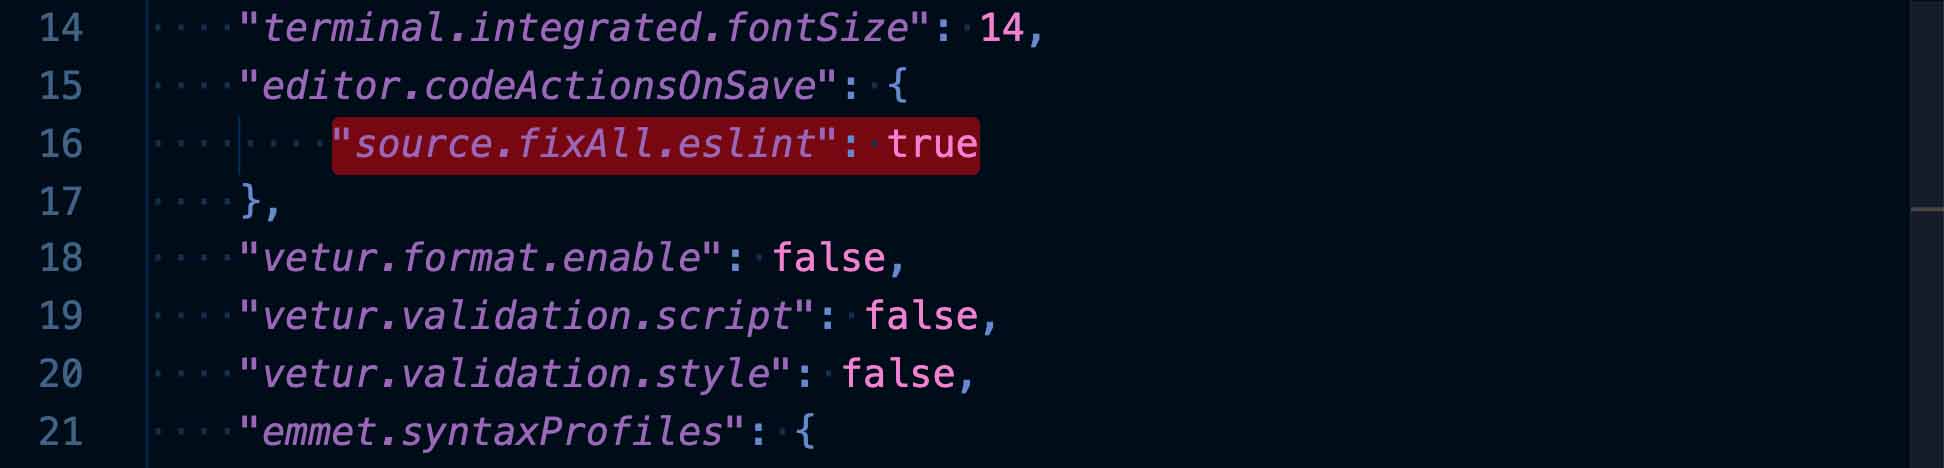
Now go back to App.vue with all the errors. When you save the file, all the errors will get fixed up.
This feature is magical, but it doesn’t work on all types of errors. Some errors do require manual handling. For example, if you created a variable but forgot to use it, VS Code wouldn’t know how to fix this because it wouldn’t know how you wanted to use that variable.
But nevertheless, this auto-fix feature is still a huge timesaver.
Configuring Prettier
Different from ESLint, Prettier doesn’t require any configurations for basic use cases. But optional, we can create a Prettier config file similar to the ESLint config file we have. This can be useful for adding additional settings tailored to our personal style or our team’s preferences.
The prettier config file has to be named .prettierrc.js. (It has the same rc suffix as in the ESLint config file name.)
For example, here’s a sample config file for Prettier:
📃 /.prettierrc.js
module.exports = {
    singleQuote: true,
    semi: false
}
These rules will override the existing rules we had. Single quotes, instead of double quotes, are required for string literals. And statements shouldn’t end with semicolons.
Other VS Code Features
Copy Relative Path
Whenever we have to refer to a file from another file in that same project, we have to use relative paths. But it can be a hassle to manually translate a file’s path into a relative version in the context of another file.
Copy Relative Path is a neat little tool that can relieve you of this mental burden. Whenever you have a file opened in VS Code (e.g. App.vue file), you can right-click on another file in the sidebar (e.g. components/HelloWorld.vue) and choose Copy Relative Path.
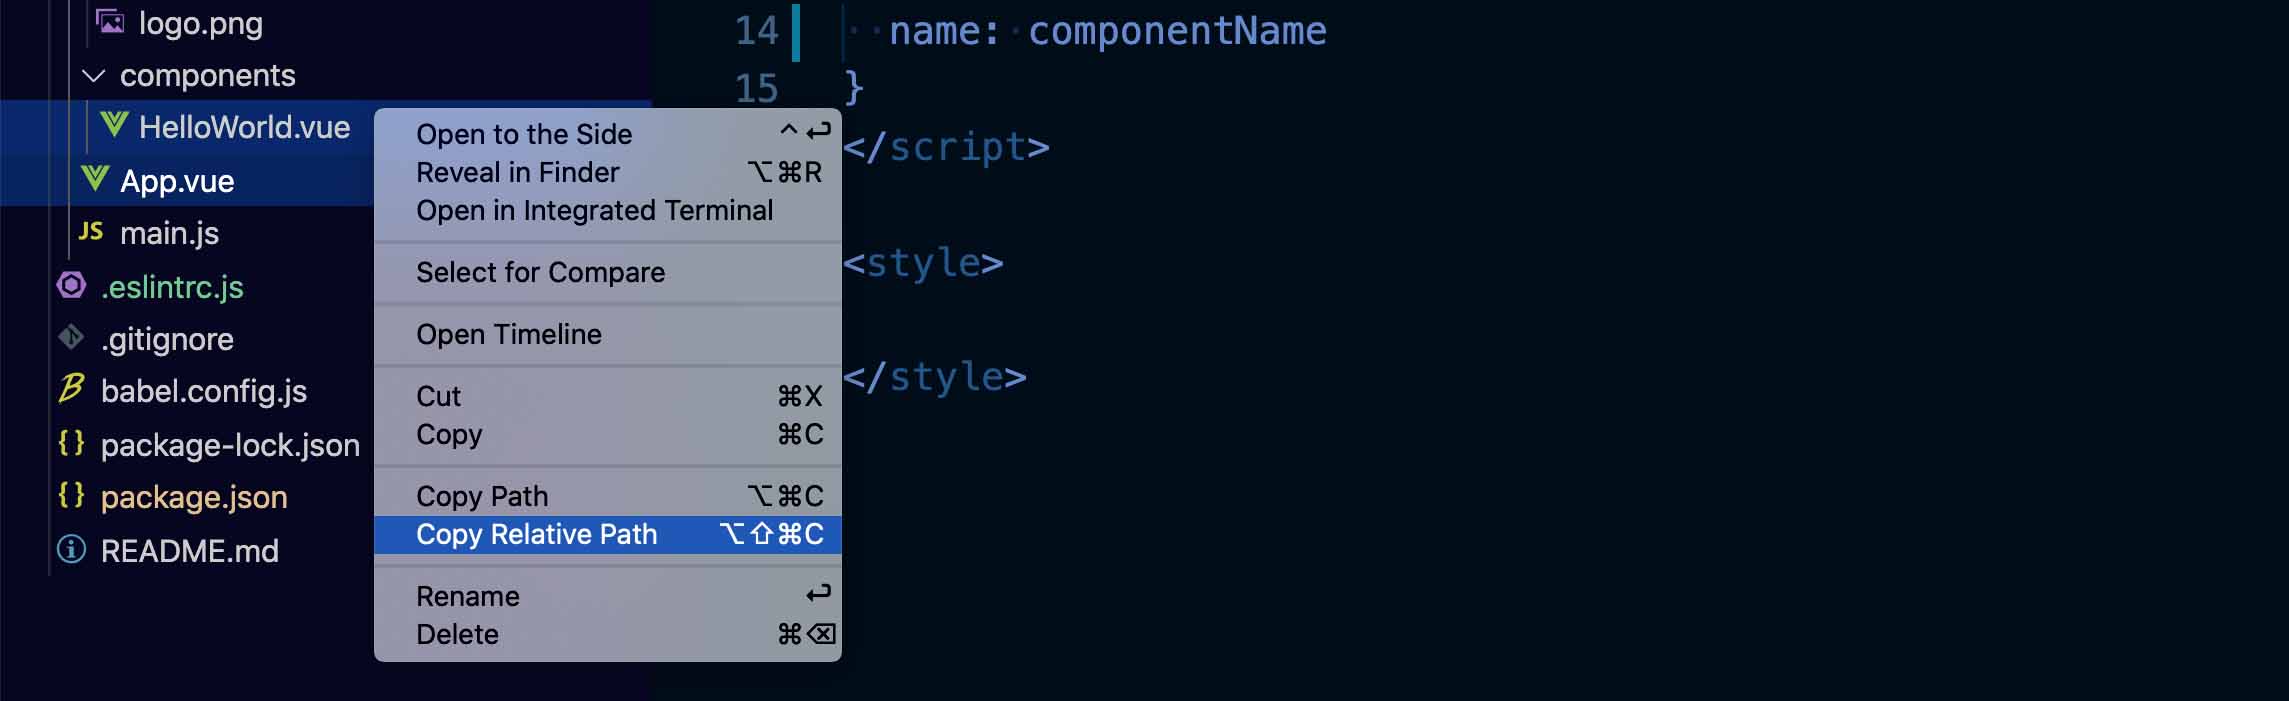
This gives you the relative path from the first file to the second file. And you can paste the path to wherever you need it.
Git Change Indicators
VS Code comes with Git support by default. It mostly just acts as an alternate interface to the command line Git. But there is one feature that you couldn’t get from the traditional Git experience.
As we start changing the code in our App.vue, we are seeing a colorful gutter (highlighted in the screenshot). They are actually indicators of the code changes since the latest commit.
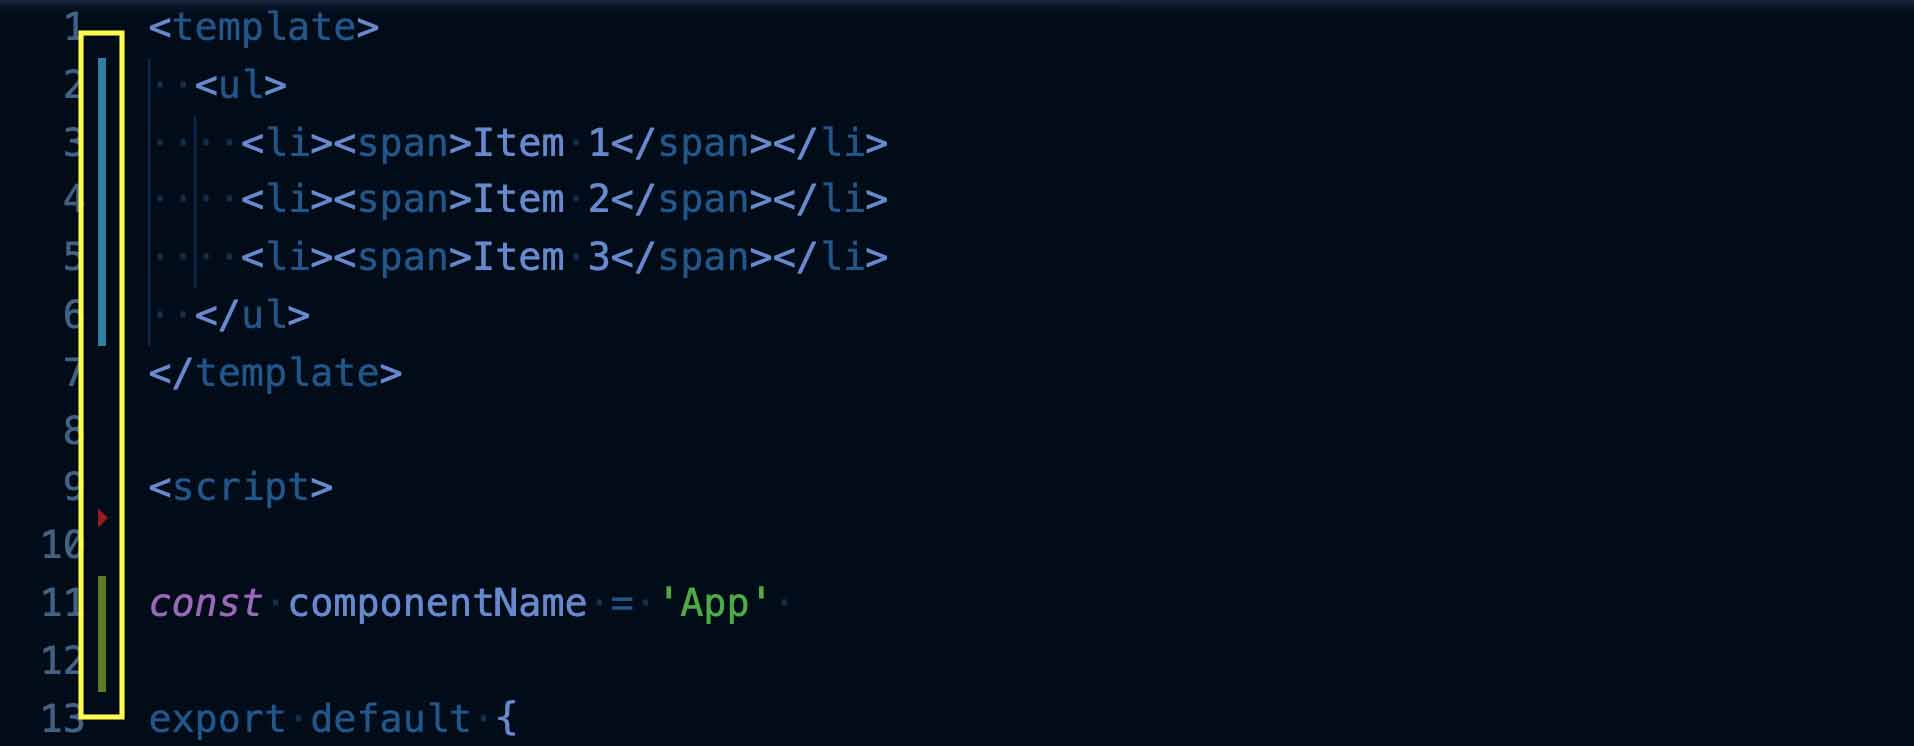
The green indicates the newly added code, the red arrow indicates the removed code, and the blue indicates the modified code.
This is no replacement for the usual Git workflow, but it’s a nice visual aid.
More Snippets
If you’re interested in installing some additional convenient code snippets, you can download a full suite of Vue VSCode Snippets, created by Core Vue Team Member Sarah Drasner.
Let’s search for the extension:
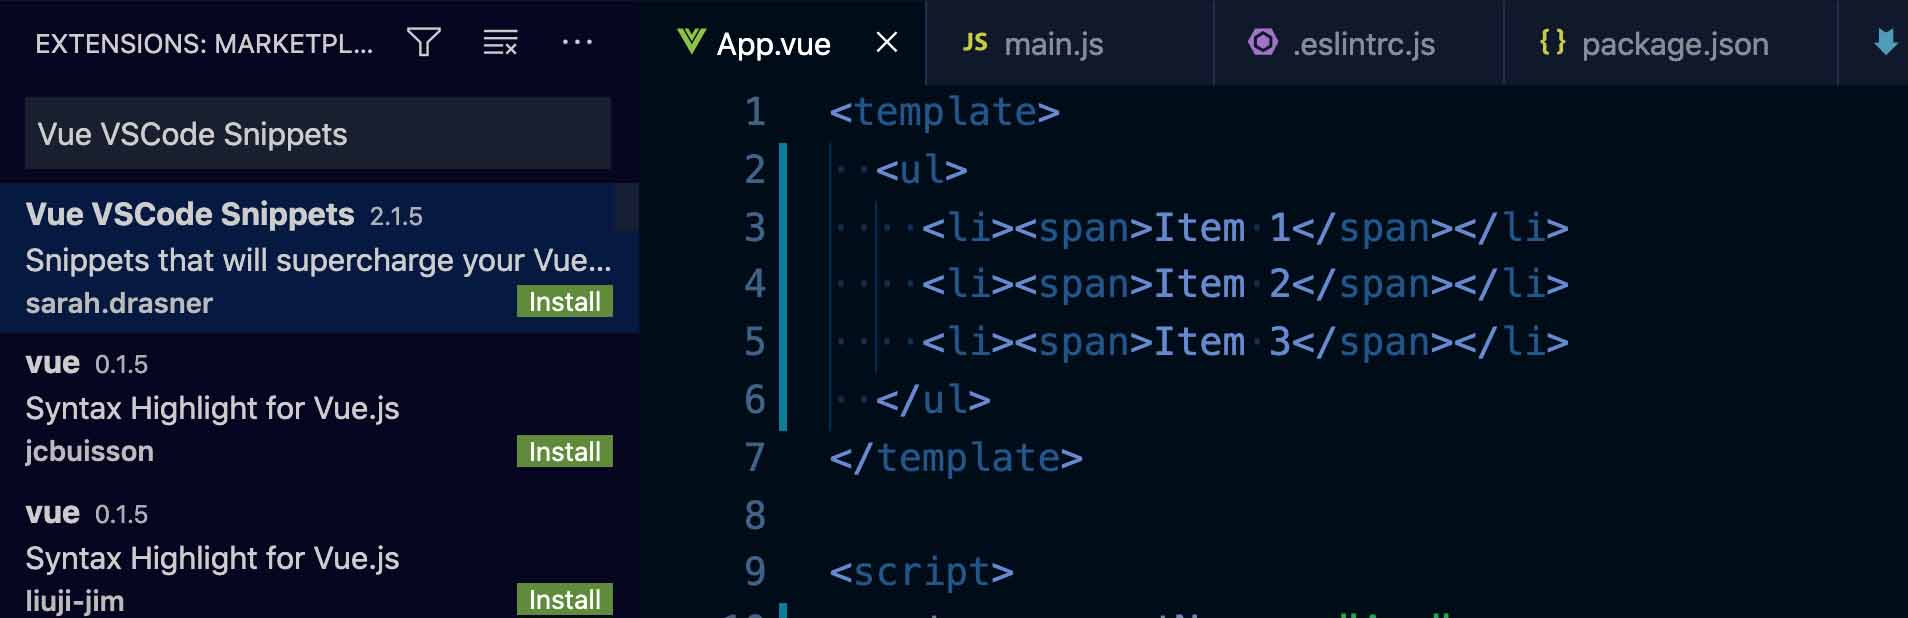
Click Install:

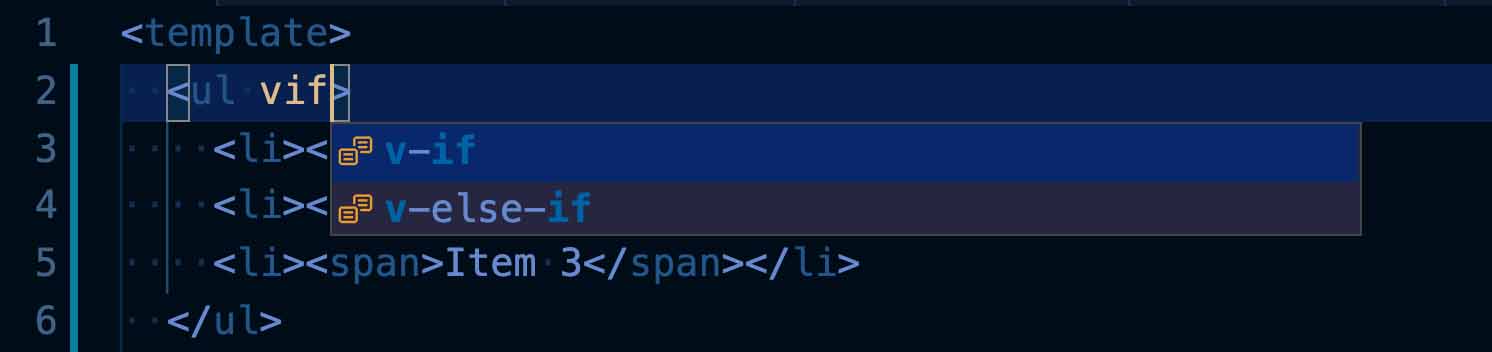
Let’s take a look at them in action.
If we type vif on an element in our template, that’ll give us a v-if statement:

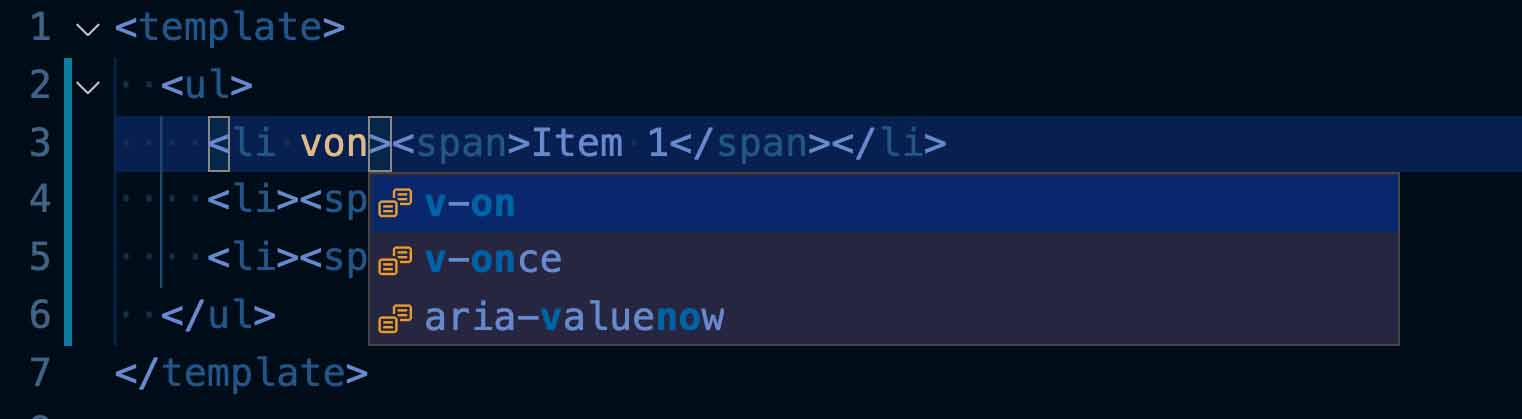
Typing von will give us a full event handler:

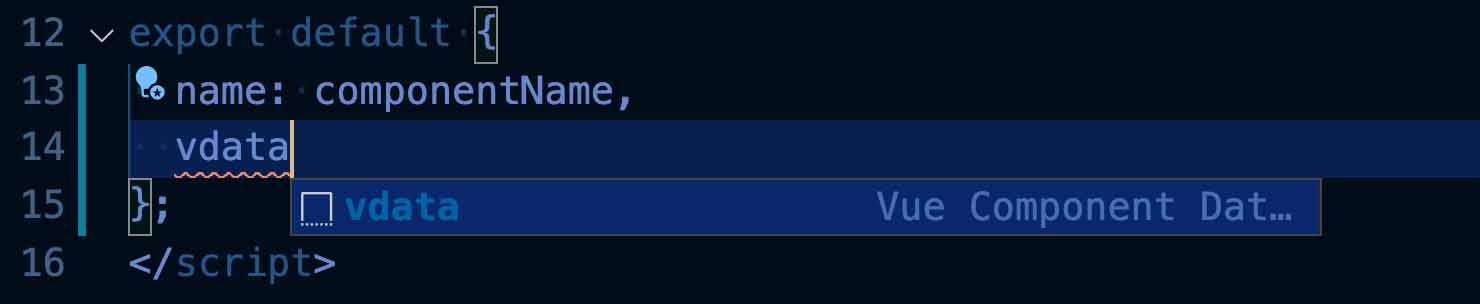
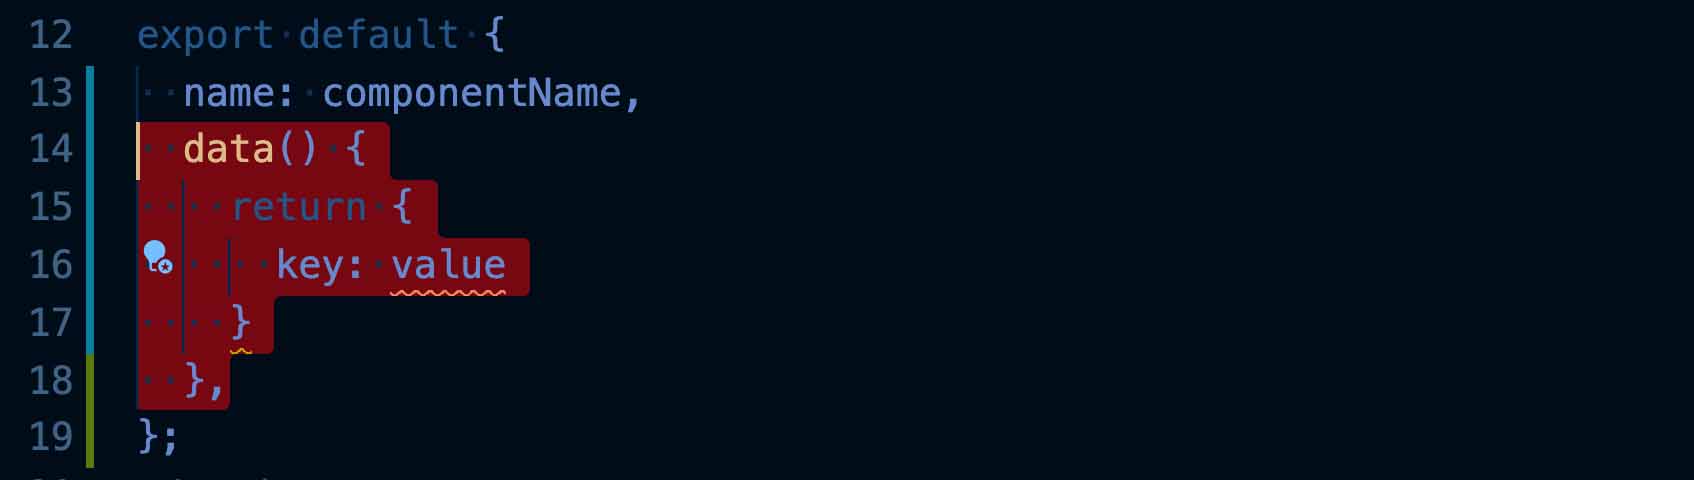
Instead of manually typing out a data property, we can simply type vdata which will create one for us:
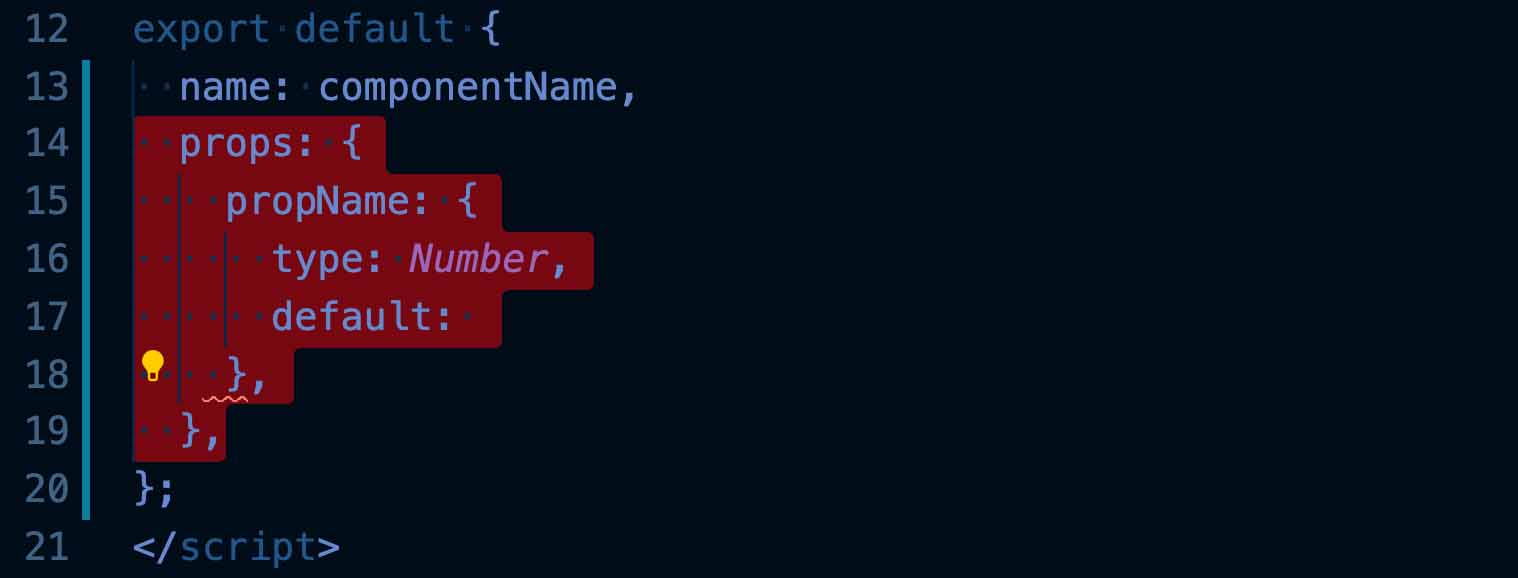
We can do the same thing to add props with vprops:

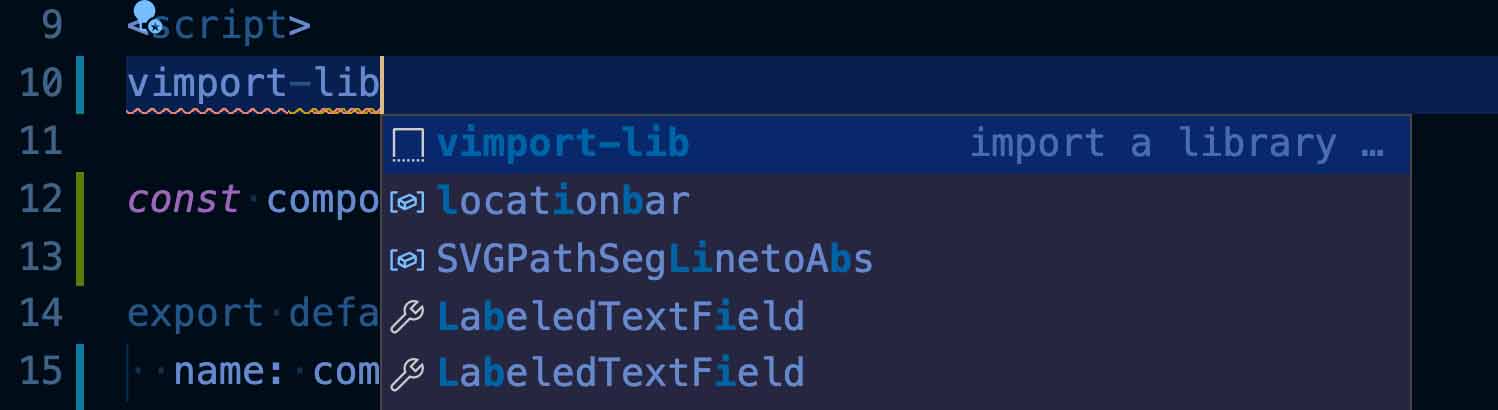
We can even use this to quickly generate the code for library import, with vimport-lib:
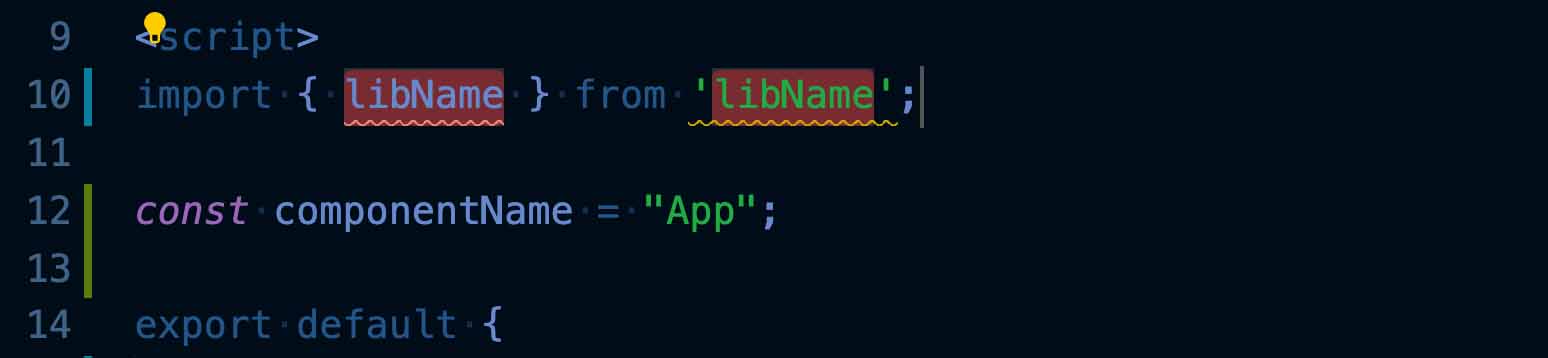
As you can see, these are very helpful and time-saving snippets.
Color Themes
Finally, if you want to change your color theme, you can go to Code > Preferences > Color Theme. (The one I’ve been using is Abyss)
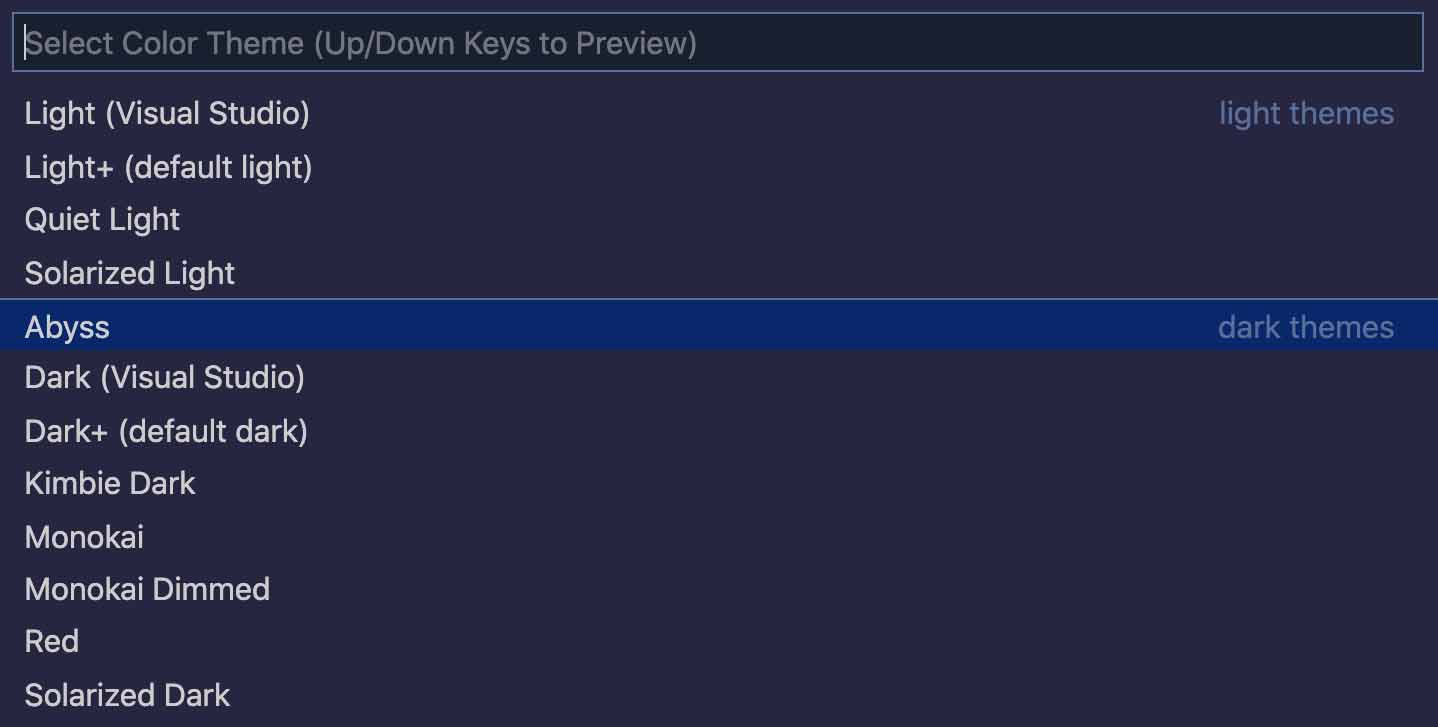
If you don’t like anything on this list, you can search for other themes in the Marketplace (View > Extensions).
You can also head to the Visual Studio Marketplace website:
https://marketplace.visualstudio.com/
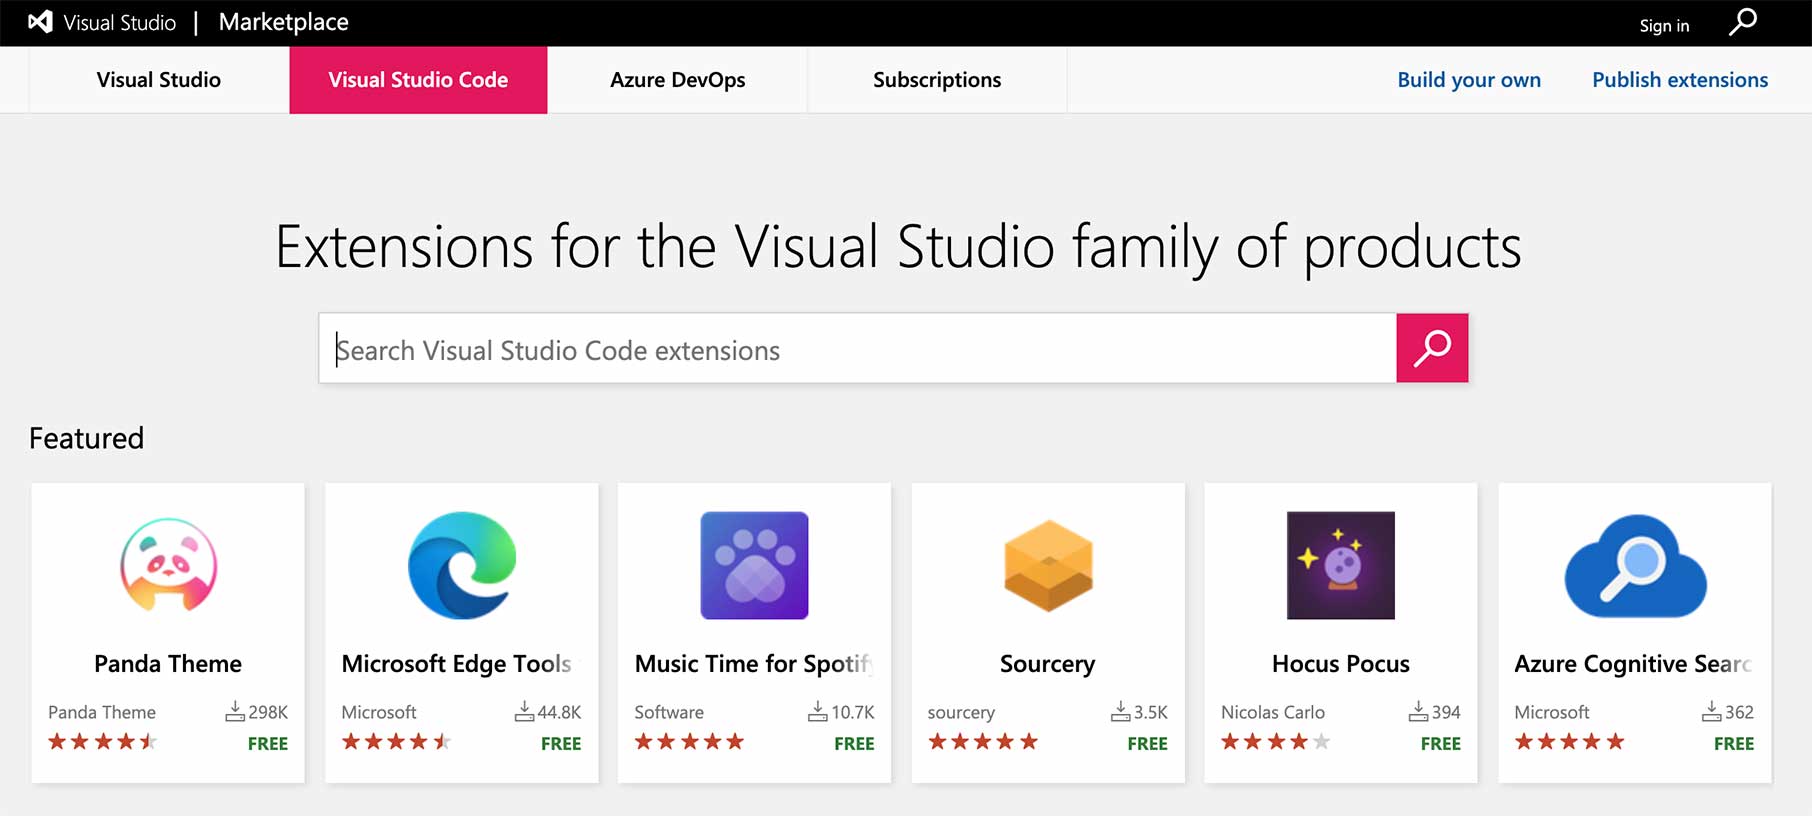
Here, you can preview different extensions and themes, such as Night Owl by our friend Sarah Drasner.
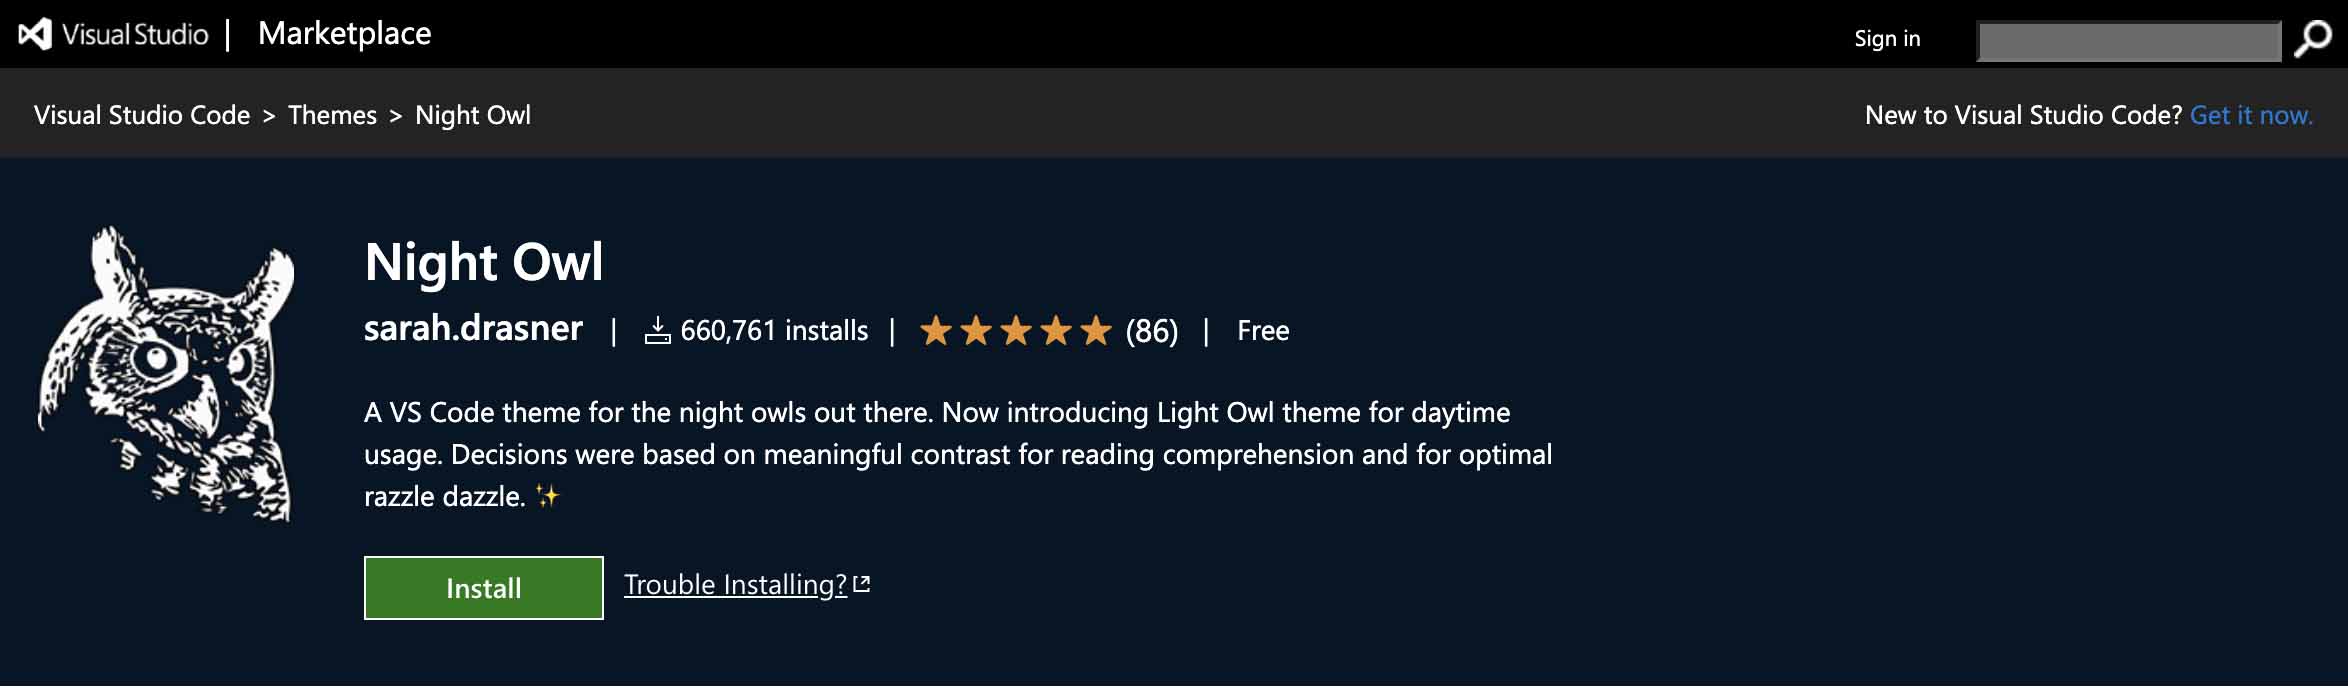
You can install it directly from the browser then find it in your Color Theme Preferences.
Continue Learning
We’ve gathered a set of essential tools in VS Code for an efficient development environment. But VS Code is a feature-rich code editor, there are many other useful features and extensions you can integrate into your workflow.
And to learn more about Vue development in general, you can check out our Real World Vue course.